

Heavy Bowgun |
|
|---|---|
| Weapon Type | Ranged |
| Damage Type | Shot (Ammo) Damage |
Heavy Bowgun (ヘビィボウガン hebi bougan, "heavy bowgun",重弩) is one of the fourteen weapon categories in Monster Hunter Rise (MHR or MHRise). Like all Weapons, it features a unique set of moves and an upgrade path that branches out depending on the materials used.
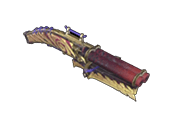
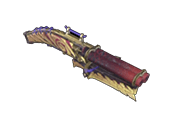
A powerful ranged weapon as heavy on firepower as it is in the hand.
Can be loaded with Wyvernheart or Wyvernsnipe ammo depending on the situation.
Heavy Bowgun Weapon Tree
- You can check out our Heavy Bowgun Weapon Tree to find the different upgrade paths for the Heavy Bowgun weapon category.
- Click here for a Comparative List of Heavy Bowguns
- Click here to see MH Rise Heavy Bowgun Builds. These builds were created around the weapon types, each with a specific set of handpicked Weapons, Equipment and complementing Skills and Decorations. These builds with Specific Heavy Bowguns may be paired with a set of Armor to optimize the combination in order to create a Build type focused on the Skills available with the selected equipment.
- Master Rank Heavy Bowguns are the top tier Heavy Bowguns available in Monster Hunter Rise, and as all Master Rank Weapons, can only be obtained by owning the Sunbreak Expansion. These weapons use Master Rank Materials that can be obtained by completing quests and doing endgame content. Click here to see all Master Rank Heavy Bowguns.
Heavy Bowgun Weapon Traits
- Long Range.
- High damage.
- Specializes in high damage, and explosive ammo.
- The Bowgun can be used to attack monsters from long range. There are two types of bowgun: the heavy bowgun, which can use powerful ammo, and the light bowgun, which allows for greater mobility and evasive capabilities, and faster shooting.
- Ammunition comes in every elemental and status damage type, as well as ammo suitable for short or long range. Ramp-up Skills can further add more ammo types to your bowgun. Always check the ammo capabilities of your bowgun before building!
Heavy Bowgun Weapon Features
Weapon Advantages
- Is a veritable turret, capable of high damage with careful positioning.
- Ammunition covers every possible damage type, including severing and blunt.
- Typically larger ammo capacity than the Light Bowgun.
- Dodges further than most weapons.
- Shield attachment allows use of Guard skills.
- Can heal and support allies with Recover, Demon, and Armor ammo.
Weapon Disadvantages
- Must supply your own ammunition.
- Slow movement.
- Slow dodge animation.
- Slow sheathing speed.
What is Deviation in Monster Hunter Rise?
Deviation in MHR is a stat present in both the Light Bowgun and Heavy Bowgun. This stat defines how a bullet fired will deviate from the center reticle when it lands, and therefore plays a part in the accuracy of the gun. There are two things to take note of when looking at a Bowgun's Deviation stat. The first is whether the deviation has an L or R. 'L' means that the bullet fired will tend to curve towards the left, whereas 'R' means that the bullet will curve towards the right. 'LR' means that bullets fired will randomly curve towards either the left or right. After the letter, you'll see either Mild or Severe. 'Mild' mean that the bullet will curve a bit later in the trajectory, while 'Severe' means that the bullet will curve sooner after it has been fired. Some Bowguns have no Deviation (denoted None), meaning that the bullet will fire straight ahead where the reticle is aiming at.
Heavy Bowgun Controls
 : Crosshairs
 : Fire
 : Load Special Ammo
 : Reload
 + or
+ or  : Select Ammo
- + : Melee Attack
- Reload: Reloads the selected ammo. Hold to reload all ammo in sequence.
- Load Special Ammo: Allows for the firing of special ammo. Press again to unload it, allowing it to regenerate.
- Charged Shot: Charged Shot powers up as you hold down the button. A longer charge means a stronger shot.
Silkbind Controls
 + : Anchor Guard
- + : Free Silkbind Glide
- Anchor Guard: Allows you to absorb an attack without taking damage. Follow up by pressing to fire. (Wirebug Gauge Cost: 2)
- Free Silkbind Glide: Uses a Wirebug to hurl yourself forward. Press + to follow up with a melee attack or press
 to follow up with a quick sheathe.
Heavy Bowgun Silkbind Attacks
Setting Sun

A Silkbind technique in which a Wirebug generates a ring of Ironsilk.
Special powder accumulates within the ring, and when ammo passes through it, the velocity of the ammo is decreased.
Firing piercing ammo/multi-hit ammo through the ring will boost the total number of hits upon impact.
Free Silkbind Glide

Push the stick to control the direction you go in. Press the corresponding button to perform a close-range attack or quickly sheathe your weapon.
Press
Counter Shot

Stretch out a web of silk and take a stance to prepare for a powerful counterattack.
The attack is activated if you get hit while in this stance.
Press
Can be switched out with Counter Charge
Counter Charge

Press
Can be switched out with Counter Shot
Heavy Bowgun Switch Skills
Switch Skills in Monster Hunter Rise (MHR or MHRise) refer to swappable moves in a Weapon's moveset. Each of the 14 Weapon-types have 3 sets of 2 moves that can be switched out with each other, allowing for a diverse, customizable approach to combat. Switch Skills are unlocked by progressing in the game, with each set having a default move that is available from the beginning.
- Each Weapon-type has a set of swappable Silkbind Attacks and 2 sets of swappable standard moves in the base game.
- The first set of Switch Skills are unlocked by completing the Lv. 3⭐Urgent Village Quest Feathered Frenzy
- The second set of Switch Skills are unlocked by forging or upgrading 8 Weapons within a Weapon-type. Note that this needs to be done for every Weapon-type that you want to unlock Switch Skills for.
- The third set of Switch Skills are unlocked by completing the associated High Rank Hub Quest given by Master Utsushi. These quests are unlocked by gaining access to the required Hub Quest rank.
- Lv. 5⭐ Hone Your Heavy Bowgun for the Heavy Bowgun.
- Once unlocked, Switch Skills can be swapped at any Item Box and Switch Skill combinations can be saved to Item Loadouts as well.
- The Sunbreak Expansion introduces the Switch Skill Swap mechanic, where hunters can preload 2 Switch Skill loadouts and swap between them freely during hunts. Hunters will also now have access to a total of 5 sets of swappable Switch Skills, including new Silkbind Attacks and regular moves.
- This expansion also introduces the Swap Evade, a special dodge maneuver that can be performed right after a Switch Skill Swap, allowing hunters to quickly evade and maintain distance while safely swapping skill sets.
- In the table below, the left column represents default moves available from the beginning, while the right represents unlockable Switch Skills.
Switch Skill Swap Mechanic
The Switch Skill Swap mechanic allows the hunter to assign Switch Skill loadouts and swap between them on the fly, whether in combat or otherwise. This allows the hunter to further expand their arsenal of available moves during hunts and to further customize their builds to accommodate their playstyle. Being able to make split-second decisions to swap loadouts and use specific moves to counter monster attacks as they wind up is sure to add an exciting new dimension to monster hunting.
With the Switch Skill Swap mechanic, hunters are given two loadouts to switch between, denoted by the ![]() Red Scroll and
Red Scroll and ![]() Blue Scroll icons on the UI. Hunters can set up each loadout from the Item Box at Kamura Village, Elgado Outpost or even at Camps while out on hunts, just as they would when assigning Switch Skills individually. When out on hunts, hunters can swap between the two loadouts by holding
Blue Scroll icons on the UI. Hunters can set up each loadout from the Item Box at Kamura Village, Elgado Outpost or even at Camps while out on hunts, just as they would when assigning Switch Skills individually. When out on hunts, hunters can swap between the two loadouts by holding ![]() and pressing the
and pressing the ![]() +
+ ![]() buttons. The character will perform a quick animation and briefly flash with energy, signifying a successful swap.
buttons. The character will perform a quick animation and briefly flash with energy, signifying a successful swap.

![]()
![]()
![]()
| NEW! Heavy Bowgun Switch Skills introduced with the Sunbreak Expansion | |
|---|---|
| Switch Skills Set 1 | |
Melee Attack |
Switch Skill Name |
| A bludgeoning attack delivered by directly smashing with the weapon. Delivers impressive damage, and may even stun your target. If a shield is equipped, incoming attacks can be blocked while executing your attack. |
Switch Skill Description |
Controls
|
Controls |
| Switch Skills Set 2 | |
Mech-Wyvernsnipe |
Healing Mech-Wyvernsnipe |
| Fires a specialized shot, different depending on the weapon. The number of rounds is managed via its own gauge and replenishes over time.
|
Fires a specialized shot, different depending on the weapon. The number of rounds is managed via its own gauge and replenishes over time. Regular Wyvernheart and Wyvernsnipe shells inflict less damage, but hits will replenish the hunter's health.
|
Controls
|
Controls
|
| Switch Skills Set 3 | |
Charged Shot |
Crouching Shot |
| A style of shooting that accumulates power by charging a shot. The amount of power a shot is increased by is determined by how long the shot was charged.
|
A style of shooting that utilizes a special stance to reduce recoil. In exchange for not being able to move, you're able to fire in rapid succession. The longer you fire, the shorter the firing interval becomes, but at the risk of overheating your bowgun. If your bowgun overheats, it can't be fired until it has cooled down. Note: Certain ammo types cannot be used.
|
Controls
|
Controls
|
| Switch Skills Set 4 (Silkbind) | |
Counter Shot |
Rising Moon |
| A parrying skill using Wirebugs. Absorbs an attack from a monster without taking any damage. Follow up with a powerful counterattack. (Wirebug Gauge recovery speed: Fast)
|
A Silkbind technique in which a Wirebug generates a ring of Ironsilk. Special powder accumulates within the ring, and when ammo passes through it, the velocity of the ammo increases, and in turn, extends the ammo's range. This can make certain ammo types viable from farther away. (Wirebug Gauge recovery speed: Fast)
|
Controls
|
Controls
|
| Switch Skills Set 5 (Silkbind) | |
Free Silkbind Glide |
Setting Sun |
| Advance like a raging wildfire. This technique uses a Wirebug to pull you while you glide forward. It can be used to evade attack and adjust position. (Wirebug Gauge recovery speed: Fast)
|
A Silkbind technique in which a Wirebug generates a ring of Ironsilk. Special powder accumulates within the ring, and when ammo passes through it, the velocity of the ammo is decreased. Firing piercing ammo/multi-hit ammo through the ring will boost the total number of hits upon impact. (Wirebug Gauge recovery speed: Fast)
|
Controls
|
Controls
|


Heavy Bowgun Controls
 : Crosshairs
 : Fire
 : Load Special Ammo
 : Reload
- Ctrl + or : Select Ammo
- + : Melee Attack
- Reload: Reloads the selected ammo. Hold to reload all ammo in sequence.
- Load Special Ammo: Allows for the firing of special ammo. Press again to unload it, allowing it to regenerate.
- Charged Shot: Charged Shot powers up as you hold down the button. A longer charge means a stronger shot.
Silkbind Controls
- Shift + : Counter Shot
- Shift + : Free Silkbind Glide
- Counter Shot: Allows you to absorb an attack without taking damage. Follow up by pressing to fire. (Wirebug Gauge Cost: 2)
- Free Silkbind Glide: Uses a Wirebug to hurl yourself forward. Press + to follow up with a melee attack or press E to follow up with a quick sheathe.
Heavy Bowgun Silkbind Attacks
Setting Sun
A Silkbind technique in which a Wirebug generates a ring of Ironsilk.
Special powder accumulates within the ring, and when ammo passes through it, the velocity of the ammo is decreased.
Firing piercing ammo/multi-hit ammo through the ring will boost the total number of hits upon impact.
Free Silkbind Glide
Push the stick to control the direction you go in. Press the corresponding button to perform a close-range attack or quickly sheathe your weapon.
Press Shift +
Counter Shot
Stretch out a web of silk and take a stance to prepare for a powerful counterattack.
The attack is activated if you get hit while in this stance.
Press Shift +
Can be switched out with Counter Charge
Counter Charge
Press Shift +
Can be switched out with Counter Shot
Heavy Bowgun Switch Skills
Switch Skills in Monster Hunter Rise (MHR or MHRise) refer to swappable moves in a Weapon's moveset. Each of the 14 Weapon-types have 3 sets of 2 moves that can be switched out with each other, allowing for a diverse, customizable approach to combat. Switch Skills are unlocked by progressing in the game, with each set having a default move that is available from the beginning.
- Each Weapon-type has a set of swappable Silkbind Attacks and 2 sets of swappable standard moves in the base game.
- The first set of Switch Skills are unlocked by completing the Lv. 3⭐Urgent Village Quest Feathered Frenzy
- The second set of Switch Skills are unlocked by forging or upgrading 8 Weapons within a Weapon-type. Note that this needs to be done for every Weapon-type that you want to unlock Switch Skills for.
- The third set of Switch Skills are unlocked by completing the associated High Rank Hub Quest given by Master Utsushi. These quests are unlocked by gaining access to the required Hub Quest rank.
- Lv. 5⭐ Hone Your Heavy Bowgun for the Heavy Bowgun.
- Once unlocked, Switch Skills can be swapped at any Item Box and Switch Skill combinations can be saved to Item Loadouts as well.
- The Sunbreak Expansion introduces the Switch Skill Swap mechanic, where hunters can preload 2 Switch Skill loadouts and swap between them freely during hunts. Hunters will also now have access to a total of 5 sets of swappable Switch Skills, including new Silkbind Attacks and regular moves.
- This expansion also introduces the Swap Evade, a special dodge maneuver that can be performed right after a Switch Skill Swap, allowing hunters to quickly evade and maintain distance while safely swapping skill sets.
- In the table below, the left column represents default moves available from the beginning, while the right represents unlockable Switch Skills.
| NEW! Heavy Bowgun Switch Skills introduced with the Sunbreak Expansion | |
|---|---|
| Switch Skills Set 1 | |
Melee Attack |
Switch Skill Name |
| A bludgeoning attack delivered by directly smashing with the weapon. Delivers impressive damage, and may even stun your target. If a shield is equipped, incoming attacks can be blocked while executing your attack. |
Switch Skill Description |
Controls
|
Controls |
| Switch Skills Set 2 | |
Mech-Wyvernsnipe |
Healing Mech-Wyvernsnipe |
| Fires a specialized shot, different depending on the weapon. The number of rounds is managed via its own gauge and replenishes over time.
|
Fires a specialized shot, different depending on the weapon. The number of rounds is managed via its own gauge and replenishes over time. Regular Wyvernheart and Wyvernsnipe shells inflict less damage, but hits will replenish the hunter's health.
|
Controls
|
Controls
|
| Switch Skills Set 3 | |
Charged Shot |
Crouching Shot |
| A style of shooting that accumulates power by charging a shot. The amount of power a shot is increased by is determined by how long the shot was charged.
|
A style of shooting that utilizes a special stance to reduce recoil. In exchange for not being able to move, you're able to fire in rapid succession. The longer you fire, the shorter the firing interval becomes, but at the risk of overheating your bowgun. If your bowgun overheats, it can't be fired until it has cooled down. Note: Certain ammo types cannot be used.
|
Controls
|
Controls
|
| Switch Skills Set 4 (Silkbind) | |
Counter Shot |
Rising Moon |
| A parrying skill using Wirebugs. Absorbs an attack from a monster without taking any damage. Follow up with a powerful counterattack. (Wirebug Gauge recovery speed: Fast)
|
A Silkbind technique in which a Wirebug generates a ring of Ironsilk. Special powder accumulates within the ring, and when ammo passes through it, the velocity of the ammo increases, and in turn, extends the ammo's range. This can make certain ammo types viable from farther away. (Wirebug Gauge recovery speed: Fast)
|
Controls
|
Controls
|
| Switch Skills Set 5 (Silkbind) | |
Free Silkbind Glide |
Setting Sun |
| Advance like a raging wildfire. This technique uses a Wirebug to pull you while you glide forward. It can be used to evade attack and adjust position. (Wirebug Gauge recovery speed: Fast)
|
A Silkbind technique in which a Wirebug generates a ring of Ironsilk. Special powder accumulates within the ring, and when ammo passes through it, the velocity of the ammo is decreased. Firing piercing ammo/multi-hit ammo through the ring will boost the total number of hits upon impact. (Wirebug Gauge recovery speed: Fast)
|
Controls
|
Controls
|
Heavy Bowguns are a type of Weapon in Monster Hunter Rise (MHR or MHRise). This page shows a visual gallery of all different styles for Heavy Bowguns. as well as a comparison table comparing the most imporant aspects such as Attack, Sharpness, Affinity, etc. Weapons are often upgraded based on previous decisions, with different paths leading to different looks and necessitating different materials. You can find detailed upgrade path information in the Heavy Bowgun Weapon Tree or by clicking each individual weapon below.
For a comprehensive guide on how to use Heavy Bowguns, please click the following link: Heavy Bowgun
Heavy Bowguns in Monster Hunter Rise
Quick Search of All Heavy Bowguns
Name |
|
|
Deviation |
Recoil |
|
|
|
Rare |
Rampage Skills |
Crafting |
|
|---|---|---|---|---|---|---|---|---|---|---|---|
| Defender Heavy Bowgun I | 0% | None | Some | Above Avg. | Arc Shot | Wyvernsnipe | 0 | Rarity 1 |
|
||
| Champion Heavy Bowgun | 0% | None | Some | Above Avg. | Arc Shot | Wyvernsnipe | 0 | Rarity 2 |
|
||
| Champion Heavy Bowgun II | 0% | None | Some | Above Avg. | Arc Shot | Wyvernsnipe | 0 | Rarity 4 |
|
||
| Champion Heavy Bowgun III | 0% | None | Some | Above Avg. | Arc Shot | Wyvernsnipe | 0 | Rarity 4 |
|
||
| Guardian Heavy Bowgun | 0% | None | Some | Above Avg. | Arc Shot | Wyvernsnipe | 0 | Rarity 5 |
|
||
| Kamura H. Bowgun I | 60 | 0% | None | Average | Above Avg. | Arc Shot | Wyvernsnipe | 0 | Rarity 1 |
|
|
| Kamura H. Bowgun II | 70 | 0% | None | Average | Above Avg. | Arc Shot | Wyvernsnipe | 0 | Rarity 1 |
|
|
| Kamura H. Bowgun III | 100 | 0% | None | Average | Above Avg. | Arc Shot | Wyvernsnipe | 0 | Rarity 2 |
|
|
| Kamura H. Bowgun IV | 140 | 0% | None | Average | Above Avg. | Arc Shot | Wyvernsnipe | 0 | Rarity 3 |
|
|
Kamura H. Bowgun V |
160 | 0% | None | Average | Above Avg. | Arc Shot | Wyvernsnipe | 0 | Rarity 4 |
|
|
Kamura Ninja H. Bowgun |
190 | 0% | None | Average | Above Avg. | Arc Shot | Wyvernsnipe | 0 | Rarity 5 |
|
|
| Kamura Warrior Ballista |
270 | 0% | None | Average | Above Avg. | Arc Shot | Wyvernsnipe | 0 | Rarity 8 | None |
|
| Kamura Warrior Ballista+ |
310 | 0% | None | Average | Above Avg. | Arc Shot | Wyvernsnipe | 0 | Rarity 9 | None |
|
| Fine Kamura Ballista |
350 | 0% | None | Average | Above Avg. | Arc Shot | Wyvernsnipe | 0 | Rarity 10 | None |
|
| Duke's Cannon |
340 | 0% | None | Average | Average | None | Wyvernsnipe | 0 | Rarity 9 | None |
|
| Chalice of Desire |
350 | 0% | None | Low | Very Fast | None | Wyvernsnipe | 0 | Rarity 10 | None |
|
| Silver Scatterer |
350 | 0% | None | Very Low | Above Avg. | None | Wyvernheart | 0 | Rarity 10 | None |
|
| Tigrex Howl I | 160 | -10% | R Severe | Average | Below Avg. | Arc Shot | Wyvernheart | 0 | Rarity 3 |
|
|
| Tigrex Howl II | 230 | -10% | R. Severe | Average | Below Avg. | Arc Shot | Wyvernheart | 0 | Rarity 6 |
|
|
| Tigrex Skull |
240 | -10% | R Severe | Average | Average | Arc Shot | Wyvernheart | 0 | Rarity 6 |
|
|
| Tigrex Skull + |
350 | -10% | R Severe | Average | Below Avg. | Arc Shot | Wyvernheart | 0 | Rarity 9 | None |
|
| Huge Tigrex Skull |
360 | -10% | R Severe | Average | Below Avg. | Arc Shot | Wyvernheart | 0 | Rarity 9 | None |
|
| Huge Trifrex Skull + |
370 | -10% | R Severe | Average | Below Avg. | Arc Shot | Wyvernheart | 0 | Rarity 10 | None |
|
| Cirrus Blaster I | 130 | 10% | None | Some | Above Avg. | N/A | Wyvernsnipe | 0 | Rarity 3 |
|
|
| Cirrus Blaster II |
190 | 10% | None | Some | Above Avg. | N/A | Wyvernsnipe | 0 | Rarity 5 |
|
|
| Mountainous Roar |
210 | 10% | None | Some | Fast | None | Wyvernsnipe | 0 | Rarity 6 |
|
|
| Mountainous Roar + |
330 | 10% | None | Some | Above Avg. | None | Wyvernsnipe | 0 | Rarity 9 | None |
|
| Mountainous Torrent |
340 | 10% | None | Some | Above Avg. | None | Wyvernsnipe | 0 | Rarity 9 | None |
|
| Mountainous Torrent + |
350 | 10% | None | Some | Above Avg. | None | Wyvernsnipe | 0 | Rarity 10 | None |
|
| Pure Cannon Tamamo |
360 | 10% | None | High | Average | None | Wyvernsnipe | 0 | Rarity 10 | None |
|
| Reversal Shot I | 110 | 0% | R Mild | High | Below Avg. | N/A | Wyvernsnipe | 10 | Rarity 2 |
|
|
| Reversal Shot II |
170 | 0% | R Mild | High | Below Avg. | N/A | Wyvernsnipe | 15 | Rarity 4 |
|
|
| Reversal Shot III |
180 | 0% | R Mild | High | Below Avg. | N/A | Wyvernsnipe | 17 | Rarity 5 |
|
|
| Reversal Barrage |
220 | 0% | R Mild | High | Below Avg. | N/A | Wyvernsnipe | 20 | Rarity 6 |
|
|
| Reversal Barrage + |
290 | 0% | R Mild | High | Below Avg. | Arc Shot | Wyvernheart | 0 | Rarity 8 | None |
|
| Grand Reversal Barrage |
310 | 0% | R Mild | High | Below Avg. | Arc Shot | Wyvernheart | 0 | Rarity 8 | None |
|
| Grand Reversal Barrage + |
380 | 0% | R Mild | High | Below Avg. | Arc Shot | Wyvernheart | 0 | Rarity 10 | None |
|
| Queen's Longfire I | 120 | 0% | None | Average | Below Avg. | N/A | Wyvernsnipe | 0 | Rarity 2 |
|
|
| Queen's Longfire II | 190 | 0% | None | Average | Below Avg. | Arc Shot | Wyvernsnipe | 0 | Rarity 5 |
|
|
| Queen's Farflier | 210 | 0% | None | Average | Below Avg. | Arc Shot | Wyvernsnipe | 0 | Rarity 6 |
|
|
| Queen's Farflier + |
300 | 0% | None | Average | Below Avg. | Arc Shot | Wyvernsnipe | 0 | Rarity 8 | None |
|
| Queen's Scionfire |
350 | 0% | None | Average | Below Avg. | Arc Shot | Wyvernsnipe | 0 | Rarity 9 | None |
|
| Queen's Scionfire + |
370 | 0% | None | Average | Below Avg. | Arc Shot | Wyvernsnipe | 0 | Rarity 10 | None |
|
| Moonlight Sparkflier |
360 | 10% | L Mild | Some | Below Avg. | None | Wyvernheart | 0 | Rarity 10 | None |
|
| Rosenkugel |
340 | 10% | LR Severe | Low | Below Avg. | None | Wyvernheart | 0 | Rarity 8 | None |
|
| Rosenkugel + |
350 | 10% | LR Severe | Low | Below Avg. | None | Wyvernheart | 0 | Rarity 9 | None |
|
| Rosenprima |
360 | 10% | LR Severe | Low | Below Avg. | None | Wyvernheart | 0 | Rarity 10 | None |
|
| Kaktus Prima |
340 | 20% | None | Some | Average | Arc Shot | Wyvernheart | 0 | Rarity 10 | None | |
| Guerrera Cannon I |
180 | 20% | None | Average | Fast | N/A | Wyvernsnipe | 0 | Rarity 5 |
|
|
| Guerrera Cannon II |
190 | 20% | None | Average | Fast | N/A | Wyvernsnipe | 0 | Rarity 6 |
|
|
| Thorn Cannon |
200 | 20% | None | Average | Very Fast | None | Wyvernsnipe | 0 | Rarity 6 |
|
|
| Guerrera Herald |
300 | 20% | None | Average | Fast | None | Wyvernsnipe | 0 | Rarity 8 | None |
|
| Guerrera Herald + |
320 | 20% | None | Average | Fast | None | Wyvernsnipe | 0 | Rarity 9 | None |
|
| Valia Cannon |
340 | 20% | None | Average | Fast | None | Wyvernsnipe | 0 | Rarity 10 | None |
|
| Arzuros Gun I | 100 | 0% | None | Average | Average | Arc Shot | Wyvernsnipe | 15 | Rarity 1 |
|
|
| Arzuros Gun II | 120 | 0% | None | Average | Average | Arc Shot | Wyvernsnipe | 15 | Rarity 2 |
|
|
| Arzuros Fishergun |
170 | 0% | None | Average | Average | Arc Shot | Wyvernsnipe | 15 | Rarity 4 |
|
|
| Arzuros Fishergun + |
280 | 0% | None | Average | Average | Arc Shot | Wyvernsnipe | 0 | Rarity 8 | None |
|
| Arbearalest |
360 | 0% | None | Average | Average | Arc Shot | Wyvernsnipe | 0 | Rarity 10 | None |
|
| Usurper's Tremor I | 140 | 10% | None | Average | Average | N/A | Wyvernheart | 0 | Rarity 3 |
|
|
| Usurper's Tremor II |
200 | 10% | None | Average | Average | N/A | Wyvernheart | 0 | Rarity 5 |
|
|
| Despot's Paroxysm |
220 | 10% | None | Average | Average | N/A | Wyvernheart | 0 | Rarity 6 |
|
|
| Despot's Paroxysm + |
330 | 10% | None | Average | Average | None | Wyvernheart | 0 | Rarity 9 | None |
|
| Oppressor's Making |
350 | 10% | None | Average | Average | None | Wyvernheart | 0 | Rarity 10 | None |
|
| Iron Assault I | 80 | 0% | None | Average | Above Avg. | N/A | Wyvernheart | 0 | Rarity 1 |
|
|
| Iron Assault II | 100 | 0% | None | Some | Average | N/A | Wyvernheart | 0 | Rarity 1 |
|
|
| Steel Assault | 140 | 0% | None | Some | Average | N/A | Wyvernheart | 0 | Rarity 3 |
|
|
| Striker's Bowgun I |
170 | 0% | None | Average | Average | Arc Shot | Wyvernheart | 0 | Rarity 4 |
|
|
| Striker's Bowgun II |
190 | 0% | None | Average | Average | Arc Shot | Wyvernheart | 0 | Rarity 5 |
|
|
| Elite Bowgun |
230 | 0% | None | Average | Average | Arc Shot | Wyvernheart | 0 | Rarity 6 |
|
|
| Elite Bowgun + |
280 | 0% | None | Average | Average | None | Wyvernheart | 0 | Rarity 8 | None |
|
| Imperial Bowgun |
330 | 0% | None | Average | Average | Arc Shot | Wyvernheart | 0 | Rarity 8 | None |
|
| Imperial Bowgun + |
360 | 0% | None | Average | Average | Arc Shot | Wyvernheart | 0 | Rarity 10 | None |
|
| Wyvern Assault |
330 | 20% | LR Mild | Average | Average | None | Wyvernheart | 0 | Rarity 9 | None |
|
| Wyvern Assault + |
340 | 20% | LR Mild | Average | Average | None | Wyvernheart | 0 | Rarity 9 | None |
|
| Wyvern Crasher |
350 | 20% | LR Mild | Average | Average | None | Wyvernheart | 0 | Rarity 10 | None |
|
| Flammenkanone I Heavy Bowgun |
210 | -20% | L. Severe | High | Below Avg. | Arc Shot | Wyvernheart | 0 | Rarity 5 |
|
|
| Flammenkanone II Heavy Bowgun |
220 | -20% | L. Severe | High | Below Avg. | Arc Shot | Wyvernheart | 0 | Rarity 6 |
|
|
| Gnashing Flammenkanone |
230 | -20% | L Severe | High | Average | Arc Shot | Wyvernsnipe | 0 | Rarity 6 |
|
|
| Gnashing Flammenkanone + |
320 | -20% | L Severe | High | Below Avg. | None | Wyvernheart | 0 | Rarity 8 | None |
|
| Thermablaster |
370 | -20% | L Severe | High | Below Avg. | Arc Shot | Wyvernheart | 0 | Rarity 9 | None |
|
| Thermablaster + |
400 | -20% | L Severe | High | Below Avg. | Arc Shot | Wyvernheart | 0 | Rarity 10 | None |
|
| Meteor Bazooka I | 110 | 0% | None | Average | Below Avg. | N/A | Wyvernsnipe | 0 | Rarity 2 |
|
|
| Meteor Bazooka II |
160 | 0% | None | Average | Below Avg. | N/A | Wyvernsnipe | 0 | Rarity 4 |
|
|
| Meteor Cannon |
200 | 0% | None | Average | Below | N/A | Wyvernsnipe | 0 | Rarity 5 |
|
|
| Meteor Cannon II |
270 | 0% | None | Average | Below Avg. | None | Wyvernsnipe | 0 | Rarity 8 | None |
|
| Meteor Cannon III |
320 | 0% | None | Average | Below Avg. | None | Wyvernsnipe | 0 | Rarity 8 | None |
|
| Galaxy Cannon |
360 | 0% | None | Average | Below Avg. | None | Wyvernsnipe | 0 | Rarity 10 | None |
|
| Frostmoon Howlitzer |
340 | 0% | R Mild | Average | Below Avg. | None | Wyvernsnipe | 0 | Rarity 9 | None |
|
| Frostmoon Howlitzer + |
350 | 0% | R Mild | Average | Below Avg. | None | Wyvernsnipe | 0 | Rarity 9 | None |
|
| Egil |
360 | 0% | R Mild | Average | Below Avg. | None | Wyvernsnipe | 0 | Rarity 10 | None |
|
| Rock Eater I | 110 | 0% | None | Average | Average | Arc Shot | Wyvernsnipe | 10 | Rarity 2 |
|
|
| Rock Eater II | 150 | 0% | None | Average | Average | Arc Shot | Wyvernsnipe | 10 | Rarity 3 |
|
|
| Earth Eater |
180 | 0% | None | Average | Average | Arc Shot | Wyvernsnipe | 10 | Rarity 5 |
|
|
| Earth Eater + |
280 | 0% | None | Average | Average | Arc Shot | Wyvernsnipe | 0 | Rarity 8 | None |
|
| Volarevolver |
350 | 0% | None | Average | Average | Arc Shot | Wyvernsnipe | 0 | Rarity 10 | None |
|
| Marino Burst I | 80 | 0% | L. Mild | Average | Below Avg. | Level Shot | Wyvernheart | 0 | Rarity 2 |
|
|
| Marino Burst II | 90 | 0% | L. Mild | Average | Below Avg. | Level Shot | Wyvernheart | 0 | Rarity 3 |
|
|
| Marino Cannon |
160 | 0% | L. Mild | Average | Below Avg. | Level Shot | Wyvernheart | 0 | Rarity 5 |
|
|
| Marino Cannon + |
260 | 0% | L Mild | Average | Average | Level Shot | Wyvernheart | 0 | Rarity 8 | None |
|
| Purple October |
290 | 0% | L Mild | Average | Below Avg. | Level Shot | Wyvernheart | 0 | Rarity 8 | None |
|
| Purple October + |
330 | 0% | L Mild | Average | Below Avg. | Level Shot | Wyvernheart | 0 | Rarity 10 | None |
|
| Golm Cannon |
360 | 0% | LR Severe | High | Very Slow | None | Wyvernheart | 0 | Rarity 8 | None |
|
| Golm Cannon + |
380 | 0% | LR Severe | High | Very Slow | None | Wyvernheart | 0 | Rarity 9 | None |
|
| Golclops |
400 | 0% | LR Severe | High | Very Slow | None | Wyvernheart | 0 | Rarity 10 | None |
|
| Carom Shot I | 130 | 0% | L. Mild | Average | Below Avg. | Arc Shot | Wyvernheart | 20 | Rarity 2 |
|
|
| Carom Shot II | 160 | 0% | L. Mild | Average | Below Avg. | Arc Shot | Wyvernheart | 20 | Rarity 3 |
|
|
| Rebound Shot |
200 | 0% | L. Mild | Average | Below Avg. | Arc Shot | Wyvernheart | 20 | Rarity 5 |
|
|
| Rebound Shot + |
260 | 0% | L Mild | Average | Below Avg. | Arc Shot | Wyvernheart | 0 | Rarity 8 | None |
|
| Red-Hot Rebound Shot |
280 | 0% | L Mild | Average | Below Avg. | Arc Shot | Wyvernheart | 0 | Rarity 8 | None |
|
| Red-Hot Rebound Shot + |
350 | 0% | L Mild | Average | Below Avg. | Arc Shot | Wyvernheart | 0 | Rarity 10 | None |
|
| Wind Thief Crossbow I | 80 | 10% | None | Average | Above Avg. | N/A | Wyvernsnipe | 0 | Rarity 1 |
|
|
| Wind Thief Crossbow II | 90 | 10% | None | Average | Above Avg. | N/A | Wyvernsnipe | 0 | Rarity 2 |
|
|
| Wind Thief Crossbow III |
160 | 10% | None | Average | Above Avg. | N/A | Wyvernsnipe | 0 | Rarity 4 |
|
|
| Gale Crossbow |
180 | 10% | None | Average | Above Avg. | N/A | Wyvernsnipe | 0 | Rarity 5 |
|
|
| Gale Crossbow + |
250 | 10% | None | Average | Above Avg. | None | Wyvernsnipe | 0 | Rarity 8 | None |
|
| Reaper Ballista Notus |
340 | 10% | None | Average | Above Avg. | None | Wyvernsnipe | 0 | Rarity 10 | None |
|
| Fulgent Shot I |
170 | 40% | None | Some | Above Avg. | Arc Shot | Wyvernsnipe | 0 | Rarity 6 |
|
|
| Fulgent Shot II |
180 | 40% | None | Some | Above Avg. | Arc Shot | Wyvernsnipe | 0 | Rarity 6 |
|
|
| Araknamortar |
190 | 40% | None | Some | Fast | Arc Shot | Wyvernsnipe | 0 | Rarity 7 |
|
|
| Araknaboom |
290 | 40% | None | Some | Above Avg. | Arc Shot | Wyvernsnipe | 0 | Rarity 8 | None |
|
| Araknaboom + |
320 | 40% | None | Some | Above Avg. | Arc Shot | Wyvernsnipe | 0 | Rarity 9 | None |
|
| Forlorn Firestorm |
330 | 40% | None | Some | Above Avg. | Arc Shot | Wyvernsnipe | 0 | Rarity 10 | None |
|
| Bordeaux Candlestick |
350 | 0% | None | Average | Below Avg. | Arc Shot | Wyvernsnipe | 0 | Rarity 9 | None |
|
| Bordeaux Candlestick + |
360 | 0% | None | Average | Below Avg. | Arc Shot | Wyvernsnipe | 0 | Rarity 9 | None |
|
| Lampa Da Lavater |
370 | 0% | None | Average | Below Avg. | Arc Shot | Wyvernsnipe | 0 | Rarity 10 | None |
|
| Bone Shooter I | 90 | 0% | None | High | Average | Arc Shot | Wyvernsnipe | 0 | Rarity 1 |
|
|
| Bone Shooter II | 120 | 0% | None | High | Average | Arc Shot | Wyvernsnipe | 0 | Rarity 2 |
|
|
| Bone Buster | 170 | 0% | None | High | Average | Arc Shot | Wyvernsnipe | 0 | Rarity 3 |
|
|
| Pukei Launcher I |
190 | 0% | None | High | Average | Arc Shot | Wyvernsnipe | 0 | Rarity 5 |
|
|
| Pukei Launcher II |
200 | 0% | None | High | Average | Arc Shot | Wyvernsnipe | 0 | Rarity 5 |
|
|
| Venomhail |
210 | 0% | None | High | Average | Arc Shot | Wyvernsnipe | 0 | Rarity 6 |
|
|
| Venomhail + |
290 | 0% | None | High | Average | Arc Shot | Wyvernsnipe | 0 | Rarity 8 | None |
|
| Venomsurge |
320 | 0% | None | High | Average | Arc Shot | Wyvernsnipe | 0 | Rarity 8 | None |
|
| Venomsurge + |
360 | 0% | None | High | Average | Arc Shot | Wyvernsnipe | 0 | Rarity 10 | None |
|
| Sayyad Cannon |
330 | 20% | None | Average | Average | None | Wyvernheart | 0 | Rarity 9 | None |
|
| Sayyad Cannon + |
340 | 20% | None | Average | Average | None | Wyvernheart | 0 | Rarity 9 | None |
|
| Insurrection Cannon |
350 | 20% | None | Average | Average | None | Wyvernheart | 0 | Rarity 10 | None |
|
| Anteka Burst I | 150 | 0% | None | Some | Above Avg. | Arc Shot | Wyvernheart | 10 | Rarity 3 |
|
|
| Anteka Burst II |
180 | 0% | None | Some | Above Avg. | Arc Shot | Wyvernheart | 10 | Rarity 5 |
|
|
| Anteka Blaster |
200 | 0% | None | Some | Above Avg. | Arc Shot | Wyvernheart | 10 | Rarity 6 |
|
|
| Anteka Blaster + |
260 | 0% | None | Some | Above Avg. | Arc Shot | Wyvernheart | 0 | Rarity 8 | None |
|
| Flidaismaker |
350 | 0% | None | Some | Above Avg. | Arc Shot | Wyvernheart | 0 | Rarity 10 | None |
|
| Dual Threat I | 220 | -30% | L. Sever | Average | Slow | Arc Shot | Wyvernsnipe | 0 | Rarity 6 |
|
|
| Dual Threat II | 240 | -30% | L. Sever | Average | Slow | Arc Shot | Wyvernsnipe | 0 | Rarity 6 |
|
|
| Diablazooka | 250 | -30% | L Severe | Average | Below Avg. | Arc Shot | Wyvernsnipe | 0 | Rarity 7 |
|
|
| Diablazooka + |
390 | -30% | L Severe | Average | Slow | Arc Shot | Wyvernheart | 0 | Rarity 9 | None |
|
| Horned Demonica |
400 | -30% | L Severe | Average | Slow | Arc Shot | Wyvernheart | 0 | Rarity 9 | None |
|
| Horned Demonica + |
410 | -30% | L Severe | Average | Slow | Arc Shot | Wyvernheart | 0 | Rarity 10 | None |
|
| Kadachi Cannon I | 120 | 10% | None | Average | Below Avg. | Arc Shot | Wyvernsnipe | 0 | Rarity 2 |
|
|
| Kadachi Cannon II |
160 | 10% | None | Average | Below Avg. | Arc Shot | Wyvernsnipe | 0 | Rarity 4 |
|
|
| Kadachi Raijodo |
200 | 10% | None | Average | Below Avg. | Arc Shot | Wyvernsnipe | 0 | Rarity 5 |
|
|
| Kadachi Raijodo + |
280 | 10% | None | Average | Below Avg. | Arc Shot | Wyvernsinpe | 0 | Rarity 8 | None |
|
| Thunderballista |
310 | 10% | None | Average | Below Avg. | Arc Shot | Wyvernsinpe | 0 | Rarity 8 | None |
|
| Thunderballista + |
350 | 10% | None | Average | Below Avg. | Arc Shot | Wyvernsinpe | 0 | Rarity 10 | None |
|
| Rapidcaster I | 90 | 0% | None | Average | Fast | Arc Shot | Wyvernheart | 0 | Rarity 1 |
|
|
| Rapidcaster II | 100 | 0% | None | Average | Fast | Arc Shot | Wyvernheart | 0 | Rarity 2 |
|
|
| Cyclecaster |
160 | 0% | None | Average | Fast | Arc Shot | Wyvernheart | 0 | Rarity 4 |
|
|
| Hypercaster |
270 | 0% | None | Average | Below Avg. | Arc Shot | Wyvernheart | 0 | Rarity 8 | None |
|
| Torrentcaster |
350 | 0% | None | Average | Fast | Arc Shot | Wyvernheart | 0 | Rarity 10 | None |
|
| Crab Buster |
270 | 0% | None | Average | Average | None | Wyvernsinpe | 0 | Rarity 8 | None |
|
| Crab Buster + |
310 | 0% | None | Average | Average | None | Wyvernsinpe | 0 | Rarity 8 | None |
|
| Heavy Crab Buster |
350 | 0% | None | Average | Average | None | Wyvernsinpe | 0 | Rarity 10 | None |
|
| Piercing Crab |
320 | 0% | LR Mild | Some | Average | None | Wyvernheart | 0 | Rarity 8 | None |
|
| Piercing Crab + |
340 | 0% | LR Mild | Some | Average | None | Wyvernheart | 0 | Rarity 9 | None |
|
| Ceanataur Blaster |
360 | 0% | LR Mild | Some | Average | None | Wyvernheart | 0 | Rarity 10 | None |
|
| Hidden Gambit I | 110 | 30% | None | Some | Above Avg. | Arc Shot | Wyvernsnipe | 0 | Rarity 3 |
|
|
| Hidden Gambit II |
170 | 30% | None | Some | Above Avg. | Arc Shot | Wyvernsnipe | 0 | Rarity 5 |
|
|
| Baleful Night |
190 | 30% | None | Some | Above Avg. | Arc Shot | Wyvernsnipe | 0 | Rarity 6 |
|
|
| Nirvana Ascension |
300 | 30% | None | Some | Above Avg. | Arc Shot | Wyvernsnipe | 0 | Rarity 8 | None |
|
| Nirvana Ascension + |
330 | 30% | None | Some | Above Avg. | Arc Shot | Wyvernsnipe | 0 | Rarity 9 | None |
|
| Avidya Gambit |
340 | 30% | None | Some | Above Avg. | Arc Shot | Wyvernsnipe | 0 | Rarity 10 | None |
|
| Polis's Asterism |
360 | 0% | None | Low | Fast | None | Wyvernsnipe | 0 | Rarity 10 | None |
|
| Highpriest Bowgun I | 110 | 0% | L. Mild | Some | Below Avg. | N/A | Wyvernsnipe | 0 | Rarity 2 |
|
|
| Highpriest Bowgun II | 150 | 0% | L. Mild | Some | Below Avg. | N/A | Wyvernsnipe | 0 | Rarity 3 |
|
|
Bishaten's Grace |
180 | 0% | L. Mild | Some | Below Avg. | N/A | Wyvernsnipe | 0 | Rarity 5 |
|
|
| Six Paths Blessing |
290 | 0% | L Mild | Some | Below Avg. | None | Wyvernsnipe | 0 | Rarity 8 | None |
|
| Six Paths Blessing + |
320 | 0% | L Mild | Some | Below Avg. | None | Wyvernsnipe | 0 | Rarity 8 | None |
|
| Six Path Arblast |
360 | 0% | L Mild | Some | Below Avg. | None | Wyvernsnipe | 0 | Rarity 10 | None |
|
| Bishaten's Glory |
280 | 0% | R Mild | Average | Below Avg. | Arc Shot | Wyvernheart | 0 | None |
|
|
| Bishaten's Glory + |
310 | 0% | R Mild | Average | Below Avg. | Arc Shot | Wyvernheart | 0 | None |
|
|
| Six Paths Crossing |
350 | 0% | R Mild | Average | Below Avg. | Arc Shot | Wyvernheart | 0 | None |
|
|
| Spheniscine Slayer I | 100 | 0% | None | Average | Average | N/A | Wyvernsnipe | 0 | Rarity 1 |
|
|
| Spheniscine Slayer II | 120 | 0% | None | Average | Average | N/A | Wyvernsnipe | 0 | Rarity 2 |
|
|
| Spheniscine Ruler |
170 | 0% | None | Average | Average | N/A | Wyvernsnipe | 0 | Rarity 4 |
|
|
| Spheniscine Ruler + |
260 | 0% | None | Average | Average | None | Wyvernsnipe | 0 | Rarity 8 | None |
|
| Spheniscine God |
350 | 0% | None | Average | Average | None | Wyvernsnipe | 0 | Rarity 10 | None |
|
| Sinister Volley I | 130 | 0% | R Mild | High | Fast | Arc Shot | Wyvernsnipe | 0 | Rarity 3 |
|
|
| Sinister Volley II | 150 | 0% | R Mild | High | Fast | Arc Shot | Wyvernsnipe | 0 | Rarity 3 |
|
|
| Sinister Dreadvolley |
220 | 0% | R Mild | High | Fast | Arc Shot | Wyvernsnipe | 0 | Rarity 6 |
|
|
| Sinister Dreadvolley + |
320 | 0% | R Mild | High | Fast | Arc Shot | Wyvernsnipe | 0 | Rarity 8 | None |
|
| Mighty Soulstriker |
330 | 0% | R Mild | High | Fast | Arc Shot | Wyvernsnipe | 0 | Rarity 9 | None |
|
| Devil's Conduit |
360 | 0% | None | Some | Fastest | Arc Shot | Wyvernsnipe | 0 | Rarity 10 | None |
|
| Todlicher Abzug |
340 | 20% | None | Average | Average | Arc Shot | Wyvernheart | 0 | Rarity 9 | None |
|
| Todlicher Abzug + |
350 | 20% | None | Average | Average | Arc Shot | Wyvernheart | 0 | Rarity 9 | None |
|
| Gemetzel Abzug |
360 | 20% | None | Average | Average | Arc Shot | Wyvernheart | 0 | Rarity 10 | None |
|
| Le Desastre |
320 | 40% | None | Some | Average | None | Wyvernsnipe | 0 | Rarity 9 | None | |
| Le Deluge |
330 | 40% | None | Some | Average | None | Wyvernsnipe | 0 | Rarity 10 | None |
|
| Rajang Shooter I | 190 | -20% | LR Severe | Average | Above Avg. | Arc Shot | Wyvernsnipe | 0 | Rarity 5 |
|
|
| Rajang Shooter II |
210 | -20% | LR Severe | Average | Above Avg. | Arc Shot | Wyvernsnipe | 0 | Rarity 6 |
|
|
| Rajang's Rage |
230 | -20% | LR Severe | Average | Fast | Arc Shot | Wyvernsnipe | 0 | Rarity 7 |
|
|
| Rajang's Rage + |
350 | -20% | LR Severe | Average | Above Avg. | Arc Shot | Wyvernsnipe | 0 | Rarity 9 | None |
|
| Rajang Cyclone |
360 | -20% | LR Severe | Average | Above Avg. | Arc Shot | Wyvernsnipe | 0 | Rarity 10 | None |
|
| Demonlord Thunder |
350 | 20% | LR Severe | Low | Above Avg. | None | Wyvernheart | 0 | Rarity 10 | None |
|
| Azure Elder Cannon I | 190 | 0% | LR Mild | Average | Above Avg. | Arc Shot | Wyvernheart | 0 | Rarity 5 |
|
|
| Azure Elder Cannon II | 200 | 0% | LR Mild | Average | Above Avg. | Arc Shot | Wyvernheart | 0 | Rarity 6 |
|
|
| Abyssal Gale Barrage | 210 | 0% | LR Mild | Average | Fast | Arc Shot | Wyvernheart | 0 | Rarity 7 |
|
|
| Skyshot Windstorm |
350 | 0% | LR Mild | Average | Above Avg. | Arc Shot | Wyvernheart | 0 | Rarity 10 | None |
|
| Thunderbolt Cannon I | 180 | 0% | LR Mild | Some | Average | Arc Shot | Wyvernsnipe | 0 | Rarity 6 |
|
|
| Abyssal Storm Barrage | 200 | 0% | LR Mild | Some | Above Avg. | Arc Shot | Wyvernsnipe | 0 | Rarity 7 |
|
|
| Skyshot Thunderstorm |
340 | 0% | LR Mild | Some | Average | Arc Shot | Wyvernsnipe | 0 | Rarity 10 | None |
|
| Daora's Delphinidae |
210 | 10% | L Mild | Average | Fast | Arc Shot | Wyvernsnipe | 0 | Rarity 6 |
|
|
| Daora Grande |
220 | 10% | L Mild | Average | Fast | Arc Shot | Wyvernsnipe | 0 | Rarity 7 |
|
|
| Daora's Grande + |
330 | 10% | L Mild | Average | Above Avg. | Arc Shot | Wyvernsnipe | 0 | Rarity 9 | None |
|
| Daora's Ceti |
340 | 10% | L Mild | Average | Above Avg. | Arc Shot | Wyvernsnipe | 0 | Rarity 10 | None |
|
| Teostra's Artillery I | 210 | 5% | R Severe | Average | Average | Arc Shot | Wyvernsnipe | 0 | Rarity 6 |
|
|
| Teostra's Flames | 230 | 5% | R Severe | Average | Average | Arc Shot | Wyvernheart | 0 | Rarity 7 |
|
|
| Teostra's Flames + |
340 | 5% | R Severe | Average | Below Avg. | Arc Shot | Wyvernheart | 0 | Rarity 9 | None |
|
| Teostra's Firestorm |
350 | 5% | R Severe | Average | Below Avg. | Arc Shot | Wyvernheart | 0 | Rarity 10 | None |
|
| Kamaeleon I |
210 | 30% | LR Mild | Average | Fast | Arc Shot | Wyvernsnipe | 0 | Rarity 6 |
|
|
| Veiled Kamaeleon |
220 | 0% | LR Mild | Average | Fast | Arc Shot | Wyvernsnipe | 30 | Rarity 7 |
|
|
| Veiled Kamaeleon + |
350 | 0% | LR Mild | Average | Above Avg. | Arc Shot | Wyvernsnipe | 0 | Rarity 9 | None |
|
| Invisible Kamaeleon |
360 | 0% | LR Mild | Average | Above Avg. | Arc Shot | Wyvernsnipe | 0 | Rarity 10 | None |
|
| Redwing Cannon I |
200 | 0% | None | Low | Very Fast | Arc Shot | Wyvernheart | 0 | Rarity 6 |
|
|
| Diabolica |
210 | 0% | None | Low | Very Fast | Arc Shot | Wyvernheart | 0 | Rarity 7 |
|
|
| Crimson Geyserwing |
350 | 0% | None | Low | Fast | Arc Shot | Wyvernheart | 0 | Rarity 10 | None |
|
| Abyssal Nova |
390 | -15% | None | High | Below Avg. | None | Wyvernheart | 0 | Rarity 10 | None |
|
| Righteous Varka |
370 | 0% | None | Average | Above Avg. | None | Wyvernsnipe | 0 | Rarity 10 | None |
|
| Ill Omen |
370 | -20% | None | Some | Above Avg. | None | Wyvernsnipe | 0 | Rarity 10 | None |
|
| Carrozza Bazooka I | 100 | 0% | None | Some | Below Avg. | Arc Shot | Wyvernsnipe | 0 | Rarity 2 |
|
|
| Carrozza Bazooka II | 120 | 0% | None | Some | Below Avg. | Arc Shot | Wyvernsnipe | 0 | Rarity 3 |
|
|
| Cendrillon |
180 | 0% | None | Some | Below Avg. | Arc Shot | Wyvernsnipe | 0 | Rarity 5 |
|
|
| Cendrillon + |
310 | 0% | None | Some | Below Avg. | Arc Shot | Wyvernsnipe | 0 | Raritry 8 | None |
|
| Bibidi Babidi Boom |
350 | 0% | None | Some | Below Avg. | Arc Shot | Wyvernsnipe | 0 | Rarity 10 | None |
|
| Journey Jelly I | 120 | 0% | R. Mild | Average | Above Avg. | N/A | Wyvernheart | 0 | Rarity 3 |
|
|
| Journey Jelly II |
170 | 0% | R. Mild | Average | Above Avg. | N/A | Wyvernheart | 10 | Rarity 5 |
|
|
| Guiding Light |
190 | 0% | R. Mild | Average | Above Avg. | N/A | Wyvernheart | 10 | Rarity 6 |
|
|
| Sacred Radiance |
330 | 0% | R Mild | Average | Above Avg. | None | Wyvernheart | 0 | Rarity 9 | None |
|
| Death Penalty |
340 | 0% | R Mild | Average | Above Avg. | None | Wyvernheart | 0 | Rarity 10 | None |
|
| Ladybug Cannon I |
160 | 0% | None | Some | Slow | Arc Shot | Wyvernheart | 20 | Rarity 5 |
|
|
| Ladybug Cannon II |
180 | 0% | None | Some | Slow | Arc Shot | Wyvernheart | 20 | Rarity 5 |
|
|
| Ladybug Mortar |
200 | 0% | None | Some | Slow | Arc Shot | Wyvernheart | 20 | Rarity 6 |
|
|
| Ladybug Launcher |
320 | 0% | None | Some | Slow | Arc Shot | Wyvernheart | 20 | Rarity 8 | None |
|
| Great Ladybug Launcher |
360 | 0% | None | Some | Slow | Arc Shot | Wyvernheart | 20 | Rarity 10 | None |
|
| Felyne Bowgun I |
160 | 0% | R Severe | Average | Below Avg. | Level Shot | Wyvernsnipe | 0 | Rarity 4 |
|
|
| Felyne Bowgun II |
180 | 0% | R Severe | Average | Below Avg. | Level Shot | Wyvernsnipe | 0 | Rarity 5 |
|
|
| Felyne Cannon |
200 | 0% | R Severe | Average | Below Avg. | Level Shot | Wyvernsnipe | 0 | Rarity 6 |
|
|
| Felyne Cannon + |
340 | 0% | R Severe | Average | Below Avg. | Level Shot | Wyvernsnipe | 0 | Rarity 9 | None |
|
| Felyne Artillery |
360 | 0% | R Severe | Average | Below Avg. | Level Shot | Wyvernsnipe | 0 | Rarity 10 | None |
|
| Injector Cannon |
260 | 0% | None | Low | Above Avg. | None | Wyvernsnipe | 0 | Rarity 8 | None |
|
| Injector Cannon + |
310 | 0% | None | Low | Above Avg. | None | Wyvernsnipe | 0 | Rarity 8 | None |
|
| Zect Injector |
350 | 0% | None | Low | Above Avg. | None | Wyvernsnipe | 0 | Rarity 10 | None |
|
| Royal Order's Bowgun |
280 | 10% | None | Average | Average | Arc Shot | Wyvernheart | 0 | Rarity 8 | None |
|
| Royal Order's Bowgun + |
350 | 10% | None | Average | Average | Arc Shot | Wyvernheart | 0 | Rarity 10 | None |
|
| Antique Machina HB |
350 | 0% | LR Severe | Low | Average | Level Shot | Wyvernheart | 0 | Rarity 10 | None |
|
| Rampage H. Bowgun I | 150 | 0% | L. Severe | Average | Below Avg. | N/A | Wyvernheart | 0 | Rarity 4 |
|
|
| Rampage H. Bowgun II | 170 | 0% | L. Severe | Average | Below Avg. | N/A | Wyvernheart | 0 | Rarity 5 |
|
|
| Rampage H. Bowgun III | 180 | 0% | L. Severe | Average | Below Avg. | N/A | Wyvernheart | 0 | Rarity 5 |
|
|
| Rampage H. Bowgun IV | 190 | 0% | L. Severe | Average | Below Avg. | N/A | Wyvernheart | 0 | Rarity 6 |
|
|
| Rampage H. Bowgun V | 200 | 0% | L Severe | Average | Average | N/A | Wyvernheart | 0 | Rarity 6 |
|
|
| Rampage H. Bowgun S | 210 | 0% | L Severe | Average | Average | None | Wyvernheart | 0 | Rarity 7 |
|
|
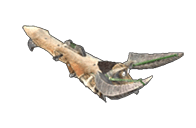
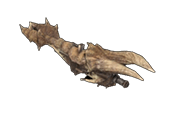
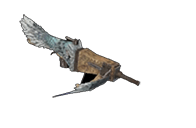
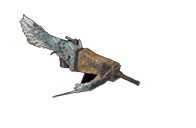
Heavy Bowgun Gallery
Heavy Bowguns Defender Weapons


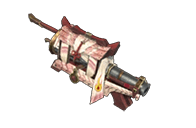
Heavy Bowguns Kamura Weapons


Master Rank Heavy Bowguns Kamura Weapons


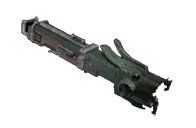
Heavy Bowguns Ore Weapons


Master Rank Heavy Bowguns Ore Weapons


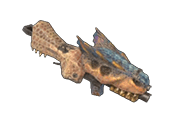
Heavy Bowguns Bone Weapons


Master Rank Heavy Bowguns Bone Weapons


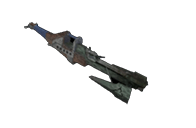
Heavy Bowguns Independent Weapons


Master Rank Heavy Bowguns Independet Weapons


Heavy Bowgun Weapon Tree for Monster Hunter Rise (MHR or MHRise) features the different upgrade paths for the Heavy Bowgun weapon. In Monster Hunter Rise, there are 14 categories of weapons that players can choose from to use for hunting Monsters. The Heavy Bowgun is a weapon built for ranged attacks. Affords high mobility. It also fires Arc Shots to cover for allies or Power Shots that hit hard. Coatings can be applied to inflict status effects. This page lists all of the Heavy Bowguns in Monster Hunter Rise, showing their effectiveness and upgrade paths.
Master Rank Heavy Bowgun Weapons
Introduced with the release of the Sunbreak Expansion, Master Rank Weapons are a brand new and more powerful tier of Weaapons available to hunters to help them deal with the deadlier Monsters that can be found on the Sunbreak Expansion.
Note that these Weapons can only be accessed by players that have purchased and installed the Sunbreak Expansion. For those who own the expansionless version of Monster Hunter, these Weapons are unobtainable.
- You can check out our Heavy Bowgun Weapon Tree to find the different upgrade paths for each Master Rank Heavy Bowgun weapon.
Heavy Bowgun Weapon Traits
- Long Range.
- High damage.
- Specializes in high damage, and explosive ammo.
- The Bowgun can be used to attack monsters from long range. There are two types of bowgun: the heavy bowgun, which can use powerful ammo, and the light bowgun, which allows for greater mobility and evasive capabilities, and faster shooting.
- Ammunition comes in every elemental and status damage type, as well as ammo suitable for short or long range. Ramp-up Skills can further add more ammo types to your bowgun. Always check the ammo capabilities of your bowgun before building!
- A powerful ranged weapon as heavy on firepower as it is in the hand. Can be loaded with Wyvernheart or Wyvernsnipe ammo depending on the situation.
Heavy Bowgun Weapon Features
Weapon Advantages
- Is a veritable turret, capable of high damage with careful positioning.
- Ammunition covers every possible damage type, including severing and blunt.
- Typically larger ammo capacity than the Light Bowgun.
- Dodges further than most weapons.
- Shield attachment allows use of Guard skills.
- Can heal and support allies with Recover, Demon, and Armor ammo.
Weapon Disadvantages
- Must supply your own ammunition.
- Slow movement.
- Slow dodge animation.
- Slow sheathing speed.
Important: For a comprehensive guide on how to use Heavy Bowguns, please click the following link: Heavy Bowgun
MH Rise Heavy Bowgun Weapon Tree
Heavy Bowgun Defender Tree
 Defender Heavy Bowgun I
 110
110  30
30
 Champion Heavy Bowgun150 30
 Champion Heavy Bowgun II190 30
- Champion Heavy Bowgun III210 30
 Guardian Heavy Bowgun230 30
Heavy Bowgun Kamura Tree
 Kamura H. Bowgun I60 --
- Kamura H. Bowgun II70 --
 Kamura H. Bowgun III100 --
 Kamura H. Bowgun IV
140 --
 Kamura H. Bowgun V
160 -- 
 Kamura Ninja H. Bowgun
190 -- 
 Kamura Warrior Ballista 270 --

 Kamura Warrior Ballista + 310 --
 Fine Kamura Ballista 350 --
- Duke's Cannon 340 --

- Chalice of Desire 350 --
- Tigrex Howl I
160 R Severe
 Tigrex Howl II
230 R Severe
 Tigrex Skull
240 R Severe
- Tigrex Skull + 350
 -10% R Severe
- Huge Tigrex Skull 360-10% R Severe
- Huge Tigrex Skull + 370-10% R Severe
- Cirrus Blaster I
130 --
- Cirrus Blaster II
190 --
- Mountainous Roar
210 --
- Mountainous Roar + 33010% --
- Mountainous Torrent 34010% --
- Mountainous Torrent + 35010% --
- Pure Cannon Tamamo 36010% --
- Reversal Shot I110 R Mild
- Reversal Shot II
170 R Mild
- Reversal Shot III
180 R Mild
- Reversal Barrage
220 R Mild
- Reversal Barrage + 290 20 R Mild
- Grand Reversal Barrage 31020 R Mild
- Grand Reversal Barrage + 38020 R Mild
- Queen's Longfire I
120 --
- Queen's Longfire II
190 --
- Queen's Farflier
210 --
- Queen's Farflier + 300 --
- Queen's Scionfire 350 --
- Queen's Scionfire + 370 --
- Moonlight Sparkflier 360 10% L Mild

- Rosenkugel 34010% LR Severe
- Rosenkugel + 35010% LR Severe
- Rosenprima 36010% LR Severe
- Kaktus Prima 34020% --

- Guerrera Cannon I
180 --
- Guerrera Cannon II190 --
- Thorn Cannon200 --
- Guerrera Herald 30020% LR Severe
- Guerrera Herald + 32020% LR Severe
- Valia Cannon 34020% LR Severe
- Arzuros Gun I100 --
- Arzuros Gun II
120 --
- Arzuros Fishergun
170 --
- Arzuros Fishergun + 280 --
- Arbearalest 360 --
- Usurper's Tremor I140 --
- Usurper's Tremor II
200 --
- Despot's Paroxysm
220 --
- Despot's Paroxysm + 33010% --
- Oppressor's Making 35010% --
Heavy Bowgun Ore Tree
- Iron Assault I80 --
- Iron Assault II100 --
- Steel Assault140 --
- Striker's Bowgun I
170 --
- Striker's Bowgun II
190 --
- Elite Bowgun
230 --
- Elite Bowgun + 280 --

- Imperial Bowgun 330 --
- Imperial Bowgun + 360 --
- Wyvern Assault 33020% LR Mild

- Wyvern Assault + 34020% LR Mild
- Wyvern Crasher 35020% LR Mild
- Flammenkanone I
210 L Severe
- Flammenkanone II
220 L Severe
- Gnashing Flammenkanone220 L Severe
- Gnashing Flammenkanone + 320-20% L Severe
- Thermablaster 370-20% L Severe
- Thermablaster + 400-20% L Severe
- Meteor Bazooka I110 --
- Meteor Bazooka II
160 --
- Meteor Cannon
200 --
- Meteor Cannon II 270 --
- Meteor Cannon III 320 --
- Galaxy Cannon 360 --
- Frostmoon Howlitzer 340 R Mild
- Frostmoon Howlitzer + 350 R Mild
- Egil 360 R Mild
- Rock Eater I110 --
- Rock Eater II
150 --
- Earth Eater
180 --
- Earth Eater + 28010 --
- Volarevolver 35010 --
- Marino Burst I80 L Mild
- Marino Burst II
90 L Mild
- Marino Cannon
160 L Mild
- Marino Cannon + 260 L Mild
- Purple October 290 L Mild
- Purple October + 330 L Mild
- Golm Cannon 360 LR Severe

- Golm Cannon + 380 LR Severe
- Golclops 400 LR Severe

- Carom Shot I130 L Mild
- Carom Shot II
160 L Mild
- Rebound Shot
200 L Mild
- Rebound Shot + 260 20 L Mild
- Red-Hot Rebound Shot 280 20 L Mild
- Red-Hot Rebound Shot + 350 20 L Mild
- Wind Thief Crossbow I80 --
- Wind Thief Crossbow II
90 --
- Wind Thief Crossbow III
160 --
- Gale Crossbow
180 --
- Gale Crossbow + 25010% --
- Reaper Ballista Notus 34010% --
- Fulgent Shot I
170 --
- Fulgent Shot II
180 --
- Araknamortar
190 --
- Araknaboom 29040% --
- Araknaboom + 32040% --
- Forlorn Firestorm 33040% --
- Bordeaux Candlestick 350 --
- Bordeaus Candlestick + 360 --
- Lampa Da Lavater 370 --
Heavy Bowgun Bone Tree
- Bone Shooter I90 --
- Bone Shooter II120 --
- Bone Buster170 --
- Pukei Launcher I
190 --
- Pukei Launcher II
200 --
- Venomhail
210 --
- Venomhail + 290 --
- Venomsurge 320 --
- Venomsurge + 360 --
- Sayyad Cannon 33020% --
- Sayyad Cannon + 34020% --
- Insurrection Cannon 35020% --
- Anteka Burst I150 --
- Anteka Burst II
180 --
- Anteka Blaster
200 --
- Anteka Blaster + 260 10 --
- Flidaismaker 350 10 --
- Dual Threat I
220 L Severe
- Dual Threat II
240 L Severe
- Diablazooka250 L Severe
- Diablazooka + 390-30% L Severe
- Horned Demonica 400-30% L Severe
- Horned Demonica + 410-30% L Severe
- Kadachi Cannon I
120 --
- Kadachi Cannon II
160 --
- Kadachi Raijodo
200 --
- Kadachi Raijodo + 28010% --
- Thunderballista 31010% --
- Thunderballista + 35010% --
- Rapidcaster I
90 --
- Rapidcaster II
100 --
- Cyclecaster
160 --
- Hypercaster 270 --
- Torrentcaster 350 --
- Crab Buster 270 --
- Crab Buster + 310 --
- Heavy Crab Buster 350 --
- Piercing Crab 320 LR Mild
- Piercing Crab + 340 LR Mild
- Ceanataur Blaster 360 LR Mild
- Hidden Gambit I
110 --
- Hidden Gambit II
170 --
- Baleful Night
190 --
- Nirvana Ascension 30030% --
- Nirvana Ascension + 33030% --
- Avidya Gambit 34030% --
- Polis's Asterism 360 --
- Highpriest Bowgun I
110 L Mild
- Highpriest Bowgun II
150 L Mild
- Bishaten's Grace
180 L Mild
- Six Paths Blessing 290 L Mild
- Six Paths Blessing + 320 L Mild
- Six Path Arblast 360 L Mild
- Bishaten's Glory 280 R Mild
- Bishaten's Glory + 310 R Mild
- Six Paths Crossing 350 R Mild
- Spheniscine Slayer I
100 --
- Spheniscine Slayer II
120 --
- Spheniscine Ruler
170 --
- Spheniscine Ruler + 260 --
- Spheniscine God 350 --
Heavy Bowgun Independent Tree
- Silver Scatterer
350 -- - Sinister Volley I
130 R Mild
- Sinister Volley II
150 R Mild
- Sinister Dreadvolley
220 R Mild
- Sinister Dreadvolley + 320 R Mild
- Mighty Soulstriker 350 R Mild
- Devil's Conduit 360 R Mild
- Todlicher Abzug 34020% --
- Todlicher Abzug + 35020% --
- Gemetzel Abzug 36020% --
- Le Desastre 32040% --
- Le Deluge 33040% --
- Ursprung Mort 360-35% / 15% --
- Rajang Shooter I
190 LR Severe
- Rajang Shooter II
210 LR Severe
- Rajang's Rage
230 LR Severe
- Rajang's Rage + 350-20% LR Severe
- Rajang Cyclone 360-20% LR Severe
- Demonlord Thunder 350-20% LR Severe
- Azure Elder Cannon I
190 LR Mild
- Azure Elder Cannon II
200 LR Mild
- Abyssal Gale Barrage
210 LR Mild
- Skyshot Windstorm 350 LR Mild
- Thunderbolt Cannon I
180 LR Mild
- Abyssal Storm Barrage
200 LR Mild
- Skyshot Thunderstorm 200 LR Mild
- Daora's Delphinidae210 L Mild
- Daora Grande
220 L Mild
- Daora Grande + 330 10% L Mild
- Daora's Ceti 340 10% L Mild
- Teostra's Artillery I210 R Severe
- Teostra's Flames
230 R Severe
- Teostra's Flames + 340 5% R Severe
- Teostra's Firestorm 350 5% R Severe
- Kamaeleon I
210 LR Mild
- Veiled Kamaeleon
220 LR Mild
- Veiled Kamaleon + 350 LR Mild
- Invisible Kamaeleon360 LR Mild
- Redwing Cannon I
200 --
- Diabolica
210 --
- Crimson Geyserwing 350 15% --
- Abyssal Nova 390 --
- Righteous Varka 370 --
- Ill Omen
370 -- - Carrozza Bazooka I
100 --
- Carrozza Bazooka II
120 --
- Cendrillon
180 --
- Cendrillon + 310 --
- Bibidi Babidi Boom 350 --
- Journey Jelly I
120 R Mild
- Journey Jelly II
170 R Mild
- Guiding Light
190 R Mild
- Sacred Radiance 330 10 R Mild
- Death Penalty 340 10 R Mild
- Ladybug Cannon I
160 --
- Ladybug Cannon II
180 --
- Ladybug Mortar
200 --
- Ladybug Launcher
320 --
- Great Ladybug Launcher
360 --
- Felyne Bowgun I
160 R Severe
- Felyne Bowgun II
180 R Severe
- Felyne Cannon
200 R Severe
- Felyne Cannon + 340 R Severe
- Felyne Artillery 360 R Severe
- Injector Cannon 260 --
- Injector Cannon + 310 --
- Zect Injector 350 --
- Royal Order's Bowgun 28010%50 --
- Royal Order's Bowgun + 35010%50 --
- Antique Machina HB 350 LR Severe
- Rampage H. Bowgun I150 L Severe
- Rampage H. Bowgun II
170 L Severe
- Rampage H. Bowgun III
180 L Severe
- Rampage H. Bowgun IV
190 L Severe
- Rampage H. Bowgun V200 L Severe
- Rampage H. Bowgun S210 L Severe
| MHR Weapon Types |
Bow ♦ Charge Blade ♦ Dual Blades ♦ Great Sword ♦ Gunlance ♦ Hammer ♦ Hunting Horn ♦ Insect Glaive ♦ Lance ♦ Light Bowgun ♦ Long Sword ♦ Switch Axe ♦ Sword & Shield |
Looking at the Heavy Bowguns, it says Arc Shot, which means the shot is affected by gravity, Level Shot, which means it isn’t, and N/A. What does N/A mean? Does it just not shoot, or is there not enough information to know how it shoots?
2
+16
-1