

Switch Axe |
|
|---|---|
| Weapon Type | Melee |
| Damage Type | Cut Damage |
Switch Axe (スラッシュアックス surasshu akkusu, "slash axe") is one of the fourteen weapon categories in Monster Hunter Rise (MHR or MHRise). Like all Weapons, it features a unique set of moves and an upgrade path that branches out depending on the materials used.
Switches between Axe Mode, for fluid mobility and hefty single hits, and Sword Mode, for quicker strikes. Phial effects activated by the sword persist in axe form.
Switch Axe Weapon Tree
- You can check out our Switch Axe Weapon Tree to find the different upgrade paths for the Switch Axe weapon category.
- Click here for a Comparative List of Switch Axes.
- Click here to see MH Rise Switch Axe Builds. These builds were created around the weapon types, each with a specific set of handpicked Weapons, Equipment and complementing Skills and Decorations. These builds with Specific Switch Axes may be paired with a set of Armor to optimize the combination in order to create a Build type focused on the Skills available with the selected equipment.
- Master Rank Switch Axes are the top tier Switch Axes available in Monster Hunter Rise, and as all Master Rank Weapons, can only be obtained by owning the Sunbreak Expansion. The weapons use Master Rank Materials that can be obtained by completing quests and doing endgame content. Click here to see all Master Rank Switch Axes.
Switch Axe Weapon Traits
- Axe mode has good reach and mobility.
- A complex weapon with two forms and a phial system.
- Sword mode has extra damage and uses the phial's bonus.
- The switch axe morphs between axe and sword modes. Axe mode boasts power and long reach, while sword mode features faster attacks and explosive finishers.
Switch Axe Weapon Features
Weapon Advantages
- A versatile weapon that can switch between a sword or axe mode.
- Phials are used to boost the performance and capability of the weapon.
- The Switch Axe is mainly a DPS weapon that's in favour of attacks rather than defence.
- Very effective at dishing out elemental and status damage.
Weapon Disadvantages
- Does not have any defensive moves or attacks.
- Some attacks cause the wielder to become stationary, allowing yourself to be open to a monster's attacks.
- Requires smart positioning in order to avoid being caught while also still being able to deal damage.
Switch Axe Controls
Axe
 : Axe Overhead Slash
- Rapidly press
 : Axe Wild Swing
 - + : Axe Rising Slash
 + : Axe Forward Slash
 : Morph/Reload
- Switch Gauge: Once your Switch Gauge is filled to a certain point, you can morph your sword. If your gauge is low, you will reload instead. When the sword is not in use, the gauge fills gradually over time.
- Axe: Heavy Slam: Use Axe Wild Swing a certain number of times (4), then press to perform an Axe Heavy Slam. This combination will often prime you to reach its Maximum Potency.
Sword
- : Sword Overhead Slash
- : Sword Double Slash
- + : Element Discharge
- : Morph
- Phials: Attacks in sword mode will expend the Switch Gauge to add a phial's effects to your attacks.
- Amped State: Attacking with the sword enhances phials until they enter an Amped State, giving Axe Mode and Sword Mode extra hits.
Silkbind Controls
 + : Switch Charger
- + : Invincible Gambit
- Switch Charger: Uses a Wirebug to launch yourself forward while quickly generating your Switch Gauge. In addition, the Switch Gauge won't decrease for a short period of time.
- Invincible Gambit: A forward-moving spinning attack that fortifies the user, making them immune to flinching or being knocked back by even the fiercest of attacks.
Switch Axe Weapon Useful Combos
Axe Basic Combo
- +, , ,
- Axe: Forward Slash > Axe: Overhead Slash > Axe: Side Slash > Axe: Rising Slash
Sword: Combo during an Opening
- x3, x2, +, Rapidly press
- Slash Combo >Slash Combo > Element Discharge > Element Discharge Finisher
Switch Axe Silkbind Attacks
Elemental Burst Counter

Compresses Switch Gauge energy, that can be released as an Elemental Burst.
If the burst is released right as a monster attacks, you'll perform a Power Finisher and your switch axe will go into an Amped State.
Switch Charger

Uses a Wirebug to launch you forward while quickly regenerating your Switch Gauge. In addition, the Switch Gauge won't decrease for a short period of time.
Press
Invincible Gambit
A forward-moving spinning attack. Fortifies the user, making them immune to flinching or being knocked back by even the fiercest of attacks.
Press
Can be switched out with Soaring Wyvern Blade
Soaring Wyvern Blade

Press
Can be switched out with Invincible Gambit
Switch Axe Switch Skills
Switch Skills in Monster Hunter Rise (MHR or MHRise) refer to swappable moves in a Weapon's moveset. Each of the 14 Weapon-types have 3 sets of 2 moves that can be switched out with each other, allowing for a diverse, customizable approach to combat. Switch Skills are unlocked by progressing in the game, with each set having a default move that is available from the beginning.
- Each Weapon-type has a set of swappable Silkbind Attacks and 2 sets of swappable standard moves in the base game.
- The first set of Switch Skills are unlocked by completing the Lv. 3⭐Urgent Village Quest Feathered Frenzy
- The second set of Switch Skills are unlocked by forging or upgrading 8 Weapons within a Weapon-type. Note that this needs to be done for every Weapon-type that you want to unlock Switch Skills for.
- The third set of Switch Skills are unlocked by completing the associated High Rank Hub Quest from Master Utsushi. These quests are unlocked by gaining access to the required Hub Quest rank.
- Lv. 4⭐ Study the Switch Axe for the Switch Axe.
- Once unlocked, Switch Skills can be swapped at any Item Box and Switch Skill combinations can be saved to Item Loadouts as well.
- The Sunbreak Expansion introduces the Switch Skill Swap mechanic, where hunters can preload 2 Switch Skill loadouts and swap between them freely during hunts. Hunters will also now have access to a total of 5 sets of swappable Switch Skills, including new Silkbind Attacks and regular moves.
- This expansion also introduces the Swap Evade, a special dodge maneuver that can be performed right after a Switch Skill Swap, allowing hunters to quickly evade and maintain distance while safely swapping skill sets.
- In the table below, the left column represents default moves available from the beginning, while the right represents unlockable Switch Skills.
Switch Skill Swap Mechanic
The Switch Skill Swap mechanic allows the hunter to assign Switch Skill loadouts and swap between them on the fly, whether in combat or otherwise. This allows the hunter to further expand their arsenal of available moves during hunts and to further customize their builds to accommodate their playstyle. Being able to make split-second decisions to swap loadouts and use specific moves to counter monster attacks as they wind up is sure to add an exciting new dimension to monster hunting.
With the Switch Skill Swap mechanic, hunters are given two loadouts to switch between, denoted by the ![]() Red Scroll and
Red Scroll and ![]() Blue Scroll icons on the UI. Hunters can set up each loadout from the Item Box at Kamura Village, Elgado Outpost or even at Camps while out on hunts, just as they would when assigning Switch Skills individually. When out on hunts, hunters can swap between the two loadouts by holding
Blue Scroll icons on the UI. Hunters can set up each loadout from the Item Box at Kamura Village, Elgado Outpost or even at Camps while out on hunts, just as they would when assigning Switch Skills individually. When out on hunts, hunters can swap between the two loadouts by holding ![]() and pressing the
and pressing the ![]() +
+ ![]() buttons. The character will perform a quick animation and briefly flash with energy, signifying a successful swap.
buttons. The character will perform a quick animation and briefly flash with energy, signifying a successful swap.

![]()
![]()
![]()
| Switch Axe Switch Skills introduced with the Sunbreak Expansion | |
|---|---|
| Switch Skills Set 1 | |
Forward Slash |
Forward Overhead Slash |
| Thrusts the axe's blade forward while stepping. Doesn't do a lot of damage, but is versatile. |
A lunging attack performed by winding up the axe and smashing it down. Difficult to pull off but delivers good damage. A subsequent Sword Mode attack will turn into a Double Slash |
Controls
|
Controls
|
| Switch Skills Set 2 | |
Finishing Discharge |
Compressed Finishing Discharge |
| A finishing blow for the Element Discharge. Performs a thrust attack while fortifying elemental energy, ending with a massive explosion. If your Amp Gauge is full and the target is a large monster, the action becomes a Zero Sum Discharge Finisher. |
A finishing blow for the Element Discharge. Puts you in a knockdown-resistant state and delivers a swift strike accompanied by an elemental explosion. The Activation Gauge has no effect on this action. |
Controls
|
Controls
|
| Switch Skills Set 3 | |
Axe: Wide Sweep |
2-Staged Morph Slash Combo |
| A technique that closes the distance to your target by using the centrifugal force of swinging with an Axe: Wild Swing. Useful for when the target is out of swinging range, or when you want to get in close for Sword Mode attacks.
|
A two-staged Morph Slash attack that follows an Axe: Wild Swing. 1st Stage: Morphs into Sword Mode. During this combo, the power of Sword Mode attacks increase and Axe Mode attacks fill the Switch Gauge faster.
|
Controls
|
Controls
|
| Switch Skills Set 4 (Silkbind) | |
Invincible Gambit |
Soaring Wyvern Blade |
| A technique using a Wirebug to surge forward and dish out three strikes. You will be impervious to knockdowns until the strikes are completed, making this attack useful in a slugfest or pinch. (Wirebug Gauge recovery speed: Medium)
|
Uses a Wirebug to fly up while slashing, ending with an Advancing Slash from midair. If the Advancing Slash is successful, the weapon's Amp Gauge fills up, a large explosion goes off where it connected. (Wirebug Gauge recovery speed: Medium)
|
Controls
|
Controls
|
Wire Step |
|
| A Wirebug-based evasion technique that allows you to morph into Axe Mode while flanking the enemy. Highly effective for maneuvering while in Axe Mode. (Wirebug Gauge recovery speed: Fast)
|
|
Controls
|
|
| Switch Skills Set 5 (Silkbind) | |
Switch Charger |
Elemental Burst Counter |
| A technique that uses a Wirebug to restore your Switch Gauge as you move. Once active, your Switch Gauge won't deplete for a while, so use this technique to gain the advantage at the start of the battle. (Wirebug Gauge recovery speed: Medium)
|
Compresses Switch Gauge energy, that can be released as an Elemental Burst. If the burst is released right as a monster attacks, you'll perform a Power Finisher and your switch axe will go into an Amped State. (Wirebug Gauge recovery speed: Fast)
|
Controls
|
Controls
|


Switch Axe Controls
Axe
 : Axe Overhear Slash
- Rapidly press
 : Axe Wild Swing
 - + : Axe Rising Slash
- W A S D + : Axe Forward Slash
 : Morph/Reload
- Switch Gauge: Once your Switch Gauge is filled to a certain point, you can morph your sword. If your gauge is low, you will reload instead. When the sword is not in use, the gauge fills gradually over time.
- Axe: Heavy Slam: Use Axe Wild Swing a certain number of times, then press to perform an Axe Heavy Slam. This combination will often prime you to reach its Maximum Potency.
Sword
- : Sword Overhead Slash
- : Sword Double Slash
- + : Element Discharge
- : Morph
- Phials: Attacks in sword mode will expend the Switch Gauge to add a phial's effects to your attacks.
- Amped State: Attacking with the sword enhances phials until they enter an Amped State, giving Axe Mode and Sword Mode extra hits.
Silkbind Controls
 + : Switch Charger
- + : Invincible Gambit
- Switch Charger: Uses a Wirebug to launch yourself forward while quickly generating your Switch Gauge. In addition, the Switch Gauge won't decrease for a short period of time.
- Invincible Gambit: A forward-moving spinning attack that fortifies the user, making them immune to flinching or being knocked back by even the fiercest of attacks.
Switch Axe Weapon Useful Combos
Axe Basic Combo
- W A S D + , , ,
- Axe: Forward Slash > Axe: Overhead Slash > Axe: Side Slash > Axe: Rising Slash
Axe: Combo into Sword Mode
- Rapidly press , , ,
- Axe: Wild Swing > Axe: Heavy Slam > Axe: Morph Rising Double Slash > Sword: Triple Slash
Sword: Combo during an Opening
- x3, x2, + , Rapidly press
- Slash Combo >Slash Combo > Element Discharge > Element Discharge Finisher
Switch Axe Silkbind Attacks
Elemental Burst Counter
Compresses Switch Gauge energy, that can be released as an Elemental Burst.
If the burst is released right as a monster attacks, you'll perform a Power Finisher and your switch axe will go into an Amped State.
Switch Charger
Uses a Wirebug to launch you forward while quickly regenerating your Switch Gauge. In addition, the Switch Gauge won't decrease for a short period of time.
While holding
Invincible Gambit
A forward-moving spinning attack. Fortifies the user, making them immune to flinching or being knocked back by even the fiercest of attacks.
While holding
Can be switched out with Soaring Wyvern Blade
Soaring Wyvern Blade
While holding
Can be switched out with Invincible Gambit
Switch Axe Switch Skills
Switch Skills in Monster Hunter Rise (MHR or MHRise) refer to swappable moves in a Weapon's moveset. Each of the 14 Weapon-types have 3 sets of 2 moves that can be switched out with each other, allowing for a diverse, customizable approach to combat. Switch Skills are unlocked by progressing in the game, with each set having a default move that is available from the beginning.
- Each Weapon-type has a set of swappable Silkbind Attacks and 2 sets of swappable standard moves in the base game.
- The first set of Switch Skills are unlocked by completing the Lv. 3⭐Urgent Village Quest Feathered Frenzy
- The second set of Switch Skills are unlocked by forging or upgrading 8 Weapons within a Weapon-type. Note that this needs to be done for every Weapon-type that you want to unlock Switch Skills for.
- The third set of Switch Skills are unlocked by completing the associated High Rank Hub Quest from Master Utsushi. These quests are unlocked by gaining access to the required Hub Quest rank.
- Lv. 4⭐ Study the Switch Axe for the Switch Axe.
- Once unlocked, Switch Skills can be swapped at any Item Box and Switch Skill combinations can be saved to Item Loadouts as well.
- The Sunbreak Expansion introduces the Switch Skill Swap mechanic, where hunters can preload 2 Switch Skill loadouts and swap between them freely during hunts. Hunters will also now have access to a total of 5 sets of swappable Switch Skills, including new Silkbind Attacks and regular moves.
- This expansion also introduces the Swap Evade, a special dodge maneuver that can be performed right after a Switch Skill Swap, allowing hunters to quickly evade and maintain distance while safely swapping skill sets.
- In the table below, the left column represents default moves available from the beginning, while the right represents unlockable Switch Skills.
| Switch Axe Switch Skills introduced with the Sunbreak Expansion | |
|---|---|
| Switch Skills Set 1 | |
Forward Slash |
Switch Skil Name |
| Thrusts the axe's blade forward while stepping. Doesn't do a lot of damage, but is versatile. |
Switch Skill Description |
Controls
|
Controls |
| Switch Skills Set 2 | |
Finishing Discharge |
Switch Skill Name |
| A finishing blow for the Element Discharge. Performs a thrust attack while fortifying elemental energy, ending with a massive explosion. If your Amp Gauge is full and the target is a large monster, the action becomes a Zero Sum Discharge Finisher. |
Switch Skill Description |
Controls
|
Controls |
| Switch Skills Set 3 | |
Axe: Wide Sweep |
2-Staged Morph Slash Combo |
| A technique that closes the distance to your target by using the centrifugal force of swinging with an Axe: Wild Swing. Useful for when the target is out of swinging range, or when you want to get in close for Sword Mode attacks.
|
A two-staged Morph Slash attack that follows an Axe: Wild Swing. 1st Stage: Morphs into Sword Mode. During this combo, the power of Sword Mode attacks increase and Axe Mode attacks fill the Switch Gauge faster.
|
Controls
|
Controls
|
| Switch Skills Set 4 (Silkbind) | |
Invincible Gambit |
Soaring Wyvern Blade |
| A technique using a Wirebug to surge forward and dish out three strikes. You will be impervious to knockdowns until the strikes are completed, making this attack useful in a slugfest or pinch. (Wirebug Gauge recovery speed: Medium)
|
Uses a Wirebug to fly up while slashing, ending with an Advancing Slash from midair. If the Advancing Slash is successful, the weapon's Amp Gauge fills up, a large explosion goes off where it connected. (Wirebug Gauge recovery speed: Medium)
|
Controls
|
Controls
|
Wire Step |
|
| A Wirebug-based evasion technique that allows you to morph into Axe Mode while flanking the enemy. Highly effective for maneuvering while in Axe Mode. (Wirebug Gauge recovery speed: Fast)
|
|
Controls
|
|
| Switch Skills Set 5 (Silkbind) | |
Switch Charger |
Elemental Burst Counter |
| A technique that uses a Wirebug to restore your Switch Gauge as you move. Once active, your Switch Gauge won't deplete for a while, so use this technique to gain the advantage at the start of the battle. (Wirebug Gauge recovery speed: Medium)
|
Compresses Switch Gauge energy, that can be released as an Elemental Burst. If the burst is released right as a monster attacks, you'll perform a Power Finisher and your switch axe will go into an Amped State. (Wirebug Gauge recovery speed: Fast)
|
Controls
|
Controls
|
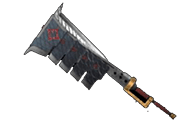
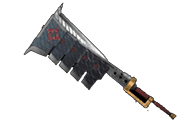
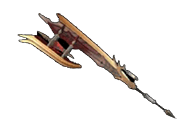
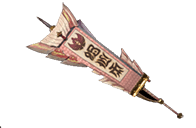
Switch Axes are a type of Weapon in Monster Hunter Rise (MHR or MHRise). This page shows a visual gallery of all different styles for Switch Axes. as well as a comparison table comparing the most imporant aspects such as Attack, Sharpness, Affinity, etc. Weapons are often upgraded based on previous decisions, with different paths leading to different looks and necessitating different materials. You can find detailed upgrade path information in the Switch Axe Weapon Tree or by clicking each individual weapon below.
For a comprehensive guide on how to use Switch Axes, please click the following link: Switch Axe
Switch Axes in Monster Hunter Rise
Quick Search of All Switch Axes
Name |
|
|
|
Phial |
|
Rare |
Rampage Skills |
Crafting |
|---|---|---|---|---|---|---|---|---|
| Defender Switch Axe I | 110 | None | 0% | Exhaust Phial | 30 | Rarity 1 |
|
|
| Champion Switch Axe | 150 | None | 0% | Exhaust Phial | 30 | Rarity 2 |
|
|
| Champion Switch Axe II | 190 | None | 0% | Exhaust Phial | 30 | Rarity 4 |
|
|
| Champion Switch Axe III | 210 | None | 0% | Exhaust Phial | 30 | Rarity 4 |
|
|
| Guardian Switch Axe | 230 | None | 0% | Exhaust Phial | 30 | Rarity 5 |
|
|
| Kamura Iron Axe I | 50 | None | 0% | Power Phial | 0 | Rarity 1 |
|
|
| Kamura Iron Axe II | 60 | None | 0% | Power Phial | 0 | Rarity 1 |
|
|
| Kamura Iron Axe III | 90 | None | 0% | Power Phial | 0 | Rarity 2 |
|
|
| Kamura Iron Axe IV | 140 | None | 0% | Power Phial | 0 | Rarity 3 |
|
|
| Kamura Iron Axe V |
150 | None | 0% | Power Phial | 0 | Rarity 4 |
|
|
| Kamura Ninja Axe |
190 | None | 0% | Power Phial | 0 | Rarity 5 |
|
|
| Kamura Warrior Battleaxe |
250 | None | 0% | Power Phial | 0 | Rarity 8 | None |
|
| Kamura Warrior Battleaxe + |
290 | None | 0% | Power Phial | 0 | Rarity 9 | None |
|
| Fine Kamura Battleaxe |
330 | None | 0% | Power Phial | 0 | Rarity 10 | None |
|
| Duke's Axe |
320 | 0% | Power Phial | 0 | Rarity 9 | None |
|
|
| Fracturing Falter |
330 | 0% | Power Phial | 0 | Rarity 10 | None |
|
|
| Silver Slasher |
320 | 0% | Element Phial | 0 | Rarity 10 | None |
|
|
| Fond Farewell I | 110 | 10% | Power Phial | 0 | Rarity 3 |
|
||
| Fond Farewell II |
170 | 10% | Power Phial | 0 | Rarity 5 |
|
||
| Parting Slice |
180 | 15% | Power Phial | 0 | Rarity 6 |
|
||
| Parting Slice + |
300 | 15% | Power Phial | 0 | Rarity 9 | None |
|
|
| Leave-Taker |
310 | 15% | Power Phial | 0 | Rarity 9 | None |
|
|
| Leave-Taker + |
320 | 15% | Power Phial | 0 | Rarity 10 | None |
|
|
| Pure Switch Axe Mikado |
320 | 10% | Power Phial | 0 | Rarity 10 | None |
|
|
| Rath Flamesplitter I | 120 | 0% | Power Phial | 0 | Rarity 3 |
|
||
| Rath Flamesplitter II | 140 | 0% | Power Phial | 0 | Rarity 3 |
|
||
| Rath Flamesplitter III |
190 | 0% | Power Phial | 0 | Rarity 5 |
|
||
| Rath Blaze Splitter |
210 | 0% | Power Phial | 0 | Rarity 6 |
|
||
| Rath Blaze Splitter + |
310 | 0% | Power Phial | 0 | Rarity 9 | None |
|
|
| High Rubillion |
330 | 0% | Power Phial | 0 | Rarity 10 | None |
|
|
| Rathsplicer |
310 | 35% | Element Phial | 0 | Rarity 10 | None |
|
|
| Wheel Axe I | 120 | None | 0% | Dragon Phial |
0 | Rarity 2 |
|
|
| Wheel Axe II |
180 | None | 0% | Dragon Phial |
0 | Rarity 5 |
|
|
| Axe of Wisdom |
200 | None | 0% | Dragon Phial |
0 | Rarity 6 |
|
|
| Axe of Righteousness |
260 | 0% | Dragon Phial | 0 | Rarity 8 | None |
|
|
| Axe of Righteousness + |
290 | 0% | Dragon Phial | 0 | Rarity 8 | None |
|
|
| Battleaxe of Kings |
330 | 0% | Dragon Phial | 0 | Rarity 10 | None |
|
|
| Axe of Glory |
260 | 0% | Element Phial | 0 | Rarity 8 | None |
|
|
| Axe of Glory + |
290 | 0% | Element Phial | 0 | Rarity 8 | None |
|
|
| Axe of Virtue |
340 | 0% | Element Phial | 0 | Rarity 10 | None |
|
|
| Delex Sail I | 100 | 0% | Power Phial | 0 | Rarity 2 |
|
||
| Delex Sail II | 150 | 0% | Power Phial | 0 | Rarity 3 |
|
||
| Delex Cleaver |
180 | 0% | Power Phial | 0 | Rarity 5 |
|
||
| Delex Cleaver + |
250 | 0% | Power Phial | 0 | Rarity 8 | None |
|
|
| Delex Hatchet |
350 | 0% | Power Phial | 0 | Rarity 10 | None |
|
|
| Khezu Axe I | 80 | 0% | Elemental Phial | 0 | Rarity 2 |
|
||
| Khezu Axe II | 100 | 0% | Elemental Phial | 0 | Rarity 2 |
|
||
| Khezu Cleaver |
140 | 0% | Elemental Phial | 0 | Rarity 4 |
|
||
| Khezu Cleaver + |
260 | 0% | Element Phial | 0 | Rarity 8 | None |
|
|
| Fullmark |
290 | 0% | Element Phial | 0 | Rarity 8 | None |
|
|
| Fullmark + |
330 | 0% | Element Phial | 0 | Rarity 10 | None |
|
|
| Arzuros Axe I | 110 | None | 0% | Poison Phial |
0 | Rarity 1 |
|
|
| Arzuros Axe II | 120 | None | 0% | Poison Phial |
0 | Rarity 2 |
|
|
| Arzuros Revelax |
180 | None | 0% | Poison Phial |
0 | Rarity 4 |
|
|
| Arzuros Revelax + |
250 | None | 0% | Poison Phial |
0 | Rarity 8 | None |
|
| Arzuros Jubilax |
340 | None | 0% | Poison Phial |
0 | Rarity 10 | None |
|
| Amber Slash I | 80 | 20% | Element Phial | 0 | Rarity 2 |
|
||
| Amber Slash II | 120 | 25% | Element Phial | 0 | Rarity 3 |
|
||
| Amber Slash III |
170 | 30% | Element Phial | 0 | Rarity 5 |
|
||
| Amber Hoarfrost |
190 | 30% | Element Phial | 0 | Rarity 6 |
|
||
| Amber Snapfrost |
260 | 30% | Element Phial | 0 | Rarity 8 | None |
|
|
| Amber Snapfrost + |
280 | 30% | Element Phial | 0 | Rarity 9 | None |
|
|
| Amber Permafrost |
310 | 30% | Element Phial | 0 | Rarity 10 | None |
|
|
| Proto Iron Axe I | 70 | None | 0% | Paralysis Phial |
0 | Rarity 1 |
|
|
| Proto Iron Axe II | 90 | None | 0% | Paralysis Phial |
0 | Rarity 1 |
|
|
| Improved Steel Axe | 110 | None | 0% | Paralysis Phial |
0 | Rarity 2 |
|
|
| Elite Switch Axe I | 150 | None | 0% | Paralysis Phial |
0 | Rarity 3 |
|
|
| Elite Switch Axe II |
160 | None | 0% | Paralysis Phial |
0 | Rarity 4 |
|
|
| Czar Switch Axe |
200 | None | 0% | Paralysis Phial |
0 | Rarity 5 |
|
|
| Czar Switch Axe II |
240 | None | 0% | Paralysis Phial |
0 | Rarity 8 | None |
|
| Czar Switch Axe III |
290 | None | 0% | Paralysis Phial |
0 | Rarity 8 | None |
|
| Valor Switch Axe |
330 | None | 0% | Paralysis Phial |
0 | Rarity 10 | None |
|
| Frostmoon Eclipser |
300 | 0% | Power Phial | 0 | Rarity 9 | None |
|
|
| Frostmoon Eclipser + |
310 | 0% | Power Phial | 0 | Rarity 9 | None |
|
|
| Purnima Icechopper |
330 | 0% | Power Phial | 0 | Rarity 10 | None |
|
|
| Limus Os I | 190 | -15% | Element Phial | 0 | Rarity 5 |
|
||
| Limus Os II | 210 | -15% | Element Phial | 0 | Rarity 5 |
|
||
| Luto Ascia | 230 | -15% | Element Phial | 0 | Rarity 6 |
|
||
| Luto Ascia + |
280 | -15% | Element Phial | 0 | Rarity 8 | None |
|
|
| Valtos Claw |
320 | -15% | Element Phial | 0 | Rarity 8 | None |
|
|
| Valtos Claw + |
350 | -15% | Element Phial | 0 | Rarity 10 | None |
|
|
| Dragonmaiden Axe I | 170 | 0% | Element Phial | 0 | Rarity 5 |
|
||
| Dragonmaiden Axe II | 190 | 0% | Element Phial | 0 | Rarity 5 |
|
||
| Grior's Landmaker | 210 | 0% | Elemental Phial | 0 | Rarity 6 |
|
||
| Grior's Landmaker + |
270 | 0% | Element Phial | 0 | Rarity 8 | None |
|
|
| Grior's Landforger |
310 | 0% | Element Phial | 0 | Rarity 9 | None |
|
|
| Grior's Landforger + |
340 | 0% | Element Phial | 0 | Rarity 10 | None |
|
|
| Golden Crescent |
330 | 0% | Element Phial | 0 | Rarity 10 | None |
|
|
| Rosenacanta |
300 | 20% | Element Phial | 0 | Rarity 9 | None |
|
|
| Rosenacanta + |
310 | 20% | Element Phial | 0 | Rarity 9 | None |
|
|
| Rosenprion |
320 | 20% | Element Phial | 0 | Rarity 10 | None |
|
|
| Kaktusprion |
310 | 15% | Element Phial | 0 | Rarity 10 | None | ||
| General's Strongaxe I |
150 | None | 0% | Exhaust Phial |
10 | Rarity 4 |
|
|
| General's Strongaxe II |
170 | None | 0% | Exhaust Phial |
10 | Rarity 5 |
|
|
| Conqueress |
210 | None | 0% | Exhaust Phial |
10 | Rarity 6 |
|
|
| Conqueress II |
260 | None | 0% | Exhaust Phial |
30 | Rarity 8 | None |
|
| Conqueress III |
300 | None | 0% | Exhaust Phial |
30 | Rarity 8 | None |
|
| Reconqueress |
340 | None | 0% | Exhaust Phial |
30 | Rarity 10 | None |
|
| The Shredder I | 120 | 0% | Power Phial | 10 | Rarity 3 |
|
||
| The Shredder II | 140 | 0% | Power Phial | 10 | Rarity 3 |
|
||
| The Power Shredder |
170 | 0% | Power Phial | 10 | Rarity 5 |
|
||
| The Power Shredder + |
250 | 0% | Power Phial | 30 | Rarity 8 | None |
|
|
| The Lightning Shredder |
300 | 0% | Power Phial | 30 | Rarity 8 | None |
|
|
| The Lightning Shredder + |
350 | 0% | Power Phial | 30 | Rarity 10 | None |
|
|
| High Raijard |
300 | 20% | Power Phial | 0 | Rarity 9 | None |
|
|
| High Raijard + |
310 | 20% | Power Phial | 0 | Rarity 9 | None |
|
|
| Voltaic Load |
320 | 20% | Power Phial | 0 | Rarity 10 | None |
|
|
| Ash Drache I |
150 | 5% | Power Phial | 5 | Rarity 4 |
|
||
| Ash Drache II |
170 | 5% | Power Phial | 5 | Rarity 5 |
|
||
| Fall Drache |
200 | 5% | Power Phial | 5 | Rarity 6 |
|
||
| Fall Drache + |
260 | 10% | Power Phial | 25 | Rarity 8 | None |
|
|
| Revived Drache |
310 | 10% | Power Phial | 25 | Rarity 9 | None |
|
|
| Revived Drache + |
340 | 10% | Power Phial | 25 | Rarity 10 | None |
|
|
| Almudron Axe I | 130 | 0% | Element Phial | 0 | Rarity 3 |
|
||
| Almudron Axe II |
140 | 0% | Element Phial | 0 | Rarity 4 |
|
||
| Doom Bringer Axe |
180 | 0% | Element Phial | 0 | Rarity 6 |
|
||
| Night Bringer Axe |
280 | 0% | Element Phial | 0 | Rarity 8 | None |
|
|
| Night Bringer Axe + |
300 | 0% | Element Phial | 0 | Rarity 9 | None |
|
|
| Void Bringer Axe |
320 | 0% | Element Phial | 0 | Rarity 10 | None |
|
|
| Magma Switch |
290 | 0% | Element Phial | 0 | Rarity 9 | None |
|
|
| Magma Switch + |
300 | 0% | Element Phial | 0 | Rarity 9 | None |
|
|
| Volcanic Switch |
320 | 0% | Element Phial | 0 | Rarity 10 | None |
|
|
| Axenosom I | 100 | 0% | Power Phial | 0 | Rarity 2 |
|
||
| Axenosom II | 110 | 0% | Power Phial | 0 | Rarity 2 |
|
||
| Axenosom III |
160 | 0% | Power Phial | 0 | Rarity 4 |
|
||
| Daybreak Silvaris |
170 | 0% | Power Phial | 0 | Rarity 5 |
|
||
| Lunadawn Sirja |
240 | 0% | Power Phial | 0 | Rarity 8 | None |
|
|
| Lunadawn Sirja + |
260 | 0% | Power Phial | 0 | Rarity 8 | None |
|
|
| Dawnbreak Simorgh |
340 | 0% | Power Phial | 0 | Rarity 10 | None |
|
|
| Assault Axe I | 120 | None | -20% | Paralysis Phial |
0 | Rarity 2 |
|
|
| Assault Axe II | 150 | None | -20% | Paralysis Phial |
0 | Rarity 3 |
|
|
| Blitzkrieg | 200 | None | -20% | Paralysis Phial |
0 | Rarity 5 |
|
|
| Battlebuster |
270 | None | -20% | Paralysis Phial |
0 | Rarity 8 | None |
|
| Battlebuster + |
280 | None | -20% | Paralysis Phial |
0 | Rarity 8 | None |
|
| Bastion Bliz |
350 | None | -20% | Paralysis Phial |
0 | Rarity 10 | None |
|
| Snowfall Axe I | 80 | 0% | Element Phial | 0 | Rarity 1 |
|
||
| Snowfall Axe II | 90 | 0% | Element Phial | 0 | Rarity 2 |
|
||
| Snowfall Axe III |
140 | 0% | Element Phial | 0 | Rarity 4 |
|
||
| Dewdrop Dream |
170 | 0% | Element Phial | 0 | Rarity 5 |
|
||
| Dewdrop Dream + |
240 | 0% | Element Phial | 0 | Rarity 8 | None |
|
|
| Spirit Perplaxer |
330 | 0% | Element Phial | 0 | Rarity 10 | None |
|
|
| Bone Axe I | 80 | None | 0% | Power Phial | 0 | Rarity 1 |
|
|
| Bone Axe II | 100 | None | 0% | Power Phial | 0 | Rarity 1 |
|
|
| Daidalos Axe | 110 | None | 0% | Power Phial | 0 | Rarity 2 |
|
|
| Power Gasher I | 140 | None | 0% | Power Phial | 0 | Rarity 3 |
|
|
| Power Gasher II | 180 | None | 0% | Power Phial | 0 | Rarity 4 |
|
|
| Maximal Gasher | 200 | None | 0% | Power Phial | 0 | Rarity 5 |
|
|
| Maximal Gasher + |
280 | None | 0% | Power Phial | 0 | Rarity 8 | None |
|
| Powerhouse Gasher |
320 | None | 0% | Power Phial | 0 | Rarity 8 | None |
|
| Powerhouse Gasher + |
350 | None | 0% | Power Phial | 0 | Rarity 10 | None |
|
| Aksa Switch |
310 | None | 10% | Dragon Phial |
0 | Rarity 9 | None |
|
| Aksa Switch + |
320 | None | 10% | Dragon Phial |
0 | Rarity 9 | None |
|
| Baran Defiance |
330 | None | 10% | Dragon Phial |
0 | Rarity 10 | None |
|
| Scissor Axe |
250 | 0% | Power Phial | 0 | Rarity 8 | None |
|
|
| Scissor Axe + |
290 | 0% | Power Phial | 0 | Rarity 8 | None |
|
|
| Megatalon Shears |
340 | 0% | Power Phial | 0 | Rarity 10 | None |
|
|
| Flammenbeil I |
210 | -20% | Element Phial | 0 | Rarity 5 |
|
||
| Flammenbeil II |
220 | -20% | Element Phial | 0 | Rarity 6 |
|
||
| Gnashing Flammenbeil |
230 | -20% | Element Phial | 0 | Rarity 7 |
|
||
| Gnashing Flammenbeil + |
280 | -20% | Element Phial | 0 | Rarity 8 | None |
|
|
| Lohenbeil |
330 | -20% | Element Phial | 0 | Rarity 9 | None |
|
|
| Lohenbeil + |
350 | -20% | Element Phial | 0 | Rarity 10 | None |
|
|
| Rex Slasher I | 160 | None | -20% | Exhaust Phial |
0 | Rarity 3 |
|
|
| Rex Slasher II | 210 | None | -20% | Exhaust Phial |
0 | Rarity 6 |
|
|
| Rex Gnasher | 220 | None | -20% | Exhaust Phial |
0 | Rarity 6 |
|
|
| Rex Gnasher + |
330 | None | -20% | Exhaust Phial |
0 | Rarity 9 | None |
|
| Rex Thrasher |
340 | None | -20% | Exhaust Phial |
0 | Rarity 9 | None |
|
| Rex Thrasher + |
350 | None | -20% | Exhaust Phial |
0 | Rarity 10 | None |
|
| Axe Semper Tyrannis I |
220 | None | -15% | Exhaust Phial |
15 | Rarity 6 |
|
|
| Axe Semper Tyrannis II |
230 | None | -15% | Exhaust Phial |
15 | Rarity 6 |
|
|
| Grand Chaos |
240 | None | -15% | Exhaust Phial |
15 | Rarity 7 |
|
|
| Grand Chaos + |
340 | None | -15% | Exhaust Phial |
30 | Rarity 9 | None |
|
| Axe of Gaia |
350 | None | -15% | Exhaust Phial |
30 | Rarity 9 | None |
|
| Axe of Gaia + |
360 | None | -15% | Exhaust Phial |
30 | Rarity 10 | None |
|
| Venom Hatchet I | 90 | 0% | Power Phial | 0 | Rarity 2 |
|
||
| Venom Hatchet II | 110 | 0% | Power Phial | 0 | Rarity 3 |
|
||
| Mortal Serpent |
140 | 0% | Power Phial | 0 | Rarity 4 |
|
||
| Mortal Serpent + |
310 | 0% | Power Phial | 0 | Rarity 9 | None |
|
|
| Thanatos Serpent |
340 | 0% | Power Phial | 0 | Rarity 10 | None |
|
|
| Hidden Axe I | 100 | None | 40% | Poison Phial |
0 | Rarity 3 |
|
|
| Hidden Axe II |
160 | None | 40% | Poison Phial |
0 | Rarity 5 |
|
|
| Night's Crescent |
180 | None | 40% | Poison Phial |
0 | Rarity 6 |
|
|
| Crescent Moon |
270 | None | 40% | Poison Phial |
0 | Rarity 8 | None |
|
| Crescent Moon + |
280 | None | 40% | Poison Phial |
0 | Rarity 9 | None |
|
| Avidya Axe |
300 | None | 40% | Poison Phial |
0 | Rarity 10 | None |
|
| Mizar's Asterism |
340 | 0% | Poison Phial | 0 | Rarity 10 | None |
|
|
| Binding Roller I | 110 | 0% | Element Phial | 0 | Rarity 2 |
|
||
| Binding Roller II | 130 | 0% | Element Phial | 0 | Rarity 3 |
|
||
| Binding Roller III | 180 | 0% | Element Phial | 0 | Rarity 5 |
|
||
| Vermilingua | 200 | 0% | Element Phial | 0 | Rarity 6 |
|
||
| Vermilingua + |
240 | 0% | Element Phial | 0 | Rarity 8 | None |
|
|
| Vermilion Bloodaxe |
260 | 0% | Element Phial | 0 | Rarity 8 | None |
|
|
| Vermilion Bloodaxe + |
320 | 0% | Element Phial | 0 | Rarity 10 | None |
|
|
| Ludroth Axe I | 90 | 0% | Element Phial | 0 | Rarity 2 |
|
||
| Ludroth Axe II | 100 | 0% | Element Phial | 0 | Rarity 2 |
|
||
| Splish Splax |
160 | 0% | Element Phial | 0 | Rarity 5 |
|
||
| Splish Splax + |
240 | 0% | Element Phial | 0 | Rarity 8 | None |
|
|
| Ludroth Drencher |
290 | 0% | Element Phial | 0 | Rarity 8 | None |
|
|
| Ludroth Drencher + |
330 | 0% | Element Phial | 0 | Rarity 10 | None |
|
|
| Golm Axe |
310 | None | 0% | Exhaust Phial |
0 | Rarity 8 | None |
|
| Golm Axe + |
330 | None | 0% | Exhaust Phial |
0 | Rarity 9 | None |
|
| Great Gorgon Battleaxe |
360 | None | 0% | Exhaust Phial |
0 | Rarity 10 | None |
|
| Usurper's Downpour I | 110 | 0% | Power Phial | 0 | Rarity 3 |
|
||
| Usurper's Downpour II | 180 | 0% | Power Phial | 0 | Rarity 4 |
|
||
| Despot's Cloudburst |
200 | 0% | Power Phial | 0 | Rarity 6 |
|
||
| Despot's Cloudburst + |
310 | 0% | Power Phial | 0 | Rarity 9 | None |
|
|
| Oppressor's Torrent |
330 | 0% | Power Phial | 0 | Rarity 10 | None |
|
|
| Longear Axe I | 90 | 0% | Element Phial | 0 | Rarity 1 |
|
||
| Longear Axe II | 130 | 0% | Element Phial | 0 | Rarity 3 |
|
||
| Longear Axe III |
160 | 0% | Element Phial | 0 | Rarity 4 |
|
||
| Longear Weiss |
180 | 0% | Element Phial | 0 | Rarity 5 |
|
||
| Longear Weiss + |
240 | 0% | Element Phial | 0 | Rarity 8 | None |
|
|
| Splitear Weiss |
300 | 0% | Element Phial | 0 | Rarity 10 | None |
|
|
| Sinister Axe I | 130 | 0% | Power Phial | 0 | Rarity 3 |
|
||
| Sinister Axe II | 140 | 0% | Power Phial | 0 | Rarity 3 |
|
||
| Sinister Shadowslice |
200 | 0% | Power Phial | 0 | Rarity 6 |
|
||
| Sinister Shadowslice + |
300 | 0% | Power Phial | 0 | Rarity 8 | None |
|
|
| Tormented Shadowslice |
330 | 0% | Power Phial | 0 | Rarity 9 | None |
|
|
| Vengeful Fellcleave |
340 | 0% | Power Phial | 0 | Rarity 10 | None |
|
|
| Eisenleib |
300 | 20% | Power Phial | 0 | Rarity 9 | None |
|
|
| Eisenleib + |
310 | 20% | Power Phial | 0 | Rarity 9 | None |
|
|
| Eisenherz |
320 | 20% | Power Phial | 0 | Rarity 10 | None |
|
|
| La Guillotine |
300 | 30% | Power Phial | 0 | Rarity 9 | None |
|
|
| La Conclusion |
310 | 30% | Power Phial | 0 | Rarity 10 | None |
|
|
| Undying Axe I | 180 | 10% | Element Phial | 0 | Rarity 5 |
|
||
| Undying Axe II |
210 | 15% | Element Phial | 0 | Rarity 6 |
|
||
| Undying Light |
220 | 15% | Element Phial | 0 | Rarity 7 |
|
||
| Undying Light + |
320 | 15% | Element Phial | 0 | Rarity 9 | None |
|
|
| Undying Purity |
330 | 15% | Element Phial | 0 | Rarity 10 | None |
|
|
| Demonlord Edge |
330 | 0% | Power Phial | 0 | Rarity 10 | None |
|
|
| Azure Elder Axe I | 180 | 0% | Power Phial | 0 | Rarity 5 |
|
||
| Azure Elder Axe II | 200 | 0% | Power Phial | 0 | Rarity 6 |
|
||
| Abyssal Gale Axe | 210 | 0% | Power Phial | 0 | Rarity 7 |
|
||
| Skyfall |
340 | 0% | Power Phial | 0 | Rarity 10 | None |
|
|
| Thunderbolt Axe I | 180 | 0% | Element Phial | 0 | Rarity 6 |
|
||
| Abyssal Storm Axe | 190 | 0% | Element Phial | 0 | Rarity 7 |
|
||
| Thunderclap |
310 | 0% | Element Phial | 0 | Rarity 10 | None |
|
|
| Rookslayer Axe I |
200 | -15% | Power Phial | 0 | Rarity 6 |
|
||
| Rookslayer Axe II |
210 | -15% | Power Phial | 0 | Rarity 6 |
|
||
| Bazelrush Rookslayer |
220 | -15% | Power Phial | 0 | Rarity 7 |
|
||
| Bazelava Rookslayer |
350 | -15% | Power Phial | 0 | Rarity 10 | None |
|
|
| Bazelheart |
360 | -15% | Power Phial | 0 | Rarity 10 | None |
|
|
| Daora's Farasa I |
180 | 0% | Power Phial | 0 | Rarity 6 |
|
||
| Daora's Janah |
190 | 0% | Power Phial | 0 | Rarity 7 |
|
||
| Daora's Janah + |
310 | 0% | Power Phial | 0 | Rarity 9 | None |
|
|
| Daora's Ajniha |
320 | 0% | Power Phial | 0 | Rarity 10 | None |
|
|
| Teostra's Arx I |
190 | 0% | Element Phial | 0 | Rarity 6 |
|
||
| Teostra's Castle |
210 | 0% | Element Phial | 0 | Rarity 7 |
|
||
| Teostra's Castle + |
320 | 0% | Element Phial | 0 | Rarity 9 | None |
|
|
| Teostra's Hellebarde |
330 | 0% | Element Phial | 0 | Rarity 10 | None |
|
|
| Waxglare Wand I |
180 | 0% | Power Phial | 0 | Rarity 6 |
|
||
| Balor's Mirage |
190 | 0% | Power Phial | 0 | Rarity 7 |
|
||
| Balor's Mirage + |
320 | 0% | Power Phial | 0 | Rarity 9 | None |
|
|
| Zariella's Phantasm |
330 | 0% | Power Phial | 0 | Rarity 10 | None |
|
|
| Redwing Switch Axe I |
160 | 0% | Element Phial | 0 | Rarity 6 |
|
||
| Reddnaught Dunat |
180 | 0% | Element Phial | 0 | Rarity 7 |
|
||
| Wing of Sanctity |
340 | 0% | Element Phial | 0 | Rarity 10 | None |
|
|
| Abyssal Torrent |
350 | -20% | Element Phial | 0 | Rarity 10 | None |
|
|
| Wicked Niddoq |
340 | 0% | Power Phial | 0 | Rarity 10 | None |
|
|
| Cloudburst Axe |
360 | -25% | Power Phial | 0 | Rarity 10 | None |
|
|
| Origami Axe I | 150 | None | 0% | Dragon Phial |
0 | Rarity 3 |
|
|
| Origami Axe II |
160 | None | 0% | Dragon Phial |
0 | Rarity 4 |
|
|
| Petal Cloud |
170 | None | 0% | Dragon Phial |
0 | Rarity 5 |
|
|
| Blossom Fall |
300 | None | 0% | Dragon Phial |
0 | Rarity 9 | None |
|
| Full Bloom Axe |
340 | None | 0% | Dragon Phial |
0 | Rarity 10 | None |
|
| Grim Cat I |
140 | 0% | Power Phial | 0 | Rarity 4 |
|
||
| Grim Cat II |
170 | 0% | Power Phial | 0 | Rarity 5 |
|
||
| Grimmige Katze |
180 | 0% | Power Phial | 0 | Rarity 6 |
|
||
| Grimmige Katze + |
250 | 0% | Power Phial | 0 | Rarity 8 | None |
|
|
| Felyne Fatality |
340 | 0% | Power Phial | 0 | Rarity 10 | None |
|
|
| Infernal Axe I | 100 | 0% | Element Phial | 0 | Rarity 2 |
|
||
| Infernal Axe II | 140 | 0% | Element Phial | 0 | Rarity 3 |
|
||
| Hellish Edge |
190 | 0% | Element Phial | 0 | Rarity 5 |
|
||
| Hellish Edge + |
260 | 0% | Element Phial | 0 | Rarity 8 | None |
|
|
| Calamitous Axe |
330 | 0% | Element Phial | 0 | Rarity 10 | None |
|
|
| Sleepy Shellslice I | 90 | 0% | Power Phial | 15 | Rarity 2 |
|
||
| Sleepy Shellslice II | 120 | 0% | Power Phial | 15 | Rarity 3 |
|
||
| Schale Batis |
170 | 0% | Power Phial | 20 | Rarity 5 |
|
||
| Schale Batis + |
260 | 0% | Power Phial | 20 | Rarity 8 | None |
|
|
| Dreamcrusher |
320 | 0% | Power Phial | 20 | Rarity 10 | None |
|
|
| Royal Order's Axe |
300 | None | 10% | Paralysis Phial |
50 | Rarity 9 | None |
|
| Royal Order's Axe + |
310 | None | 10% | Paralysis Phial |
50 | Rarity 10 | None |
|
| Antique Machina SA |
330 | None | 0% | Poison Phial |
0 | Rarity 10 | None |
|
| Rampage Slicer I | 150 | None | 0% | Power Phial | 0 | Rarity 4 |
|
|
| Rampage Slicer II | 170 | None | 0% | Power Phial | 0 | Rarity 5 |
|
|
| Rampage Slicer III | 180 | None | 0% | Power Phial | 0 | Rarity 5 |
|
|
| Rampage Slicer IV | 190 | None | 0% | Power Phial | 0 | Rarity 6 |
|
|
| Rampage Slicer V | 200 | None | 0% | Power Phial | 0 | Rarity 6 |
|
|
| Rampage Slicer S | 210 | None | 0% | Power Phial | 0 | Rarity 7 |
|
|
Switch Axe Gallery
Switch Axe Defender Weapons


Switch Axe Kamura Weapons


Master Rank Switch Axe Kamura Weapons


Switch Axe Ore Weapons


Master Rank Switch Axe Ore Weapons


Switch Axe Bone Weapons


Master Rank Switch Axe Bone Weapons


Switch Axe Independent Weapons


Master Rank Switch Axe Independent Weapons


Switch Axe Weapon Tree for Monster Hunter Rise (MHR or MHRise) features the different upgrade paths for the Switch Axe weapon. In Monster Hunter Rise, there are 14 categories of weapons that players can choose from to use for hunting Monsters. The Switch Axe switches between Axe Mode, for fluid mobility and hefty single hits, and Sword Mode, for quicker strikes. Phial effects activated by the sword persist in axe form. This page lists all of the Switch Axes in Monster Hunter Rise, showing their effectiveness and upgrade paths.
Switch Axe Weapon Traits
- Axe mode has good reach and mobility.
- A complex weapon with two forms and a phial system.
- Sword mode has extra damage and uses the phial's bonus.
- The switch axe morphs between axe and sword modes. Axe mode boasts power and long reach, while sword mode features faster attacks and explosive finishers.
Master Rank Switch Axe Weapons
Introduced with the release of the Sunbreak Expansion, Master Rank Weapons are a brand new and more powerful tier of Weaapons available to hunters to help them deal with the deadlier Monsters that can be found on the Sunbreak Expansion.
Note that these Weapons can only be accessed by players that have purchased and installed the Sunbreak Expansion. For those who own the expansionless version of Monster Hunter, these Weapons are unobtainable.
- You can check out the Switch Axe Weapon Tree to find the different upgrade paths for each Master Rank Switch Axe weapon.
Switch Axe Weapon Features
Weapon Advantages
- A versatile weapon that can switch between a sword or axe mode.
- Phials are used to boost the performance and capability of the weapon.
- The Switch Axe is mainly a DPS weapon that's in favour of attacks rather than defence.
- Very effective at dishing out elemental and status damage.
Weapon Disadvantages
- Does not have any defensive moves or attacks.
- Some attacks cause the wielder to become stationary, allowing yourself to be open to a monster's attacks.
- Requires smart positioning in order to avoid being caught while also still being able to deal damage.
Important: For a comprehensive guide on how to use Switch Axes, please click the following link: Switch Axe
MH Rise Switch Axe Weapon Tree
Switch Axe Defender Tree
 Defender Switch Axe I
 110
110  30
30
 Champion Switch Axe150 30
 Champion Switch Axe II190 30
- Champion Switch Axe III210 30
 Guardian Switch Axe230 30
Switch Axe Kamura Tree
- Kamura Iron Axe I
50 Pwr
- Kamura Iron Axe II
60 Pwr
- Kamura Iron Axe III
90 Pwr
 Kamura Iron Axe IV
140 Pwr
- Kamura Iron Axe V
150 Pwr 
- Kamura Ninja Axe
190 Pwr 
 Kamura Warrior Battleaxe 250 Pwr

- Kamura Warrior Battleaxe + 290 Pwr
 Fine Kamura Battleaxe 330 Pwr
 Duke's Axe 320 Pwr
 27
27
- Fracturing Falter 330 Pwr 31
- Fond Farewell I
110 Pwr  19
19
- Fond Farewell II
170 Pwr 24
 Parting Slice
190 Pwr 29
- Parting Slice + 300
 15% Pwr 40
- Leave-Taker 310 15% Pwr 41
- Leave-Taker + 320 15% Pwr 43
- Pure Switch Axe Mikado 320 10% Pwr
 22
22
- Rath Flamesplitter I
120 Pwr 19
- Rath Flamesplitter II
140 Pwr 22
- Rath Flamesplitter III
190 Pwr 25
- Rath Blaze Splitter210 Pwr 30
- Rath Blaze Splitter + 310 Pwr
 42
42
- High Rubillion 330 Pwr 47
- Rathsplicer 310 Elem 62
- Wheel Axe I
120 Drg 20
- Wheel Axe II
180 Drg  23
23
- Axe of Wisdom
200 Drg 25
- Axe of Righteousness 260 Drg 32
- Axe of Righteousness + 290 Drg 34
- Battleaxe of Kings 330 Drg 37
- Axe of Glory 260 Elem
 32
32
- Axe of Glory + 290 Elem 33
- Axe of Virtue 340 Elem 38
- Delex Sail I
120 Pwr 11
- Delex Sail II
150 Pwr 13
- Delex Cleaver
180 Pwr 15
- Delex Cleaver + 250 Pwr 23
- Delex Hatchet 350 Pwr 25
- Khezu Axe I
80 Elem  23
23
- Khezu Axe II
100 Elem 26
- Khezu Cleaver
140 Elem 32
- Khezu Cleaver + 260 Elem 46
- Fullmark 290 Elem 48
- Fullmark + 330 Elem 46
- Arzuros Axe I
110 Poison  23
23
- Arzuros Axe II
120 Poison 26
- Arzuros Revelax
180 Poison 29
- Arzuros Revelax + 250 Poison 31
- Arzuros Jubilax 340 Poison 34
- Amber Slash I80 Elem
 19
19
- Amber Slash II
120 Elem 23
- Amber Slash III
170 Elem 26
- Amber Hoarfrost
190 Elem 29
- Amber Snapfrost 260 30% Elem 39
- Amber Snapfrost + 280 30% Elem 40
- Amber Permafrost 310 30% Elem 41
Switch Axe Ore Tree
- Proto Iron Axe I
70 Paralysis  10
10
- Proto Iron Axe II
90 Paralysis 12
- Improved Steel Axe
110 Paralysis 14
- Elite Switch Axe I
150 Paralysis 17
- Elite Switch Axe II
160 Paralysis 17
- Czar Switch Axe
200 Paralysis 22
- Czar Switch Axe II 240 Paralysis 23
- Czar Switch Axe III 290 Paralysis 24
- Valor Switch Axe 330 Paralysis 25
- Frostmoon Eclipser 300 Pwr
 32
32
- Frostmoon Eclipser + 310 Pwr 34
- Purnima Icechopper 330 Pwr 36
- Limus Os I
190 Elem 17
- Limus Os II
210 Elem 21
- Luto Ascia
230 Elem 25
- Luto Ascia + 280 -15% Elem 27
- Valtos Claw 320 -15% Elem 29
- Valtos Claw + 350 -15% Elem 31
- Dragonmaiden Axe I
170 Elem 19
- Dragonmaiden Axe II
190 Elem 22
- Grior's Landmaker
210 Elem 25
- Grior's Landmaker + 270 Elem 31
- Grior's Landforger 310 Elem 37
- Grior's Landforger + 340 Elem 45
- Golden Crescent 330 Elem 32
- Rosenacanta 300 20% Elemental 25
- Rosenacanta + 310 20% Elemental 30
- Rosenprion 320 20% Elemental 35
- Kaktusprion 310 15% Elemental 49
- General's Strongaxe I
150 Exhaust  25
25
- General's Strongaxe II
170 Exhaust 28
- Conqueress
210 Exhaust 30
- Conqueress II 260 Exhaust 32
- Conqueress III 300 Exhaust 34
- Reconqueress 340 Exhaust 36
- The Shredder I
120 Pwr 15
- The Shredder II
140 Pwr 18
- The Power Shredder
170 Pwr 21
- The Power Shredder + 250 30 Pwr 30
- The Lightning Shredder 300 30 Pwr 32
- The Lightning Shredder + 350 30 Pwr 34
- High Raijard 300 20% Pwr 23
- High Raijard + 310 20% Pwr 25
- Voltaic Load 320 20% Pwr 28
- Ash Drache I
150 Pwr 19
- Ash Drache II
170 Pwr 21
- Fall Drache
200 Pwr 22
- Fall Drache + 260 10% 25 Pwr 32
- Revived Drache 310 10% 25 Pwr 35
- Revived Drache + 340 10% 25 Pwr 38
- Almudron Axe I
130 Elem 31
- Almudron Axe II
140 Elem 36
- Doom Bringer Axe
180 Elem 42
- Night Bringer Axe 280 Elem 64
- Night Bringer Axe + 300 Elem 70
- Void Bringer Axe 320 Elem 74
- Magma Switch 290 Elem 69
- Magma Switch + 300 Elem 73
- Volcanic Switch 320 Elem 78
- Axenosom I100 Pwr 13
- Axenosom II
110 Pwr 18
- Axenosom III
160 Pwr 21
- Daybreak Silvaris
170 Pwr 26
- Lunadawn Sirja 240 Pwr 43
- Lunadawn Sirja + 260 Pwr 48
- Dawnbreak Simorgh340 Pwr 55
- Assault Axe I120 Paralysis 9
- Assault Axe II
150 Paralysis 11
- Blitzkrieg
200 Paralysis 15
- Battlebuster 270 -20% Paralysis 16
- Battlebuster + 280 -20% Paralysis 17
- Bastion Bliz 350 -15% Paralysis 18
- Snowfall Axe I80 Elem
 13
13
- Snowfall Axe II
90 Elem 16
- Snowfall Axe III
140 Elem 20
- Dewdrop Dream
170 Elem 22
- Dewdrop Dream + 240 Elem 25
- Spirit Perplaxer 330 Elem 29
Switch Axe Bone Tree
- Bone Axe I
80 Pwr
- Bone Axe II
100 Pwr
- Daidalos Axe
110 Pwr
- Power Gasher I
140 Pwr
- Power Gasher II
180 Pwr
- Maximal Gasher
200 Pwr
- Maximal Gasher + 280 Pwr
- Powerhouse Gasher 320 Pwr
- Powerhouse Gasher + 350 Pwr
- Aksa Switch 310 10% Drg 19
- Aksa Switch + 320 10% Drg 20
- Baran Defiance 330 10% Drg 21
- Scissor Axe 250 Pwr 3025
- Scissor Axe + 290 Pwr 3029
- Megatalon Shears 340 Pwr 3036
- Flammenbeil I
210 Elem 14
- Flammenbeil II
220 Elem 17
- Gnashing Flammenbeil230 Elem 20
- Gnashing Flammenbeil + 280 -20% Elem 23
- Lohenbeil 330 -20% Elem 26
- Lohenbeil + 350 -20% Elem 29
- Rex Slasher I
160 Exhaust 17
- Rex Slasher II
210 Exhaust 20
- Rex Gnasher220 Exhaust 24
- Rex Gnasher + 330 Exhaust 26
- Rex Thrasher 340 Exhaust 28
- Rex Thrasher + 350 Exhaust 30
- Axe Semper Tyrannis I
220 Exhaust 12
- Axe Semper Tyrannis II
230 Exhaust 14
 Grand Chaos240 Exhaust 16
- Grand Chaos + 340 -15% Exhaust 18 30
- Axe of Gaia 350 -15% Exhaust 20 30
- Axe of Gaia + 360 -15% Exhaust 22 30
- Venom Hatchet I90 Pwr 27
- Venom Hatchet II
110 Pwr 34
- Mortal Serpent
140 Pwr 40
- Mortal Serpent + 310 Pwr 50
- Thanatos Serpent 340 Pwr 60
- Hidden Axe I
100 Poison 12
- Hidden Axe II
160 Poison 15
- Night's Crescent
180 Poison 17
- Crescent Moon 270 40% Poison 18
- Crescent Moon + 280 40% Poison 19
- Avidya Axe 300 40% Poison 20
- Mizar's Asterism 340 Power 18
- Binding Roller I110 Elem 10
- Binding Roller II
130 Elem 11
- Binding Roller III
180 Elem 13
- Vermilingua
200 Elem 16
- Vermilingua + 240 Elem 18
- Vermilion Bloodaxe 260 Elem 20
- Vermilion Bloodaxe + 330 Elem 22
- Ludroth Axe I90 Elem 18
- Ludroth Axe II
100 Elem 26
- Splish Splax
160 Elem 33
- Splish Splax + 240 Elem 47
- Ludroth Drencher 290 Elem 50
- Ludroth Drencher + 330 Elem 57
- Golm Axe 310 Exhaust 29
- Golm Axe + 330 Exhaust 33
- Great Gorgon Battleaxe 360 Exhaust 36
- Usurper's Downpour I110 Pwr 25
- Usurper's Downpour II
180 Pwr 28
- Despot's Cloudburst
200 Pwr 28
- Despot's Cloudburst + 310 Pwr 44
- Oppressor's Torrent 330 Pwr 45
- Longear Axe I90 Elem 12
- Longear Axe II130 Elem 15
- Longear Axe III
160 Elem 17
- Longear Weiss
180 Elem 20
- Longear Weiss + 240 Elem 37
- Splitear Weiss 330 Elem 54
Switch Axe Independent Tree
- Silver Slasher320 0% Elem 49
- Sinister Axe I
130 Pwr  17
17
- Sinister Axe II
140 Pwr 20
- Sinister Shadowslice
200 Pwr 23
- Sinister Shadowslice + 300 Pwr 25
- Tormented Shadowslice 330 Pwr 26
- Vengeful Fellcleave 340 Pwr 27
- Eisenleib 300 20% Pwr 20
- Eisenleib + 310 20% Pwr 24
- Eisenherz 320 20% Pwr 28
- La Guillotine 300 30% Pwr 42
- La Conclusion 310 30% Pwr 55
- FreveI Sursis 340 -30% / 15% Pwr 44
- Undying Axe I180 Elem 16
- Undying Axe II210 Elem 16
- Undying Light220 Elem 22
- Undying Light + 320 15% Elem 30
- Undying Purity 330 15% Elem 31
- Demonlord Edge 330 Elem 22
- Azure Elder Axe I180 Pwr 9
- Azure Elder Axe II200 Pwr 11
- Abyssal Gale Axe210 Pwr 14
- Skyfall 340 Pwr 21
- Thunderbolt Axe I180 Elem 35
- Abyssal Storm Axe190 Elem 43
- Thunderclap 310 Elem 74
- Rookslayer Axe I170 Pwr 13
- Rookslayer Axe II210 Pwr 15
- Bazelrush Rookslayer220 Pwr 17
- Bazelava Rookslayer350 -15% Pwr 20
- Bazelheart360 -15% Pwr 23
- Daora's Farasa I180 Pwr 39
- Daora's Janah190 Pwr 41
- Daora's Janah + 310 Pwr 50
- Daora's Ajniha 320 Pwr 58
- Teostra's Arx I190 Elem31
- Teostra's Castle210 Elem 36
- Teostra's Castle + 320 Elem 45
- Teostra's Hellebarde 330 Elem 52
- Waxglare Wand I180 Pwr 24
- Balor's Mirage190 Pwr 28
- Balor's Mirage + 320 Pwr 34
- Zariella's Phantasm 330 Pwr 40
- Redwing Switch Axe I160 Elem32
- Reddnaught Dunat180 Elem 37
- Wing of Sanctity 340 Elem 51
- Abyssal Torrent 350 -20% Elem 15
- Wicked Niddoq340 Power 29
- Cloudburst Axe360 Power
 47
47 - Origami Axe I150 Dragon 13
- Origami Axe II160 Dragon 15
- Petal Cloud170 Dragon17
- Blossom Fall 300 Dragon24
- Full Bloom Axe 340 Dragon28
- Grim Cat I140 Pwr 23
- Grim Cat II170 Pwr 25
- Grimmige Katze180 Pwr 27
- Grimmige Katze + 250 Pwr 28
- Felyne Fatality 340 Pwr 30
- Infernal Axe I100 Elem 18
- Infernal Axe II140 Elem 20
- Hellish Edge190 Elem 24
- Hellish Edge + 260 Elem 39
- Calamitous Axe 330 Elem 60
- Sleepy Shellslice I90 Pwr 14
- Sleepy Shellslice II120 Pwr 19
- Schale Batis170 Pwr 23
- Schale Batis + 260 Pwr 2024
- Dreamcrusher 320 Pwr 2025
- Royal Order's Axe 300 10% Para 50 12
- Royal Order's Axe + 310 10% Para 50 15
- Antique Machina SA 330 Poison 13
- Rampage Slicer I150 Pwr
- Rampage Slicer II170 Pwr
- Rampage Slicer III180 Pwr
- Rampage Slicer IV190 Pwr
- Rampage Slicer V200 Pwr
- Rampage Slicer S210 Pwr
| MHR Weapon Types |
Bow ♦ Charge Blade ♦ Dual Blades ♦ Great Sword ♦ Gunlance ♦ Hammer ♦ Heavy Bowgun ♦ Hunting Horn ♦ Insect Glaive ♦ Lance ♦ Light Bowgun ♦ Long Sword ♦ Sword & Shield |
 Anonymous
- Anonymous
Reminder: If you hate fextralife shoving their twitch auto-player onto every webpage (And thus forcing you to be part of their viewer count without your consent); You can use Ublock Origin to remove it without crappylife behing able to extort you to 'BeCoMe a ViP!' to get rid of it!
Feel free to do this in order to stop giving bloated viewer counts to streamers too lazy to 100% ANY wiki they make!
Make sure they cannot make money off of you!
- Anonymous
please make the buttons display in playstation or xbox i cant read this
- Anonymous
how to morph using a mouse that dosent have any extra buttons?
- Anonymous
- Anonymous
Just some tips for new or aspiring SA users:
-Be aggressive with sword mode. Reaching your amped state is key to maximizing damage output for both modes, plus the sword doesn't recoil on hard monster parts. Keep in mind that the phial's effect will only benefit the axe form when amped. Pulling off a heavy slam will let you build up amp faster for a bit, just be careful when committing to that long attack (the last slam attack doesn't have to connect to prime the blade.)
-Keep your charge up (the sword form's ammo). A poorly timed manual reload makes you vulnerable. Switch Charger is ideal for keeping the sword ready for use and helps with repositioning. The blade recharges gradually in axe mode as well.
-Stay mobile. SA is no SnS or DB, but morph slashes can help you close short distances and can be performed after most any attack. Fading slash can help you get a short distance away from monsters while getting some damage in (performed with a backwards input + mouse button 2 for axe form, backwards input + mouse button 5 for sword form.) Be aware of hard monster parts, though, as the sword fading slash switches you to axe form, which may bounce off if you're sharpness is low.
-Use Elemental Discharge carefully. A fully channeled attack does good damage, but leaves you vulnerable. Ideal for when the monster is toppled or staggered. Zero Sum Discharge (Elemental Discharge in amped state) does even more damage and stunning power while latching you onto the monster, but leaves you vulnerable to attacks made by the beast, especially from the part you are attached to. This can be lethal on some parts, especially the head of monsters with breath attacks, as the hit won't knock you off and leaves you open to other attacks. If it looks like it'll get dicey, press back on the controller while mashing the attack to detonate early. Also note that you can interrupt the recovery animation from a full ZSD with a dodge once you stop sliding on the ground. An early detonation has a much shorter recovery time as well.
-Work the axe's reach. You can easily alternate between a rising and overhead attack, which can help reach high tails, wings, and heads. Fading slash in axe form also has nice overhead range.
-Have fun!
- Anonymous
One thing I don't understand is how do you activate that ride monster elemental discharge thingy? Do you have to be moving a specific direction? do you have to not be moving a direction? do you have to be amped? do you have to press "A"?
- Anonymous
What is the effect "Maximum Potency" after a Heavy Slam using axe mode ?
I'm not sure but does it make easier to reach the "Amped State" in sword mode ?
- Anonymous
What skills apply to switchaxe? For example does bombardier increase elemental discarge damage?
rise really buffed SA. Overhead slam, the spinning morph to sword combo, all of those moves that required 3 wild swing strikes during monster hunter world, they work now only need 1. Wild swing always had trash dps, it still does, with sword combos doing like 50% more dps. Its so good to have only 1 wild swing in your way. I feel like they nerfed the axe to sword combo in terms of power, but thats ok. So many other buffs came in.
They also gave the morphing combo, hyper armor unless the attack is too big. You can poise through a casual claw or bite by morphing, it works if axe to sword or sword to axe. It brings a new level to switch axe, poise vs mobility. Theres also that new invincible gambit skill, even heavy moves that send you flying can be poised through... its too good. I wonder if they increased the iframes of side step? Its dodging more now I feel, even w no skills to buff its iframes. Im not sure about the last one.
more tips for newer users: Sword mode doesnt bounce to hard monster body parts. Swordmode also does massive dps because of the attack speed, easily trumps axe. But you still need axe because sword mode doesnt last forever, and its overhead slam buff helps maximize swordmode. Plus switching back to poise through attacks is good. Sword mode seems stiff/hard to move, but thats because its supposed to dps a certain area and wreck it. You can side step-roll then cut to move around, or switch to axe mobility if thats still too stiff, then go back to sword for the dps.
2
+12
-1