Hunting Horn |
|
|---|---|
| Weapon Type | Melee |
| Damage Type | Blunt Damage |
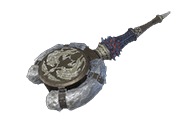
Hunting Horn (狩猟笛 shyuryou fue, "hunting animal flute") is one of the fourteen weapon categories in Monster Hunter Rise (MHR or MHRise). Like all Weapons, it features a unique set of moves and an upgrade path that branches out depending on the materials used.
A blunt weapon that allows you to buff your hunting party by performing melodies. Gather notes of a single color for a steady boost or combine 3 to gain all effects.
Hunting Horn Weapon Tree
- You can check out our Hunting Horn Weapon Tree to find the different upgrade paths for the Hunting Horn weapon category.
- Click here for a Comparative List of Hunting Horns.
- Click here to see MH Rise Hunting Horn Builds. These builds were created around the weapon types, each with a specific set of handpicked Weapons, Equipment and complementing Skills and Decorations. These builds with Specific Hunting Horns may be paired with a set of Armor to optimize the combination in order to create a Build type focused on the Skills available with the selected equipment.
- Master Rank Hunting Horns are the top tier Hunting Horns available in Monster Hunter Rise, and as all Master Rank Weapons, can only be obtained by owning the Sunbreak Expansion. These weapons use Master Rank Materials that can be obtained by completing quests and doing endgame content. Click here to see all Master Rank Hunting Horns.
Best Hunting Horn of MH Rise
Hunting Horn Weapon Traits
- Wide varity of team buffs.
- Blunt weapon that allows for repeated stunning.
- Attacks make notes which can be weaved into melodies.
Hunting Horn Weapon Features
Weapon Advantages
- Self improvement is one of the only ability in the game to have a weapon completely ignore bouncing back regardless of the hardness of monster parts.
- Can buff yourself and your allies while doing damage.
- High reaching
- Great KO and exhaust potential
- Sonic waves attacks deal the same damage regardless of the hardness of the part hit.
- Magnificent Trio, a new ability added in Rise has the ability to play all of the songs at once with playing a minimum of only 3 notes.
Weapon Disadvantages
- The Hunting Horn still has a limited set of basic moves/attacks.
- Slow and can get you locked into long animations.
- Cannot block
Monster Hunter Rise Hunting Horn Notes & Trivia
What does Sonic Wave do in MHR?
- Sonic Wave is a Hunting Horn song in Monster Hunter Rise. The song works like Sonic Bombs in that they knock Small Monsters like Remobra out of the sky and force certain burrowing Large Monsters like Diablos to surface, staggering them for a brief period of time. Sonic Wave and Sonic Bombs also have a special interaction with Lagombi, stunning it for a brief period after use despite it not being a burrowing monster.
Other Notes
- Other Notes & Trivia for Hunting Horns go here.
Hunting Horn Controls
 : Left Swing
 : Right Swing
 +
+  : Backwards Strike
 : Perform
 +
+  : Magnificent Trio
- Perform: Increases your own power by performing melodies.
- Activate Melody via Attack: Attack and line up 2 of the same note in a row on the Music Staff to cover you and nearby allies with a melody effect.
- Magnificent Trio: Attack and line up 3 different notes on the Music Staff to store a melody. Unleash a Magnificent Trio to trigger all melody effects.
- Infernal Melody: Fill the gauge next to the Music Staff by landing attacks and you can activate a special melody. Press
 after a Magnificent Trio or a Slide Beat to do so.
Silkbind Controls
 +
+  : Slide Beat
 +
+  : Earthshaker
- Slide Beat: Uses a Wirebug to propel you forward into a spinning attack. Grants self-improvement and attack-power boosts by way of melody effects.
- Earthshaker: Flings forth a blade, connects it to your weapon with Ironsilk, and transmits booming sonic attacks. (Wirebug Gauge Cost: 2)
Hunting Horn Weapon Combos & Melody Effects
Combos
Stationary Combo
 ,
,  ,
,  ,
,  +
+
- Right Swing > Left Swing > Right Swing > Side Roll (Left/Right)
Forward-moving Combo
 +
+ ,
,  +
+ ,
,  ,
,  +
+
- Forward Smash > Double Swing > Crush > Overhead Smash
Magnificent Trio Combo
 ,
,  ,
,  +
+ ,
,  +
+
- Right Swing > Left Swing > Overhead Smash > Magnificent Trio
Melody Effects
 Self Improvement: Temporarily boosts movement speed and prevents your attacks from being deflected.
 Attack Up: Temporarily boosts attack by 10% (of base attack?).
 Defense Up: Temporarily boosts defense by ?.
- Health Recovery (S): Restores 10 health.
- Health Recovery (S) + Antidote: Restores 10 health and heals poison.
- Health Recovery (L): Restores 20 health.
- Infernal melody: Boosts attack by 20% for the whole team for a small period of time.
Hunting Horn Silkbind Attacks
Silkbind Shockwave
A Silkbind attack that wraps your weapon in Ironsilk.
For a short period of time, any attack performed causes the silk to vibrate, creating a time-delayed shockwave that triggers additional hits.
These additional hits do major stun, exhaust, and part damage.
Earthshaker
An attack that drives an Ironsilk-bound blade into the target like a stake. The vibrations of the weapon's sonic blast explode inside the target.
Press
Can be switched out with Bead of Resonance
Bead of Resonance
Press
Can be switched out with Earthshaker
Hunting Horn Switch Skills
Switch Skills in Monster Hunter Rise (MHR or MHRise) refer to swappable moves in a Weapon's moveset. Each of the 14 Weapon-types have 3 sets of 2 moves that can be switched out with each other, allowing for a diverse, customizable approach to combat. Switch Skills are unlocked by progressing in the game, with each set having a default move that is available from the beginning.
- Each Weapon-type has a set of swappable Silkbind Attacks and 2 sets of swappable standard moves in the base game.
- The first set of Switch Skills are unlocked by completing the Lv. 3⭐Urgent Village Quest Feathered Frenzy
- The second set of Switch Skills are unlocked by forging or upgrading 8 Weapons within a Weapon-type. Note that this needs to be done for every Weapon-type that you want to unlock Switch Skills for.
- The third set of Switch Skills are unlocked by completing the associated High Rank Hub Quest from Master Utsushi. These quests are unlocked by gaining access to the required Hub Quest rank.
- Lv. 4⭐ Honing Your Hunting Horn for the Hunting Horn.
- Once unlocked, Switch Skills can be swapped at any Item Box and Switch Skill combinations can be saved to Item Loadouts as well.
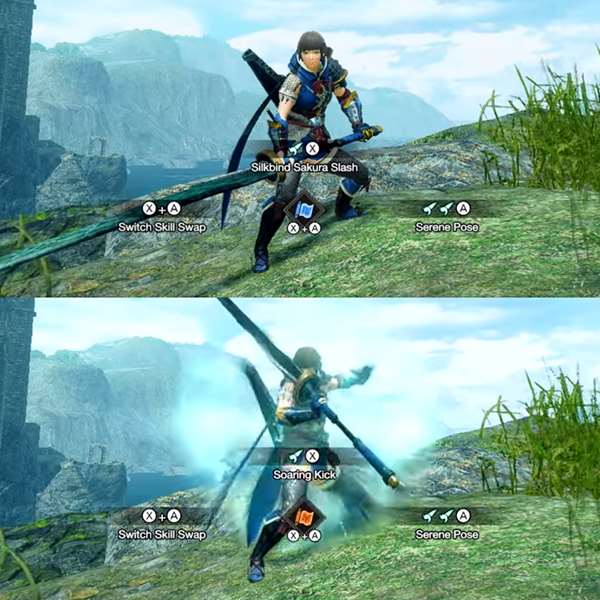
- The Sunbreak Expansion introduces the Switch Skill Swap mechanic, where hunters can preload 2 Switch Skill loadouts and swap between them freely during hunts. Hunters will also now have access to a total of 5 sets of swappable Switch Skills, including new Silkbind Attacks and regular moves.
- This expansion also introduces the Swap Evade, a special dodge maneuver that can be performed right after a Switch Skill Swap, allowing hunters to quickly evade and maintain distance while safely swapping skill sets.
- In the table below, the left column represents default moves available from the beginning, while the right represents unlockable Switch Skills.
Switch Skill Swap Mechanic
The Switch Skill Swap mechanic allows the hunter to assign Switch Skill loadouts and swap between them on the fly, whether in combat or otherwise. This allows the hunter to further expand their arsenal of available moves during hunts and to further customize their builds to accommodate their playstyle. Being able to make split-second decisions to swap loadouts and use specific moves to counter monster attacks as they wind up is sure to add an exciting new dimension to monster hunting.
With the Switch Skill Swap mechanic, hunters are given two loadouts to switch between, denoted by the ![]() Red Scroll and
Red Scroll and ![]() Blue Scroll icons on the UI. Hunters can set up each loadout from the Item Box at Kamura Village, Elgado Outpost or even at Camps while out on hunts, just as they would when assigning Switch Skills individually. When out on hunts, hunters can swap between the two loadouts by holding
Blue Scroll icons on the UI. Hunters can set up each loadout from the Item Box at Kamura Village, Elgado Outpost or even at Camps while out on hunts, just as they would when assigning Switch Skills individually. When out on hunts, hunters can swap between the two loadouts by holding ![]() and pressing the
and pressing the ![]() +
+ ![]() buttons. The character will perform a quick animation and briefly flash with energy, signifying a successful swap.
buttons. The character will perform a quick animation and briefly flash with energy, signifying a successful swap.
| NEW! Hunting Horn Switch Skills introduced with the Sunbreak Expansion | |
|---|---|
| Switch Skills Set 1 | |
Overhead Smash |
Switch Skill Name |
| A mighty attack that swings the hunting horn down from above. Effective in reducing the target's stamina. |
Switch Skill Description |
Controls
|
Controls |
| Switch Skills Set 2 | |
Melody Mode: Performance |
Melody Mode: Echo |
| Changes the way melodies are played. Two attacks of the same note in a row generates a melody effect. Using A mode focused on being aggressive.
|
Changes the way melodies are played. Press A mode useful for applying various melody effects at once.
|
Controls
|
Controls
|
| Switch Skills Set 3 | |
Crush Attack Combo |
Swing Combo |
| A combo that uses Swing and Crush attacks. Useful from a fixed position and from close range. The combo loop varies depending on button input.
|
A two-hit attack that can be delivered from either the left or right. This allows you to quickly shift directions, making it useful for repositioning.
|
Controls
|
Controls
|
| Switch Skills Set 4 (Silikbind) | |
Earthshaker |
Sonic Bloom |
| An attack that drvies an Ironsilk-bound blade into the target like a stake. When it hits, the Wirebug and weapon are connected with silk. The vibrations of the weapon's sonic blast explode inside the target. (Wirebug Gauge recovery speed: Medium)
|
Places a Wirebug cocoon on the ground that's tethered to you with Ironsilk. When attacking, vibrations are sent to the silk and stored in the cocoon, which gradually swells. After a certain number of Performances, the energy stored detonates, dealing stund and exhaust damage. (Wirebug Gauge recovery speed: Medium)
|
Controls
|
Controls
|
| Switch Skills Set 5 (Silikbind) | |
Slide Beat |
Silkbind Shockwave |
| A technique that uses a Wirebug to push ahead with repeated attacks, punctuated by a performance that buffs strength. It serves the dual purpose of closing in on your enemy and boosting your power. (Wirebug Gauge recovery speed: Fast)
|
A Silkbind attack that wraps your weapon in Ironsilk. For a short period of time, any attack performed causes the silk to vibrate, creating a time-delayed shockwave that triggers additional hits. These additional hits do major stun, exhaust, and part damage (Wirebug Gauge recovery speed: Medium)
|
Controls
|
Controls
|
Hunting Horn Controls
 : Left Swing
 : Right Swing
 +
+  : Backwards Strike
 : Perform
 +
+  : Magnificent Trio
- Perform: Increases your own power by performing melodies.
- Activate Melody via Attack: Attack and line up 2 of the same note in a row on the Music Staff to cover you and nearby allies with a melody effect.
- Magnificent Trio: Attack and line up 3 different notes on the Music Staff to store a melody. Unleash a Magnificent Trio to trigger all melody effects.
- Infernal Melody: Fill the gauge next to the Music Staff by landing attacks and you can activate a special melody. Press
 after a Magnificent Trio or a Slide Beat to do so.
Silkbind Controls
 +
+  : Slide Beat
 +
+  : Earthshaker
- Slide Beat: Uses a Wirebug to propel you forward into a spinning attack. Grants self-improvement and attack-power boosts by way of melody effects.
- Earthshaker: Flings forth a blade, connects it to your weapon with Ironsilk, and transmits booming sonic attacks. (Wirebug Gauge Cost: 2)
Hunting Horn Weapon Combos & Melody Effects
Combos
Stationary Combo
 ,
,  ,
,  , W A S D + Space
- Right Swing > Left Swing > Right Swing > Side Roll (Left/Right)
Forward-moving Combo
- W A S D +
 ,
,  +
+  ,
,  ,
,  +
+ 
- Forward Smash > Double Swing > Crush > Overhead Smash
Magnificent Trio Combo
 ,
,  ,
,  +
+  ,
,  +
+ 
- Right Swing > Left Swing > Overhead Smash > Magnificent Trio
Melody Effects
 Self Improvement: Temporarily boosts movement speed and prevents your attacks from being deflected.
 Attack Up: Temporarily boosts attack.
 Defense Up: Temporarily boosts defense.
- Health Recovery (S): Restores a sliver of health.
- Song of Raging Flame: Boosts attack considerably for a period of time.
Hunting Horn Switch Skills
Switch Skills in Monster Hunter Rise (MHR or MHRise) refer to swappable moves in a Weapon's moveset. Each of the 14 Weapon-types have 3 sets of 2 moves that can be switched out with each other, allowing for a diverse, customizable approach to combat. Switch Skills are unlocked by progressing in the game, with each set having a default move that is available from the beginning.
- Each Weapon-type has a set of swappable Silkbind Attacks and 2 sets of swappable standard moves in the base game.
- The first set of Switch Skills are unlocked by completing the Lv. 3⭐Urgent Village Quest Feathered Frenzy
- The second set of Switch Skills are unlocked by forging or upgrading 8 Weapons within a Weapon-type. Note that this needs to be done for every Weapon-type that you want to unlock Switch Skills for.
- The third set of Switch Skills are unlocked by completing the associated High Rank Hub Quest from Master Utsushi. These quests are unlocked by gaining access to the required Hub Quest rank.
- Lv. 4⭐ Honing Your Hunting Horn for the Hunting Horn.
- Once unlocked, Switch Skills can be swapped at any Item Box and Switch Skill combinations can be saved to Item Loadouts as well.
- The Sunbreak Expansion introduces the Switch Skill Swap mechanic, where hunters can preload 2 Switch Skill loadouts and swap between them freely during hunts. Hunters will also now have access to a total of 5 sets of swappable Switch Skills, including new Silkbind Attacks and regular moves.
- This expansion also introduces the Swap Evade, a special dodge maneuver that can be performed right after a Switch Skill Swap, allowing hunters to quickly evade and maintain distance while safely swapping skill sets.
- In the table below, the left column represents default moves available from the beginning, while the right represents unlockable Switch Skills.
| NEW! Hunting Horn Switch Skills introduced with the Sunbreak Expansion | |
|---|---|
| Switch Skills Set 1 | |
Overhead Smash |
Switch Skill Name |
| A mighty attack that swings the hunting horn down from above. Effective in reducing the target's stamina. |
Switch Skill Description |
Controls
|
Controls |
| Switch Skills Set 2 | |
Melody Mode: Performance |
Melody Mode: Echo |
| Changes the way melodies are played. Two attacks of the same note in a row generates a melody effect. Using A mode focused on being aggressive.
|
Changes the way melodies are played. Press A mode useful for applying various melody effects at once.
|
Controls
|
Controls
|
| Switch Skills Set 3 | |
Crush Attack Combo |
Swing Combo |
| A combo that uses Swing and Crush attacks. Useful from a fixed position and from close range. The combo loop varies depending on button input.
|
A two-hit attack that can be delivered from either the left or right. This allows you to quickly shift directions, making it useful for repositioning.
|
Controls
|
Controls
|
| Switch Skills Set 4 (Silikbind) | |
Earthshaker |
Sonic Bloom |
| An attack that drvies an Ironsilk-bound blade into the target like a stake. When it hits, the Wirebug and weapon are connected with silk. The vibrations of the weapon's sonic blast explode inside the target. (Wirebug Gauge recovery speed: Medium)
|
Places a Wirebug cocoon on the ground that's tethered to you with Ironsilk. When attacking, vibrations are sent to the silk and stored in the cocoon, which gradually swells. After a certain number of Performances, the energy stored detonates, dealing stund and exhaust damage. (Wirebug Gauge recovery speed: Medium)
|
Controls
|
Controls
|
| Switch Skills Set 5 (Silikbind) | |
Slide Beat |
Silkbind Shockwave |
| A technique that uses a Wirebug to push ahead with repeated attacks, punctuated by a performance that buffs strength. It serves the dual purpose of closing in on your enemy and boosting your power. (Wirebug Gauge recovery speed: Fast)
|
A Silkbind attack that wraps your weapon in Ironsilk. For a short period of time, any attack performed causes the silk to vibrate, creating a time-delayed shockwave that triggers additional hits. These additional hits do major stun, exhaust, and part damage (Wirebug Gauge recovery speed: Medium)
|
Controls
|
Controls
|
Hunting Horns are a type of Weapon in Monster Hunter Rise (MHR or MHRise). This page shows a visual gallery of all different styles for Hunting Horns. as well as a comparison table comparing the most imporant aspects such as Attack, Sharpness, Affinity, etc. Weapons are often upgraded based on previous decisions, with different paths leading to different looks and necessitating different materials. You can find detailed upgrade path information in the Hunting Horn Weapon Tree or by clicking each individual weapon below.
For a comprehensive guide on how to use Hunting Horns, please click the following link: Hunting Horn
Hunting Horns in Monster Hunter Rise
Quick Search of All Hunting Horns
Name |
|
|
|
|
Melody |
Rare |
Rampage Skills |
Crafting |
|---|---|---|---|---|---|---|---|---|
| Defender Horn I | 110 | None | 0% | 30 | Rarity 1 |
|
||
| Champion Horn | 150 | None | 0% | 30 | Rarity 2 |
|
||
| Champion Horn II | 192 | None | 0% | 30 | Rarity 4 |
|
||
| Champion Horn III | 210 | None | 0% | 30 | Rarity 4 |
|
||
| Guardian Horn | 230 | None | 0% | 30 | Rarity 5 |
|
||
| Kamura Chorus I | 50 | None | 0% | 0 | Rarity 1 |
|
||
| Kamura Chorus II | 60 | None | 0% | 0 | Rarity 1 |
|
||
| Kamura Chorus III | 90 | None | 0% | 0 | Rarity 2 |
|
||
| Kamura Chorus IV | 130 | None | 0% | 0 | Rarity 3 |
|
||
| Kamura Chorus V |
150 | None | 0% | 0 | Rarity 4 |
|
||
| Kamura Ninja Horn |
180 | None | 0% | 0 | Rarity 5 |
|
||
| Kamura Warrior Flute |
240 | None | 0% | 0 | Rarity 8 | None |
|
|
| Kamura Warrior Flute + |
280 | None | 0% | 0 | Rarity 8 | None |
|
|
| Fine Kamura Flute |
310 | None | 0% | 0 | Rarity 10 | None |
|
|
| Duke's Grail |
300 | 0% | 0 | Rarity 9 | None |
|
||
| Magician's Allure |
320 | 0% | 0 | Rarity 10 | None |
|
||
| Silver Smasher |
300 | 0% | 0 | Rarity 10 | None |
|
||
| Poetic Bell I | 120 | 10% | 0 | Rarity 3 |
|
|||
| Poetic Bell II |
170 | 10% | 0 | Rarity 5 |
|
|||
| Summoning Bell |
190 | 15% | 0 | Rarity 6 |
|
|||
| Summoning Bell + |
290 | 15% | 0 | Rarity 9 | None |
|
||
| Sublime Bell |
300 | 15% | 0 | Rarity 9 | None |
|
||
| Sublime Bell + |
310 | 15% | 0 | Rarity 10 | None |
|
||
| Pure Bell Inari |
300 | 10% | 0 | Rarity 10 | None |
|
||
| Sublime Bell I |
130 | 30% | 0 | Rarity 6 |
|
|||
| Sublime Bell II |
140 | 30% | 0 | Rarity 6 |
|
|||
| Araknahorn |
180 | 30% | 0 | Rarity 7 |
|
|||
| Araknatootle |
260 | 30% | 0 | Rarity 8 | None |
|
||
| Araknatootle + |
290 | 30% | 0 | Rarity 9 | None |
|
||
| Doomed Bell |
300 | 30% | 0 | Rarity 10 | None |
|
||
| Garance Toll |
280 | 20% | 0 | Rarity 9 | None |
|
||
| Garance Toll + |
290 | 20% | 0 | Rarity 9 | None |
|
||
| Kampa Da Lavater |
310 | 20% | 0 | Rarity 10 | None |
|
||
| Garance Toll |
280 | 20% | 0 | Rarity 9 | None |
|
||
| Garance Toll + |
290 | 20% | 0 | Rarity 9 | None |
|
||
| Kampa Da Lavater |
310 | 20% | 0 | Rarity 10 | None |
|
||
| Basarios Rock I | 110 | 0% | 15 | Rarity 2 |
|
|||
| Basarios Rock Mk.II | 150 | 0% | 15 | Rarity 3 |
|
|||
| Gigant Rock |
170 | 0% | 20 | Rarity 5 |
|
|||
| Gigant Rock + |
270 | 0% | 20 | Rarity 8 | None |
|
||
| Titan's Rock |
340 | 0% | 20 | Rarity 10 | None |
|
||
| Usurper's Growl I | 110 | 0% | 0 | Rarity 3 |
|
|||
| Usurper's Growl II | 160 | 0% | 0 | Rarity 5 |
|
|||
| Despot's Thunderclap |
180 | 0% | 0 | Rarity 6 |
|
|||
| Despot's Thunderclap + |
290 | 0% | 0 | Rarity 9 | None |
|
||
| Oppressor's Boon |
310 | 0% | 0 | Rarity 10 | None |
|
||
| Zurogong Primo I | 90 | None | 0% | 0 | Rarity 1 |
|
||
| Zurogong Primo II | 110 | None | 0% | 0 | Rarity 2 |
|
||
| Zurogong Secundo |
160 | None | 0% | 0 | Rarity 4 |
|
||
| Zurogong Secundo + |
250 | None | 0% | 0 | Rarity 8 | None |
|
|
| Zurogong Tertio |
330 | None | 0% | 0 | Rarity 10 | None |
|
|
| Striped Dragonga I | 140 | None | -20% | 0 | Rarity 3 |
|
||
| Striped Dragonga II | 200 | None | -20% | 0 | Rarity 6 |
|
||
| Tigrex Horn | 210 | None | -20% | 0 | Rarity 6 |
|
||
| Tigrex Horn + |
310 | None | -20% | 0 | Rarity 9 | None |
|
|
| Tigrex Roar |
320 | None | -20% | 0 | Rarity 9 | None |
|
|
| Tigrex Roar + |
330 | None | -20% | 0 | Rarity 10 | None |
|
|
| Bariguiro I | 90 | 20% | 0 | Rarity 2 |
|
|||
| Bariguiro II |
150 | 20% | 0 | Rarity 5 |
|
|||
| Algiguiro |
170 | 20% | 0 | Rarity 6 |
|
|||
| Guiro Frula |
270 | 20% | 0 | Rarity 8 | None |
|
||
| Guiro Frula + |
270 | 20% | 0 | Rarity 8 | None |
|
||
| Frigiguiro |
290 | 20% | 0 | Rarity 10 | None |
|
||
| Frilled Flute I | 90 | 0% | 0 | Rarity 2 |
|
|||
| Frilled Flute II | 130 | 0% | 0 | Rarity 3 |
|
|||
| Illusory Flute |
180 | 0% | 0 | Rarity 5 |
|
|||
| Illusory Flute + |
250 | 0% | 0 | Rarity 8 | None |
|
||
| Nightmare Flute |
280 | 0% | 0 | Rarity 8 | None |
|
||
| Nightmare Flute + |
300 | 0% | 0 | Rarity 10 | None |
|
||
| Bloom Snow Flute |
270 | 0% | 0 | Rarity 8 | None |
|
||
| Bloom Snow Flute + |
310 | 0% | 0 | Rarity 9 | None |
|
||
| Flicker Blizzard Flute |
320 | 0% | 0 | Rarity 10 | None |
|
||
| Iron Horn I | 70 | None | 0% | 0 | Rarity 1 |
|
||
| Wind Horn | 90 | None | 0% | 0 | Rarity 1 |
|
||
| Metal Bagpipe I | 100 | None | 0% | 0 | Rarity 2 |
|
||
| Great Bagpipe | 150 | None | 0% | 0 | Rarity 3 |
|
||
| Heavy Bagpipe I |
160 | None | 0% | 12 | Rarity 4 |
|
||
| Fortissimo |
180 | None | 0% | 15 | Rarity 5 |
|
||
| Fortissimo + |
230 | None | 0% | 20 | Rarity 8 | None |
|
|
| Rinforzato |
270 | None | 0% | 25 | Rarity 8 | None |
|
|
| Rinforzato + |
310 | None | 0% | 30 | Rarity 10 | None |
|
|
| Grundner Flap |
280 | 20% | 0 | Rarity 9 | None |
|
||
| Grundner Flap + |
290 | 20% | 0 | Rarity 9 | None |
|
||
| Grünlicht Flap |
300 | 20% | 0 | Rarity 10 | None |
|
||
| Frostmoon Wailer |
290 | 0% | 0 | Rarity 9 | None |
|
||
| Frostmoon Wailer + |
300 | 0% | 0 | Rarity 9 | None |
|
||
| Harmonic Resonance |
320 | 0% | 0 | Rarity 10 | None |
|
||
| Hidden Harmonic I |
140 | None | 40% | 0 | Rarity 5 |
|
||
| Hidden Harmonic II |
160 | None | 40% | 0 | Rarity 6 |
|
||
| Cry in the Night |
170 | None | 40% | 0 | Rarity 6 |
|
||
| Horn of Deprivation |
230 | None | 40% | 0 | Rarity 8 | None |
|
|
| Horn of Deprivation + |
250 | None | 40% | 0 | Rarity 9 | None |
|
|
| Avidya Harmonic |
280 | None | 40% | 0 | Rarity 10 | None |
|
|
| Namalsadirah's Asterism |
310 | 0% | 0 | Rarity 10 | None |
|
||
| Pukei Bagpipe I | 100 | 0% | 0 | Rarity 2 |
|
|||
| Pukei Bagpipe II |
170 | 0% | 0 | Rarity 5 |
|
|||
| Datura Lurr |
190 | 0% | 0 | Rarity 6 |
|
|||
| Datura Lurr + |
260 | 0% | 0 | Rarity 8 | None |
|
||
| Datura Accelerando |
290 | 0% | 0 | Rarity 8 | None |
|
||
| Datura Accelerando + |
320 | 0% | 0 | Rarity 10 | None |
|
||
| Flammenkornett I |
190 | -15% | 0 | Rarity 5 |
|
|||
| Flammenkornett II |
200 | -15% | 0 | Rarity 6 |
|
|||
| Forte Flammenkornett |
210 | -15% | 0 | Rarity 6 |
|
|||
| Forte Flammenkornett + |
260 | -15% | 0 | Rarity 8 | None |
|
||
| Horn of the Indomitable |
310 | -15% | 0 | Rarity 9 | None |
|
||
| Horn of the Indomitable + |
330 | -15% | 0 | Rarity 10 | None |
|
||
| Valkyrie Chordmaker I | 100 | 0% | 0 | Rarity 2 |
|
|||
| Valkyrie Chordmaker II | 120 | 0% | 0 | Rarity 3 |
|
|||
| Queen Chordmaker |
170 | 0% | 0 | Rarity 5 |
|
|||
| Queen Chordmaker + |
270 | 0% | 0 | Rarity 8 | None |
|
||
| Queen's Harmonium |
320 | 0% | 0 | Rarity 9 | None |
|
||
| Queen's Harmonium + |
340 | 0% | 0 | Rarity 10 | None |
|
||
| Gold Chordmaker |
320 | 15% | 0 | Rarity 10 | None |
|
||
| Rosengitarre |
270 | 20% | 0 | Rarity 9 | None |
|
||
| Rosengitarre + |
280 | 20% | 0 | Rarity 9 | None |
|
||
| Rosenseele |
290 | 20% | 0 | Rarity 10 | None |
|
||
| Kaktus Seele |
280 | 20% | 0 | Rarity 10 | None | |||
| Sandpipe I | 120 | None | -30% | 8 | Rarity 2 |
|
||
| Sandpipe II | 150 | None | -30% | 8 | Rarity 3 |
|
||
| Sandcrier | 200 | None | -30% | 10 | Rarity 5 |
|
||
| Sandcrier + |
270 | None | -30% | 10 | Rarity 8 | None |
|
|
| Sandscreecher |
290 | None | -30% | 20 | Rarity 8 | None |
|
|
| Sandscreecher + |
360 | None | -30% | 30 | Rarity 10 | None |
|
|
| Frog Flute I | 100 | 0% | 10 | Rarity 2 |
|
|||
| Frog Flute II |
160 | 0% | 10 | Rarity 4 |
|
|||
| Amphibia Allargando |
210 | 0% | 20 | Rarity 6 |
|
|||
| Amphibia Allargando + |
240 | 0% | 20 | Rarity 8 | None |
|
||
| Amphibia Larghetto |
250 | 0% | 20 | Rarity 8 | None |
|
||
| Amphibia Larghetto + |
330 | 0% | 20 | Rarity 10 | None |
|
||
| Wind Thief Horn I | 80 | None | 10% | 0 | Rarity 1 |
|
||
| Wind Thief Horn II | 90 | None | 10% | 0 | Rarity 2 |
|
||
| Gale Horn |
150 | None | 10% | 0 | Rarity 4 |
|
||
| Gale Horn + |
230 | None | 10% | 0 | Rarity 8 | None |
|
|
| Great Gale Horn |
310 | None | 10% | 0 | Rarity 10 | None |
|
|
| Droth Drone I | 80 | 0% | 0 | Rarity 2 |
|
|||
| Droth Drone II | 90 | 0% | 0 | Rarity 2 |
|
|||
| Droth Roar |
160 | 0% | 0 | Rarity 5 |
|
|||
| Droth Roar + |
240 | 0% | 0 | Rarity 8 | None |
|
||
| Echoing Droth Roar |
290 | 0% | 0 | Rarity 8 | None |
|
||
| Echoing Droth Roar + |
320 | 0% | 0 | Rarity 10 | None |
|
||
| Golm Drum |
290 | None | 0% | 0 | Rarity 8 | None |
|
|
| Golm Drum + |
310 | None | 0% | 0 | Rarity 9 | None |
|
|
| Seismic Pauken |
340 | None | 0% | 0 | Rarity 10 | None |
|
|
| Bone Horn I | 90 | None | 0% | 0 | Rarity 1 |
|
||
| Bone Horn II | 100 | None | 0% | 0 | Rarity 1 |
|
||
| Hardened Bone Horn | 140 | None | 0% | 0 | Rarity 3 |
|
||
| Hunter's Horn I | 170 | None | 0% | 0 | Rarity 4 |
|
||
| Native's Horn | 210 | None | 0% | 0 | Rarity 5 |
|
||
| Duo Horn I | 220 | None | -15% | 0 | Rarity 6 |
|
||
| Duo Horn II | 230 | None | -15% | 0 | Rarity 6 |
|
||
| Duo Risoluto | 240 | None | -15% | 0 | Rarity 7 |
|
||
| Duo Risoluto + |
330 | None | -15% | 0 | Rarity 9 | None |
|
|
| Horned Tyrant's Horn |
340 | None | -15% | 0 | Rarity 9 | None |
|
|
| Horned Tyrant's Horn + |
350 | None | -15% | 0 | Rarity 10 | None |
|
|
| Sonic Glass |
240 | 0% | 0 | Rarity 8 | None |
|
||
| Sonic Glass + |
280 | 0% | 0 | Rarity 8 | None |
|
||
| Glass Queen |
290 | 0% | 0 | Rarity 10 | None |
|
||
| Shell Castanet |
280 | 0% | 20 | Rarity 8 | None |
|
||
| Shell Castanet + |
300 | 0% | 20 | Rarity 9 | None |
|
||
| Colored Castanet |
320 | 0% | 30 | Rarity 10 | None |
|
||
| Vadya Muse |
300 | None | 10% | 0 | Rarity 9 | None |
|
|
| Vadya Muse + |
310 | None | 10% | 0 | Rarity 9 | None |
|
|
| Allysyl Muse |
320 | None | 10% | 0 | Rarity 10 | None |
|
|
| Bull Grunt I | 180 | None | -5% | 0 | Rarity 4 |
|
||
| Bull Grunt II | 190 | None | -5% | 0 | Rarity 5 |
|
||
| Wild Grunt | 230 | None | -5% | 0 | Rarity 6 |
|
||
| Feral Grunt |
260 | None | -5% | 0 | Rarity 8 | None |
|
|
| Feral Grunt + |
290 | None | -5% | 0 | Rarity 8 | None |
|
|
| Barbarian Grunt |
330 | None | -5% | 0 | Rarity 10 | None |
|
|
| Flame Feroce I | 110 | 0% | 0 | Rarity 3 |
|
|||
| Flame Feroce II |
170 | 0% | 0 | Rarity 5 |
|
|||
| Rathalos Feroce |
190 | 0% | 0 | Rarity 6 |
|
|||
| Rathalos Feroce + |
290 | 0% | 0 | Rarity 9 | None |
|
||
| Ophelia's Grace |
310 | 0% | 0 | Rarity 10 | None |
|
||
| Kulu Mosso I | 90 | None | 15% | 0 | Rarity 2 |
|
||
| Kulu Mosso II | 110 | None | 15% | 0 | Rarity 3 |
|
||
| Kulu Grosso |
150 | None | 25% | 0 | Rarity 4 |
|
||
| Kulu Grosso + |
240 | None | 25% | 0 | Rarity 8 | None |
|
|
| Kulu Katolos Mosso |
320 | None | 25% | 0 | Rarity 10 | None |
|
|
| Khezu Horn I | 90 | 0% | 0 | Rarity 2 |
|
|||
| Khezu Horn II | 100 | 0% | 0 | Rarity 2 |
|
|||
| Khezu Flute |
130 | 0% | 0 | Rarity 4 |
|
|||
| Khezu Flute + |
260 | 0% | 0 | Rarity 8 | None |
|
||
| Khezu Keen |
280 | 0% | 0 | Rarity 8 | None |
|
||
| Khezu Keen + |
320 | 0% | 0 | Rarity 10 | None |
|
||
| Vicello Nulo I | 60 | None | 0% | 0 | Rarity 1 |
|
||
| Vicello Nulo II | 80 | None | 0% | 0 | Rarity 1 |
|
||
| Vicello Unu | 120 | None | 0% | 0 | Rarity 3 |
|
||
| Vicello Nulo Black I |
150 | 0% | ?? | Rarity 4 |
|
|||
| Vicello Nulo Black II |
170 | 0% | 0 | Rarity 5 |
|
|||
| Vicello Uno Black |
190 | 0% | 0 | Rarity 6 |
|
|||
| Vicello Du Black |
240 | 0% | 0 | Rarity 8 | None |
|
||
| Vicello Tre Black |
290 | 0% | 0 | Rarity 8 | None |
|
||
| Vicello Kvar Black |
320 | 0% | 0 | Rarity 10 | None |
|
||
| Vicello Nulo Green I | 100 | 0% | 0 | Rarity 2 |
|
|||
| Vicello Nulo Green II |
150 | 0% | 0 | Rarity 5 |
|
|||
| Vicello Unu Green |
170 | 0% | 0 | Rarity 6 |
|
|||
| Vicello Du Green |
250 | 0% | 0 | Rarity 8 | None |
|
||
| Vicello Tre Green |
320 | 0% | 0 | Rarity 10 | None |
|
||
| Vicello Nulo White I | 80 | 0% | 0 | Rarity 1 |
|
|||
| Vicello Nulo White II | 120 | 0% | 0 | Rarity 3 |
|
|||
| Vicello Unu White |
170 | 0% | 0 | Rarity 5 |
|
|||
| Vicello Du White |
260 | 0% | 0 | Rarity 8 | None |
|
||
| Vicello Tre White |
310 | 0% | 0 | Rarity 10 | None |
|
||
| Sinister Strum I | 120 | 0% | 0 | Rarity 3 |
|
|||
| Sinister Strum II | 140 | 0% | 0 | Rarity 3 |
|
|||
| Sinister Shadestrum |
180 | 0% | 0 | Rarity 6 |
|
|||
| Sinister Shadestrum + |
270 | 0% | 0 | Rarity 8 | None |
|
||
| Mighty Souleraser |
290 | 0% | 0 | Rarity 9 | None |
|
||
| Devil's Lute |
300 | 0% | 0 | Rarity 10 | None |
|
||
| Kummerklang |
280 | 25% | 0 | Rarity 9 | None |
|
||
| Kummerklang + |
280 | 25% | 0 | Rarity 9 | None |
|
||
| Trauerklang |
300 | 25% | 0 | Rarity 10 | None |
|
||
| La Sépulture |
280 | 40% | 0 | Rarity 9 | None |
|
||
| Le Grégorien |
290 | 40% | 0 | Rarity 10 | None |
|
||
| Denden Daiko I | 170 | -10% | 0 | Rarity 5 |
|
|||
| Denden Daiko II |
190 | -10% | 0 | Rarity 6 |
|
|||
| Denden Doomsounder |
210 | -10% | 0 | Rarity 7 |
|
|||
| Denden Doomsounder + |
310 | -10% | 0 | Rarity 9 | None |
|
||
| Denden Delugesong |
330 | -10% | 0 | Rarity 10 | None |
|
||
| Demonlord Djembe |
290 | 0% | 0 | Rarity 10 | None |
|
||
| Azure Elder Horn I | 180 | 0% | 0 | Rarity 5 |
|
|||
| Azure Elder Horn II | 190 | 0% | 0 | Rarity 6 |
|
|||
| Abyssal Gale Horn | 200 | 0% | 0 | Rarity 7 |
|
|||
| Skytremor Typhoon |
340 | 0% | 0 | Rarity 10 | None |
|
||
| Thunderbolt Horn I | 180 | 0% | 0 | Rarity 6 |
|
|||
| Abyssal Storm Horn | 190 | 0% | 0 | Rarity 7 |
|
|||
| Skytremor Rumble |
320 | 0% | 0 | Rarity 10 | None |
|
||
| Rookslayer Drum I | 190 | -10% | 0 | Rarity 6 |
|
|||
| Rookslayer Drum II | 200 | -10% | 0 | Rarity 6 |
|
|||
| Bazelreid Rookslayer | 220 | -10% | 0 | Rarity 7 |
|
|||
| Baselsium Rookslayer |
310 | -10% | 0 | Rarity 10 | None |
|
||
| Bazel Valdi Rooksearer |
320 | -10% | 0 | Rarity 10 | None |
|
||
| Daora's Taus I |
170 | 10% | 0 | Rarity 6 |
|
|||
| Daora's Baphophone |
180 | 10% | 0 | Rarity 7 |
|
|||
| Daora's Baphophone + |
300 | 10% | 0 | Rarity 9 | None |
|
||
| Daora's Diabassoon |
310 | 10% | 0 | Rarity 10 | None |
|
||
| Teostra's Tiple I | 190 | 0% | 0 | Rarity 6 |
|
|||
| Teostra's Orphee | 200 | 0% | 0 | Rarity 7 |
|
|||
| Teostra's Orphée + |
300 | 0% | 0 | Rarity 9 | None |
|
||
| Teostra's Musica |
310 | 0% | 0 | Rarity 10 | None |
|
||
| Blessed Ocarina I |
160 | 0% | 0 | Rarity 6 |
|
|||
| Cursed Ocarina |
180 | 0% | 0 | Rarity 7 |
|
|||
| Cursed Ocarina + |
300 | 0% | 0 | Rarity 9 | None |
|
||
| Genie's Ocarina |
310 | 0% | 0 | Rarity 10 | None |
|
||
| Redwing Flute I |
150 | 0% | 0 | Rarity 6 |
|
|||
| Reddnaught Ritmico |
160 | 0% | 0 | Rarity 7 |
|
|||
| Crimson Clearwing |
280 | 0% | 0 | Rarity 10 | None |
|
||
| Abyssal Hollow |
320 | -20% | 0 | Rarity 10 | None |
|
||
| Sonorous Eisfyl |
300 | 0% | 0 | Rarity 10 | None |
|
||
| Autumn Lute |
350 | -25% | 0 | Rarity 10 | None |
|
||
| Poison Fungasax I | 90 | 0% | 0 | Rarity 2 |
|
|||
| Poison Fungasax II | 130 | 0% | 0 | Rarity 3 |
|
|||
| Toxic Fungasax | 150 | 0% | 0 | Rarity 4 |
|
|||
| Toxic Fungasax + |
270 | 0% | 0 | Rarity 8 | None |
|
||
| Mycotoxic Fungasax |
330 | 0% | 0 | Rarity 10 | None |
|
||
| Magia Charm I | 100 | 0% | 0 | Rarity 2 |
|
|||
| Magia Charm II | 150 | 0% | 0 | Rarity 3 |
|
|||
| Magia Charm III |
170 | 0% | 0 | Rarity 4 |
|
|||
| Magia Charmbell |
180 | 0% | 0 | Rarity 6 |
|
|||
| Bell of Laertes |
330 | 0% | 0 | Rarity 10 | None |
|
||
| Cornupion I | 130 | 0% | 10 | Rarity 3 |
|
|||
| Cornupion II | 150 | 0% | 10 | Rarity 3 |
|
|||
| Webbed Cornupion |
180 | 0% | 10 | Rarity 5 |
|
|||
| Hamlet's Horn |
240 | 0% | 30 | Rarity 8 | None |
|
||
| Gossamer Cornupion |
320 | 0% | 30 | Rarity 10 | None |
|
||
| Grass Flute I | 140 | 0% | 0 | Rarity 3 |
|
|||
| Grass Flute II |
150 | 0% | 0 | Rarity 4 |
|
|||
| Bombadgy's Cry |
170 | 0% | 0 | Rarity 5 |
|
|||
| Royal Order's Horn |
280 | None | 10% | 50 | Rarity 9 | None |
|
|
| Royal Order's Horn + |
300 | None | 10% | 50 | Rarity 10 | None |
|
|
| Antique Machina HH |
310 | 0% | 0 | Rarity 10 | None |
|
||
| Rampage Agitato I | 150 | None | 0% | 0 | Rarity 4 |
|
|
|
| Rampage Agitato II | 170 | None | 0% | 0 | Rarity 5 |
|
|
|
| Rampage Agitato III | 180 | None | 0% | 0 | Rarity 5 |
|
|
|
| Rampage Agitato IV | 190 | None | 0% | 0 | Rarity 6 |
|
|
|
| Rampage Agitato V | 200 | None | 0% | 0 | Rarity 6 |
|
|
|
| Rampage Agitato S | 210 | None | 0% | 0 | Rarity 7 |
|
|
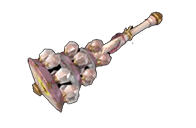
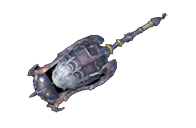
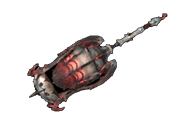
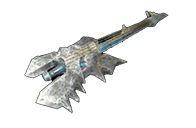
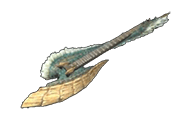
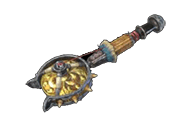
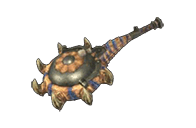
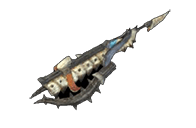
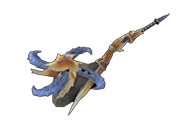
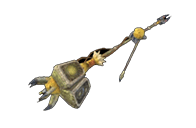
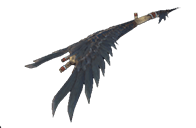
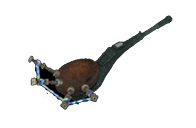
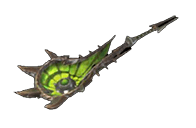
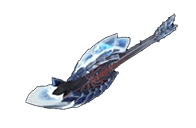
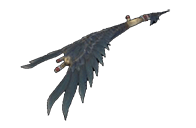
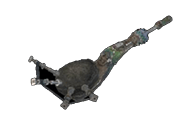
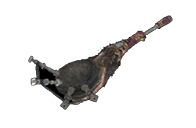
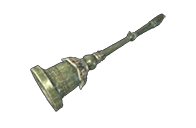
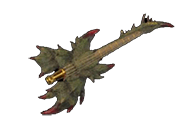
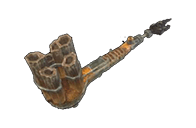
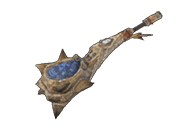
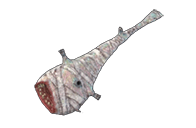
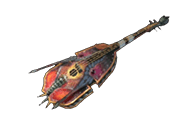
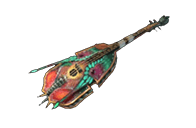
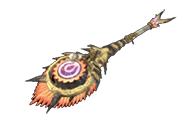
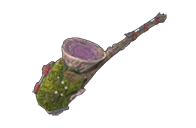
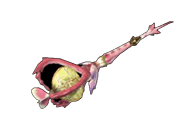
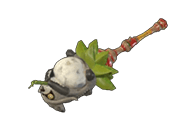
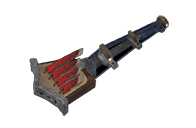
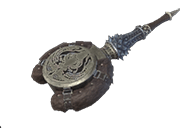
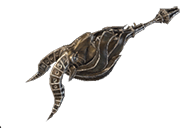
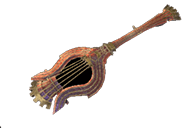
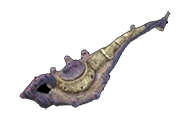
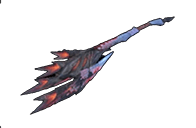
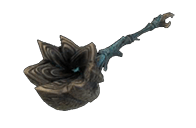
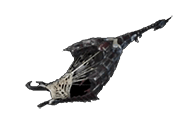
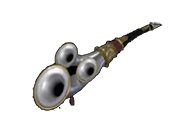
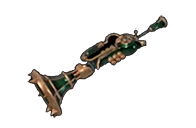
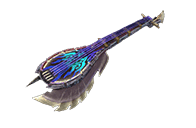
Hunting Horn Gallery
Hunting Horn Defender Weapons
Hunting Horn Kamura Weapons
Master Rank Hunting Horn Kamura Weapons
Hunting Horn Ore Weapons
Master Rank Hunting Horn Ore Weapons
Hunting Horn Bone Weapons
Master Rank Hunting Horn Bone Weapons
Hunting Horn Independent Weapons
Master Rank Hunting Horn Independet Weapons
Hunting Horn Weapon Tree for Monster Hunter Rise (MHR or MHRise) features the different upgrade paths for the Hunting Horn weapon. In Monster Hunter Rise, there are 14 categories of weapons that players can choose from to use for hunting Monsters. The Hunting Horn is a blunt weapon that allows you to buff your hunting party by performing melodies. Gather notes of a single color for a steady boost or combine 3 to gain all effects. This page lists all of the Hunting Horns in Monster Hunter Rise, showing their effectiveness and upgrade paths.
Hunting Horn Weapon Traits
- Wide varity of team buffs.
- Blunt weapon that allows for repeated stunning.
- Attacks make notes which can be weaved into melodies.
- A blunt weapon that allows you to buff your hunting party by performing melodies. Gather notes of a single color for a steady boost or combine 3 to gain all effects.
Master Rank Hunting Horn Weapon
Introduced with the release of the Sunbreak Expansion, Master Rank Weapons are a brand new and more powerful tier of Weaapons available to hunters to help them deal with the deadlier Monsters that can be found on the Sunbreak Expansion.
Note that these Weapons can only be accessed by players that have purchased and installed the Sunbreak Expansion. For those who own the expansionless version of Monster Hunter, these Weapons are unobtainable.
- You can check out the Hunting Horn Weapon Tree to find the different upgrade paths for each Master Rank Hunting Horn weapon.
Hunting Horn Weapon Features
Weapon Advantages
- Self improvement is one of the only ability in the game to have a weapon completely ignore bouncing back regardless of the hardness of monster parts.
- Can buff yourself and your allies while doing damage.
- High reaching
- Great KO and exhaust potential
- Sonic waves attacks deal the same damage regardless of the hardness of the part hit.
- Magnificent Trio, a new ability added in Rise has the ability to play all of the songs at once with playing a minimum of only 3 notes.
Weapon Disadvantages
- The Hunting Horn still has a limited set of basic moves/attacks.
- Slow and can get you locked into long animations.
- Cannot block
Important: For a comprehensive guide on how to use Hunting Horns, please click the following link: Hunting Horn
MH Rise Hunting Horn Weapon Tree
Hunting Horn Defender Tree
 Defender Horn I
 110
110 


 Champion Horn
 150
150 


 Champion Horn II
 192
192 


 Champion Horn III
 210
210 


 Guardian Horn
 230
230 


Hunting Horn Kamura Tree
 Kamura Chorus I
 50
50 


 Kamura Chorus II
 60
60 


 Kamura Chorus III
 90
90 


 Kamura Chorus IV
 130
130 


 Kamura Chorus V
 150
150 


 Kamura Ninja Horn
 180
180 


 Kamura Warrior Flute
 240
240 


 -
- 
 Kamura Warrior Flute +
 280
280 


 -
- 
 Fine Kamura Flute
 310
310 


 -
- 
 Duke's Grail
 300
300 


 -
- 
 25
25
 Magician's Allure
  320
320 


 -
- 
 28
28
 Poetic Bell I
 120
120 


 20
20
 Poetic Bell II
 170
170 


 24
24
 Summoning Bell
 190
190 


 28
28
 Summoning Bell +
 290
290 


 -
- 
 33
33
 Sublime Bell
 300
300 


 -
- 
 35
35
-
 Sublime Bell +
 310
310 


 -
- 
 38
38
-
 Pure Bell Inari
 300
300 


 23
23
 Sublime Bell I
 130
130 


 24
24
 Sublime Bell II
 140
140 


 26
26
 Araknahorn
  180
180 


 29
29
 Araknatootle
  260
260 


 -
- 
 32
32
 Araknatootle +
  290
290 


 -
- 
 33
33
 Doomed Bell
  300
300 


 -
- 
 35
35
 Garance Toll
  280
280 


 -
- 
 14
14
 Garance Toll +
  290
290 


 -
- 
 16
16
 Kampa Da Lavater
  310
310 


 -
- 
 18
18
 Basarios Rock I
 110
110 


 10
10
 Basarios Rock Mk.II
 150
150 


 12
12
 Gigant Rock
 170
170 


 15
15
 Gigant Rock +
 270
270 


 -
- 
 24
24
 Titan's Rock
 340
340 


 -
- 
 27
27
 Usurper's Growl I
 110
110 


 20
20
 Usurper's Growl II
 160
160 


 24
24
 Despot's Thunderclap
 180
180 


 28
28
 Despot's Thunderclap +
  290
290 


 -
- 
 34
34
 Oppressor's Boon
  310
310 


 -
- 
 38
38
 Zurogong Primo I
 90
90 


 Zurogong Primo II
 110
110 


 Zurogong Secundo
 160
160 


 Zurogong Secundo +
 250
250 


 -
- 
 Zurogong Tertio
 330
330 


 -
- 
 Striped Dragonga I
 140
140 


 Striped Dragonga II
 200
200 


 Tigrex Horn
  210
210 


 Tigrex Horn +
  310
310 

 -
- 
 Tigrex Roar
  320
320 

 -
- 
 Tigrex Roar +
  330
330 

 -
- 
 Bariguiro I
 90
90 


 15
15
 Bariguiro II
 110
110 


 18
18
 Algiguiro
 170
170 


 20
20
 Guiro Frula
 270
270 


 -
- 
 25
25
 Guiro Frula +
 270
270 


 -
- 
 27
27
 Frigiguiro
 290
290 


 -
- 
 30
30
 Frilled Flute I
 90
90 


 12
12
 Frilled Flute II
 130
130 


 15
15
 Illusory Flute
 180
180 


 19
19
 Illusory Flute +
 250
250 


 -
- 
 22
22
 Nightmare Flute
 280
280 


 -
- 
 26
26
 Nightmare Flute +
 300
300 


 -
- 
 30
30
 Bloom Snow Flute
 270
270 


 -
- 
 52
52
 Bloom Snow Flute +
 310
310 


 -
- 
 60
60
 Flicker Blizzard Flute
 320
320 


 -
- 
 68
68
Hunting Horn Ore Tree
 Iron Horn I
 70
70 


 Wind Horn
 90
90 


 Metal Bagpipe I
 100
100 


 Great Bagpipe
 150
150 


 Heavy Bagpipe I
 160
160 


 Fortissimo
 180
180 


 Fortissimo +
 230
230 


 -
- 
 Rinforzato
 270
270 


 -
- 
 Rinforzato +
 310
310 


 -
- 
 Grundner Flap
 280
280 


 -
- 
 23
23
 Grundner Flap +
 290
290 


 -
- 
 25
25
 Grünlicht Flap
 300
300 


 -
- 
 28
28
 Frostmoon Wailer
 290
290 


 -
- 
 21
21
 Frostmoon Wailer +
 300
300 


 -
- 
 23
23
 Harmonic Resonance
 320
320 


 -
- 
 25
25
 Hidden Harmonic I
 140
140 


 Hidden Harmonic II
 160
160 


 Cry in the Night
  170
170 


 Horn of Deprivation
  230
230 


 -
- 
 Horn of Deprivation +
  250
250 


 -
- 
 Avidya Harmonic
  280
280 


 -
- 
 Namalsadirah's Asterism
  310
310 


 -
- 
 17
17
 Pukei Bagpipe I
 100
100 


 18
18
 Pukei Bagpipe II
 170
170 


 24
24
 Datura Lurr
 190
190 


 27
27
 Datura Lurr +
 260
260 


 -
- 
 29
29
 Datura Accelerando
 290
290 


 -
- 
 30
30
 Datura Accelerando +
 320
320 


 -
- 
 34
34
 Flammenkornett I
 190
190 


 12
12
 Flammenkornett II
 200
200 


 20
20
 Forte Flammenkornett
 210
210 


 22
22
 Forte Flammenkornett +
 260
260 


 -
- 
 24
24
 Horn of the Indomitable
 310
310 


 -
- 
 27
27
 Horn of the Indomitable +
 330
330 


 -
- 
 30
30
 Valkyrie Chordmaker I
 100
100 


 16
16
 Valkyrie Chordmaker II
 120
120 


 18
18
 Queen Chordmaker
 170
170 


 22
22
 Queen Chordmaker +
 270
270 


 -
- 
 26
26
 Queen's Harmonium
 320
320 


 -
- 
 28
28
 Queen's Harmonium +
 340
340 


 -
- 
 29
29
 Gold Chordmaker
 320
320 


 -
- 
 40
40 Rosengitarre
 270
270 


 17
17
 Rosengitarre +
 280
280 


 23
23
 Rosenseele
 290
290 


 28
28
 Kaktus Seele
 280
280 


 -
- 
 42
42
 Sandpipe I
 120
120 


 Sandpipe II
 150
150 


 Sandcrier
 200
200 


 Sandcrier +
 270
270 


 Sandscreecher
 290
290 


 Sandscreecher +
 360
360 


 Frog Flute I
 100
100 


 12
12
 Frog Flute II
 160
160 


 16
16
 Amphibia Allargando
 210
210 


 18
18
 Amphibia Allargando +
 240
240 


 -
- 
 22
22
 Amphibia Larghetto
 250
250 


 -
- 
 224
224
 Amphibia Larghetto +
 330
330 


 -
- 
 26
26
 Wind Thief Horn I
 80
80 


 Wind Thief Horn II
 90
90 


 Gale Horn
 150
150 


 Gale Horn +
 230
230 


 -
- 
 Great Gale Horn
 310
310 


 -
- 
 Droth Drone I
 80
80 


 30
30
 Droth Drone II
 90
90 


 32
32
 Droth Roar
 160
160 


 35
35
 Droth Roar +
 240
240 


 -
- 
 42
42
 Echoing Droth Roar
 290
290 


 -
- 
 45
45
 Echoing Droth Roar +
 320
320 


 -
- 
 50
50
 Golm Drum
 290
290 


 -
- 
 Golm Drum +
 31-
31- 


 -
- 
 Seismic Pauken
 340-
340- 


 -
- 
Hunting Horn Bone Tree
 Bone Horn I
 90
90 


 Bone Horn II
 100
100 


 Hardened Bone Horn
 140
140 


 Hunter's Horn I
 170
170 


 Native's Horn
 210
210 


 Duo Horn I
 220
220 


 Duo Horn II
 230
230 


 Duo Risoluto
 240
240 


 Duo Risoluto +
 330
330 


 Sonic Glass
 240
240 


 -
- 
 17
17
 Sonic Glass +
 280
280 


 -
- 
 19
19
 Glass Queen
 290
290 


 -
- 
 21
21
 Shell Castanet
 280
280 


 15
15
 Shell Castanet +
 300
300 


 16
16
 Colored Castanet
 320
320 


 19
19
 Vadya Muse
 300
300 


 -
- 
 Vadya Muse +
 310
310 


 -
- 
 Allysyl Muse
 320
320 


 -
- 
 Bull Grunt I
 180
180 


 Bull Grunt II
 190
190 


 Wild Grunt
 230
230 


 Feral Grunt
 260
260 


 -
- 
 Feral Grunt +
 290
290 


 -
- 
 Barbarian Grunt
 330
330 


 -
- 
 Flame Feroce I
 110
110 


 25
25
 Flame Feroce II
 170
170 


 32
32
 Rathalos Feroce
  190
190 


 35
35
 Rathalos Feroce +
  290
290 


 -
- 
 40
40
 Ophelia's Grace
  310
310 


 -
- 
 45
45
 Kulu Mosso I
 90
90 


 Kulu Mosso II
 110
110 


 Kulu Grosso
 150
150 


 Kulu Grosso +
 240
240 


 -
- 
 Kulu Katolos Mosso
 320
320 


 -
- 
 Khezu Horn I
 90
90 


 20
20
 Khezu Horn II
 100
100 


 24
24
 Khezu Flute
 130
130 


 32
32
 Khezu Flute +
 260
260 


 -
- 
 38
38
 Khezu Keen
 280
280 


 -
- 
 40
40
 Khezu Keen +
 320
320 


 -
- 
 49
49
Hunting Horn Independent Tree
 Silver Smasher
 300
300 


 -
- 
 40
40 Vicello Nulo I
 60
60 


 Vicello Nulo II
 80
80 


 Vicello Unu
 120
120 


 Vicello Nulo Black I
 150
150 


 15
15 

 Vicello Nulo Black II
 170
170 


 17
17 

 Vicello Uno Black
 190
190 


 20
20 

 Vicello Du Black
 240
240 


 25
25 
 -
- 
 Vicello Tre Black
 290
290 


 30
30 
 -
- 
 Vicello Kvar Black
 320
320 


 38
38 
 -
- 
 Vicello Nulo Green I
 100
100 


 15
15
 Vicello Nulo Green II
 150
150 


 18
18
 Vicello Unu Green
 170
170 


 21
21
 Vicello Du Green
 250
250 


 -
- 
 23
23
 Vicello Tre Green
 320
320 


 -
- 
 25
25
 Vicello Nulo White I
 80
80 


 8
8
 Vicello Nulo White II
 120
120 


 10
10
 Vicello Unu White
 170
170 


 13
13
 Vicello Du White
 260
260 


 -
- 
 24
24
 Vicello Tre White
 310
310 


 -
- 
 37
37
 Sinister Strum I
 120
120 


 13
13
 Sinister Strum II
 140
140 


 16
16
 Sinister Shadestrum
 180
180 


 23
23
 Sinister Shadestrum +
 270
270 


 -
- 
 26
26
 Mighty Souleraser
 290
290 


 -
- 
 29
29
 Devil's Lute
  300
300 


 -
- 
 30
30
 Kummerklang
 280
280 


 -
- 
 18
18
 Kummerklang +
 280
280 


 -
- 
 20
20
 Trauerklang
 300
300 


 -
- 
 22
22
 La Sépulture
 280
280 


 35
35
 Le Grégorien
 290
290 


 43
43
 Grimm Joie
 310
310 


 -
- 
 47
47
 Denden Daiko I
 170
170 


 15
15
 Denden Daiko II
 190
190 


 17
17
 Denden Doomsounder
 210
210 


 20
20
 Denden Doomsounder +
 310
310 


 -
- 
 23
23
 Denden Delugesong
 330
330 


 -
- 
 25
25
 Demonlord Djembe
 290
290 


 -
-
 25
25 Azure Elder Horn I
 180
180 


 9
9
 Azure Elder Horn II
 190
190 


 11
11
 Abyssal Gale Horn
 200
200 


 14
14
 Skytremor Typhoon
 340
340 


 19
19
 Thunderbolt Horn I
 180
180 


 34
34
 Abyssal Storm Horn
 190
190 


 41
41
 Skytremor Rumble
 320
320 


 60
60
 Rookslayer Drum I
  190
190 


 15
15
 Rookslayer Drum II
  200
200 


 16
16
 Bazelreid Rookslayer
  220
220 


 18
18
 Baselsium Rookslayer
  310
310 


 22
22
 Bazel Valdi Rooksearer
  320
320 


 25
25
 Daora's Taus I
  170
170 


 32
32
 Daora's Baphophone
 180
180 


 35
35
 Daora's Baphophone +
 300
300 


 -
- 
 40
40
 Daora's Diabassoon
 310
310 


 -
- 
 42
42
 Teostra's Tiple I
  190
190 


 40
40
 Teostra's Orphee
 200
200 


 42
42
 Teostra's Orphée +
 300
300 


 45
45
 Teostra's Musica
 310
310 


 50
50
 Blessed Ocarina I
  160
160 


 37
37
 Cursed Ocarina
 180
180 


 40
40
 Cursed Ocarina +
 300
300 


 -
-
 44
44
 Genie's Ocarina
 310
310 


 -
-
 50
50
 Redwing Flute I
 150
150 


 32
32
 Reddnaught Ritmico
 160
160 


 37
37
 Crimson Clearwing
 280
280 


 -
- 
 51
51
 Abyssal Hollow
 320
320 


 20
20 Sonorous Eisfyl
 300
300 


 -
- 
 23
23 Autumn Lute
 350
350 


 47
47 Poison Fungasax I
 90
90 


 30
30
 Poison Fungasax II
 130
130 


 32
32
 Toxic Fungasax
 150
150 


 35
35
 Toxic Fungasax +
 270
270 


 38
38
 Mycotoxic Fungasax
 330
330 


 42
42
 Magia Charm I
 100
100 


 12
12
 Magia Charm II
 150
150 


 14
14
 Magia Charm III
 170
170 


 16
16
 Magia Charmbell +
 290
290 


 -
- 
 24
24
 Bell of Laertes
 330
330 


 -
- 
 27
27
 Cornupion I
 130
130 


 10
10
 Cornupion II
 150
150 


 12
12
 Webbed Cornupion
 180
180 


 15
15
 Hamlet's Horn
 240
240 


 -
- 
 16
16
 Gossamer Cornupion
 320
320 


 -
- 
 18
18
 Grass Flute I
 140
140 


 10
10
 Grass Flute II
 150
150 


 12
12
 Bombadgy's Cry
 170
170 


 15
15
 Royal Order's Horn
 280
280 


 -
- 
 Royal Order's Horn +
 300
300 


 -
- 
 Antique Machina HH
 310
310 


 15
15 Rampage Agitato I
 150
150 


 Rampage Agitato II
 170
170 


 Rampage Agitato III
 180
180 


 Rampage Agitato IV
 190
190 


| MHR Weapon Types |
Bow ♦ Charge Blade ♦ Dual Blades ♦ Great Sword ♦ Gunlance ♦ Hammer ♦ Heavy Bowgun ♦ Insect Glaive ♦ Lance ♦ Light Bowgun ♦ Long Sword ♦ Switch Axe ♦ Sword & Shield |
 Anonymous
Reminder: If you hate fextralife shoving their twitch auto-player onto every webpage (And thus forcing you to be part of their viewer count without your consent); You can use Ublock Origin to remove it without crappylife behing able to extort you to 'BeCoMe a ViP!' to get rid of it!
Feel free to do this in order to stop giving bloated viewer counts to streamers too lazy to 100% ANY wiki they make!
Make sure they cannot make money off of you!
 Anonymous
i have noticed that the medicine skill can increase the healing of melodies, however i am not sure if it also pairs with the health regeneration melodies or maybe it pairs with recovery speed instead, needs further testing

 Anonymous
 Anonymous
the fact that melodic slap doesn't have any info listed next to overhead smash really says a lot about society. (as of aug 9)

 Anonymous
Pfft, the link for the comprehensive guide that's above the weapon tree links back to this page

 Anonymous
 Anonymous
"Low attack power.
Somewhat slow attack speed.
Performance requires the user to stand still for a few seconds."
None of this applies. Performance doesn't even exist in Rise.
Hunting Horn, as of 1/10 thanks to AmaDEUS, has the fastest speedrun time on Mizutsune at 5:50. It has the highest DPS in the game. You should update this page so that it doesn't look like you copy-pasted Monster Hunter World information.


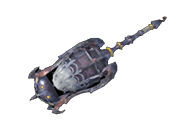
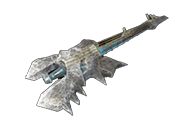
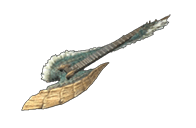
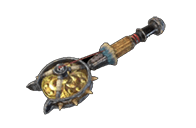
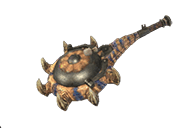
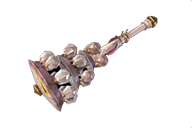
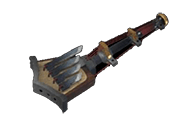
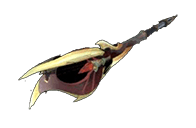
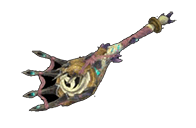
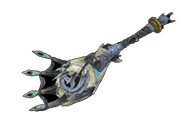
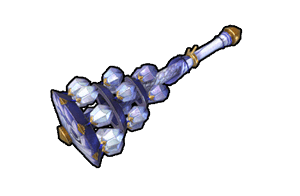
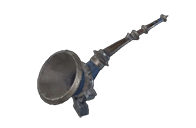
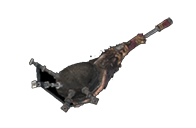
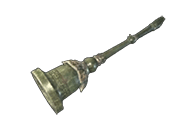
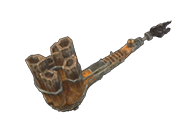
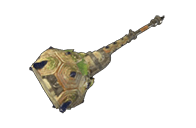
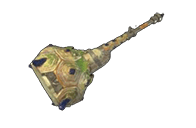
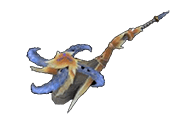
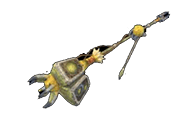
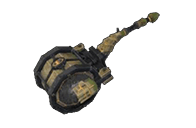
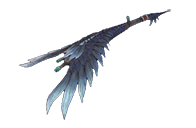
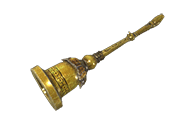
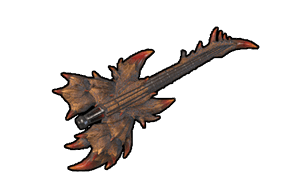
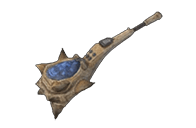
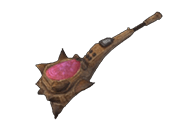
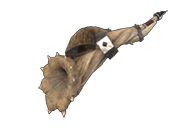
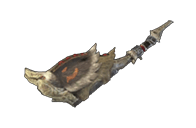
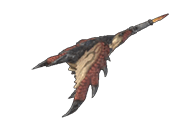

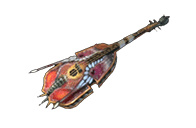
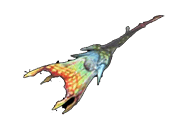
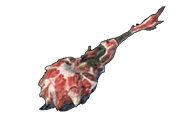
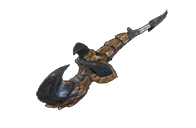
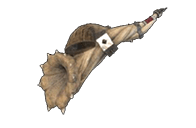
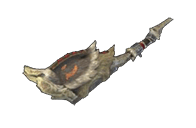
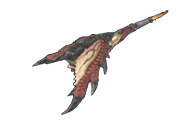
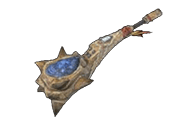

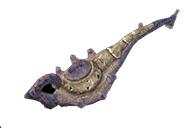
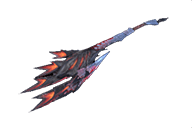
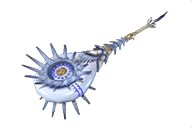
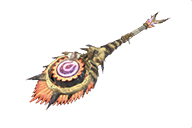


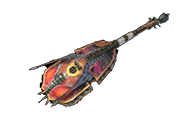
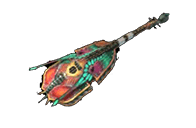
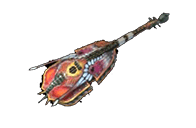
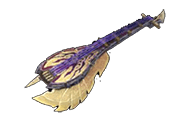
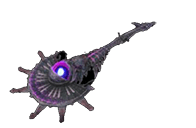
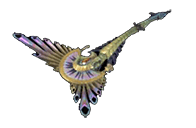
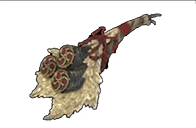
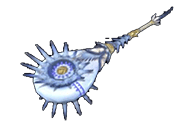
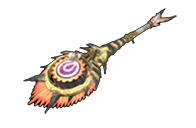
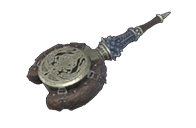
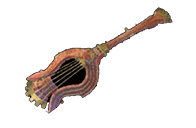

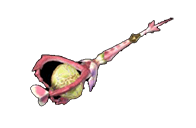

What horn is the best for healing?
1
+11
-1