

Sword & Shield |
|
|---|---|
| Weapon Type | Melee |
| Damage Type | Cut & Blunt |
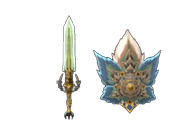
Sword & Shield (片手剣 kata te ken "single-handed sword") is one out of the fourteen weapon categories in Monster Hunter Rise (MHR or MHRise). Like all Weapons, it features a unique set of moves and an upgrade path that branches out depending on the materials used.
A blade that allows you to attack quickly and up close while evading most incoming blows. Comes with a shield that can guard AND bludgeon too!
Sword & Shield Weapon Tree
- You can check out our Sword & Shield Weapon Tree to find the different upgrade paths for the Sword & Shield weapon category.
- Click here to see a Comparative List of Sword & Shields
- Click here to see MH Rise Sword and Shield Builds. These builds were created around the weapon types, each with a specific set of handpicked Weapons, Equipment and complementing Skills and Decor. These builds with Specific Sword and Shield may be paired with a set of Armor to optimize the combination in order to create a Build type focused on the Skills available with the selected equipment.
- Click here to see all Master Rank Sword & Shield. The Master Rank Sword & Shield are the top tier Sword & Shield available in Monster Hunter Rise, and as all Master Rank Weapons, can only be obtained by owning the Sunbreak Expansion. These weapons use Master Rank Materials that can be obtained by completing quests and doing endgame content.
Best Sword & Shield of MH Rise
Sword & Shield Weapon Traits
- One of the highest DPS raw weapons.
- Hunters can use Items with their weapons drawn and whilst guarding.
- Fast recovery time, allowing for the chaining of attacks and blocks, at the expense of damage.
Sword & Shield Weapon Features
Weapon Advantages
- Information to be added soon!
Weapon Disadvantages
- Information to be added soon!
Sword & Shield Controls
 : Chop
 : Lateral Slash
 + : Shield Attack
- + : Advancing Slash
- + in the air: Plunging Thrust
- + during a combo: Spinning Reaper
 : Guard
- +
 : Use an Item
 - + : Rising Slash
- + : Guard Slash
 + during a combo: Backstep
- during a backstep: Charged Slash
- Advancing Slash: Executing an Advancing Slash uphill or toward a ledge will result in a terrain-specific attack.
- Use Item: When wielding a sword and shield, you can press while holding
 to use items even with your weapon drawn.
 - Combos: Guard Slashes and Spinning Reapers can be performed from a variety of other attacks. Use to change the direction of the attack.
- Guard Slash: Landing a Guard Slash just as a monster hits you will counter with a Shield Bash, which can combo into a Perfect Rush.
- Perfect Rush: After a backstep, press to perform a Leaping Slash, press again to perform a Perfect Rush. If you press at just the right time, it will do even more damage. You can chain into this from a successful Guard Slash too.
Silkbind Controls
 + : Windmill
- + : Falling Shadow
- Falling Shadow: A forward leaping attack. A successful hit will lead to a Scaling Slash.
- Windmill: Uses Ironsilk to swing your blade around. Its initial swing nullifies any monster's attack. (Wirebug Gauge Cost: 2)
Sword & Shield Useful Combos
Basic Combo
- , , ,
- Chop > Side Slash > Lateral Slash > Return Stroke
Powerful Combo
- , , , +
- Lateral Slash > Return Stroke > Spinning Rising Slash > Spinning Reaper
Monster-Stunning Combo
- + , ,
- Shield Attack > Shield Bash, Hard Bash
Charged Slash Combo
- , Hold + Press , Land Attack, Press
- Chop > Charged Slash > Hit Monster > Jumping Slash
- , Hold + Press , Land Attack, Press
- Chop > Charged Slash > Hit Monster > Falling Bash
Sword & Shield Silkbind Attacks
Destroyer Oil

Uses a Wirebug to cover your blade with a special ointment whose effects trigger if ignited by friction with your shield.
While active, monsters flinch more easily, creating more openings for attack.
Falling Shadow

A forward leaping attack. A successful hit will lead to a Scaling Slash. After that, you can follow up with a Falling Bash in midair.
Press
Windmill

Uses Ironsilk to swing your blade around. Its initial swing nullifies any monster's attack.
Press
Can be switched out with Metsu Shoryugeki
Metsu Shoryugeki

Press
Can be switched out with Windmill
Sword & Shield Switch Skills
Switch Skills in Monster Hunter Rise (MHR or MHRise) refer to swappable moves in a Weapon's moveset. Each of the 14 Weapon-types have 3 sets of 2 moves that can be switched out with each other, allowing for a diverse, customizable approach to combat. Switch Skills are unlocked by progressing in the game, with each set having a default move that is available from the beginning.
- Each Weapon-type has a set of swappable Silkbind Attacks and 2 sets of swappable standard moves in the base game.
- The first set of Switch Skills are unlocked by completing the Lv. 3⭐Urgent Village Quest Feathered Frenzy
- The second set of Switch Skills are unlocked by forging or upgrading 8 Weapons within a Weapon-type. Note that this needs to be done for every Weapon-type that you want to unlock Switch Skills for.
- The third set of Switch Skills are unlocked by completing the associated High Rank Hub Quest from Master Utsushi. These quests are unlocked by gaining access to the required Hub Quest rank.
- Lv. 4⭐ Study the Sword & Shield for the Sword & Shield.
- Once unlocked, Switch Skills can be swapped at any Item Box and Switch Skill combinations can be saved to Item Loadouts as well.
- The Sunbreak Expansion introduces the Switch Skill Swap mechanic, where hunters can preload 2 Switch Skill loadouts and swap between them freely during hunts. Hunters will also now have access to a total of 5 sets of swappable Switch Skills, including new Silkbind Attacks and regular moves.
- This expansion also introduces the Swap Evade, a special dodge maneuver that can be performed right after a Switch Skill Swap, allowing hunters to quickly evade and maintain distance while safely swapping skill sets.
- In the table below, the left column represents default moves available from the beginning, while the right represents unlockable Switch Skills.
Switch Skill Swap Mechanic
The Switch Skill Swap mechanic allows the hunter to assign Switch Skill loadouts and swap between them on the fly, whether in combat or otherwise. This allows the hunter to further expand their arsenal of available moves during hunts and to further customize their builds to accommodate their playstyle. Being able to make split-second decisions to swap loadouts and use specific moves to counter monster attacks as they wind up is sure to add an exciting new dimension to monster hunting.
With the Switch Skill Swap mechanic, hunters are given two loadouts to switch between, denoted by the ![]() Red Scroll and
Red Scroll and ![]() Blue Scroll icons on the UI. Hunters can set up each loadout from the Item Box at Kamura Village, Elgado Outpost or even at Camps while out on hunts, just as they would when assigning Switch Skills individually. When out on hunts, hunters can swap between the two loadouts by holding
Blue Scroll icons on the UI. Hunters can set up each loadout from the Item Box at Kamura Village, Elgado Outpost or even at Camps while out on hunts, just as they would when assigning Switch Skills individually. When out on hunts, hunters can swap between the two loadouts by holding ![]() and pressing the
and pressing the ![]() +
+ ![]() buttons. The character will perform a quick animation and briefly flash with energy, signifying a successful swap.
buttons. The character will perform a quick animation and briefly flash with energy, signifying a successful swap.

![]()
![]()
![]()
| NEW! Sword & Shield Switch Skills introduced with the Sunbreak Expansion | |
|---|---|
| Switch Skills Set 1 | |
Advancing Slash |
Sliding Slash |
| A drawn attack where you perform a downward slash while stepping forward. A quick and effective action that negates staggering and knockbacks.
|
A sliding attack that slashes the target twice. The Slide maneuver reaches far, but lacks the ability to turn. Successfully landing the first hit or inputting the necessary command while sliding allows for a follow-up jumping attack.
|
Controls
|
Controls
|
| Switch Skills Set 2 | |
Hard Basher Combo |
Switch Skill Name |
| A derivative of the Shield Slam. Shield Bash > Hard Bash. A melee attack using nothing but a shield. A direct hit to the head, however, may open up more opportunities. |
Switch Skill Description |
Controls
|
Controls |
| Switch Skills Set 3 | |
Sword/Shield Combo |
Twin Blade Combo |
| A two-hit attack that uses both the sword and shield. This traditional combo opens with a horizontal shield swipe and then follows up with a stepping downward slash.
|
A two-part attack that opens with a circular slash and follows up with a blade thrust. An easy attack to get multiple hits in with, so ideal for weapons with high elemental and status properties.
|
| Controls
|
Controls
|
| Switch Skills Set 4 (Silkbind) | |
Windmill |
Destroyer Oil |
| A multi-stage attack using a Wirebug's silk to spin the weapon around. Any incoming attack can be negated while the weapon is spinning. (Wirebug Gauge recovery speed: Fast)
|
Uses a Wirebug to cover your blade with a special ointment whose effects trigger if ignited by friction with your shield. While active, monsters flinch more easily, creating more openings for attack. (Wirebug Gauge recovery speed: Medium)
|
Controls
|
Controls
|
| Switch Skills Set 5 (Silkbind) | |
Falling Shadow |
Shield Bash |
| A technique that uses a Wirebug to leap forward and attack. If the attack lands, you will perform a Scaling Slash which can be chained into various finishing attacks. (Wirebug Gauge recovery speed: Fast)
|
A combined offensive and defensive move using a Wirebug to dash forward with your shield raised. If the attack connects with a monster, you can instantly follow up with a variety of attacks. If timed right, you can even parry an incoming attack and then continue your assault. (Wirebug Gauge recovery speed: Fast)
|
Controls
|
Controls
|


Sword & Shield Controls
 : Chop
 : Lateral Slash
- W A S D + : Shield Attack
- + : Advancing Slash
- + in the air: Plunging Thrust
- + during a combo: Spinning Reaper
 : Guard
- + E: Use an Item
- + : Rising Slash
- + : Guard Slash
- S + during a combo: Backstep
- Hold during a backstep: Charged Slash
- Advancing Slash: Executing an Advancing Slash uphill or toward a ledge will result in a terrain-specific attack.
- Use Item: When wielding a sword and shield, you can press E while holding to use items even with your weapon drawn.
- Combos: Guard Slashes and Spinning Reapers can be performed from a variety of other attacks. Use W A S D to change the direction of the attack.
- Guard Slash: Landing a Guard Slash just as a monster hits you will counter with a Shield Bash, which can combo into a Perfect Rush.
- Perfect Rush: After a backstep, press to perform a Leaping Slash, press again to perform a Perfect Rush. If you press at just the right time, it will do even more damage. You can chain into this from a successful Guard Slash too.
Silkbind Controls
 + : Windmill
- + : Falling Shadow
- Falling Shadow: A forward leaping attack. A successful hit will lead to a Scaling Slash.
- Windmill: Uses Ironsilk to swing your blade around. Its initial swing nullifies any monster's attack. (Wirebug Gauge Cost: 2)
Sword & Shield Useful Combos
Basic Combo
- , , ,
- Chop > Side Slash > Lateral Slash > Return Stroke
Powerful Combo
- , , , +
- Lateral Slash > Return Stroke > Spinning Rising Slash > Spinning Reaper
Monster-Stunning Combo
- W A S D + , ,
- Shield Attack > Shield Bash, Hard Bash
Charged Slash Combo
- , Hold S + Press , Land Attack, Press
- Chop > Charged Slash > Hit Monster > Jumping Slash
- , Hold S + Press , Land Attack, Press
- Chop > Charged Slash > Hit Monster > Falling Bash
Sword & Shield Silkbind Attacks
Destroyer Oil
Uses a Wirebug to cover your blade with a special ointment whose effects trigger if ignited by friction with your shield.
While active, monsters flinch more easily, creating more openings for attack.
Falling Shadow
A forward leaping attack. A successful hit will lead to a Scaling Slash. After that, you can follow up with a Falling Bash in midair.
- While holding , press
Windmill
Uses Ironsilk to swing your blade around. Its initial swing nullifies any monster's attack.
While holding
Can be switched out with Metsu Shoryugeki
Metsu Shoryugeki
While holding
Can be switched out with Windmill
Sword & Shield Switch Skills
Switch Skills in Monster Hunter Rise (MHR or MHRise) refer to swappable moves in a Weapon's moveset. Each of the 14 Weapon-types have 3 sets of 2 moves that can be switched out with each other, allowing for a diverse, customizable approach to combat. Switch Skills are unlocked by progressing in the game, with each set having a default move that is available from the beginning.
- Each Weapon-type has a set of swappable Silkbind Attacks and 2 sets of swappable standard moves in the base game.
- The first set of Switch Skills are unlocked by completing the Lv. 3⭐Urgent Village Quest Feathered Frenzy
- The second set of Switch Skills are unlocked by forging or upgrading 8 Weapons within a Weapon-type. Note that this needs to be done for every Weapon-type that you want to unlock Switch Skills for.
- The third set of Switch Skills are unlocked by completing the associated High Rank Hub Quest from Master Utsushi. These quests are unlocked by gaining access to the required Hub Quest rank.
- Lv. 4⭐ Study the Sword & Shield for the Sword & Shield.
- Once unlocked, Switch Skills can be swapped at any Item Box and Switch Skill combinations can be saved to Item Loadouts as well.
- The Sunbreak Expansion introduces the Switch Skill Swap mechanic, where hunters can preload 2 Switch Skill loadouts and swap between them freely during hunts. Hunters will also now have access to a total of 5 sets of swappable Switch Skills, including new Silkbind Attacks and regular moves.
- This expansion also introduces the Swap Evade, a special dodge maneuver that can be performed right after a Switch Skill Swap, allowing hunters to quickly evade and maintain distance while safely swapping skill sets.
- In the table below, the left column represents default moves available from the beginning, while the right represents unlockable Switch Skills.
| NEW! Sword & Shield Switch Skills introduced with the Sunbreak Expansion | |
|---|---|
| Switch Skills Set 1 | |
Advancing Slash |
Sliding Slash |
| A drawn attack where you perform a downward slash while stepping forward. A quick and effective action that negates staggering and knockbacks.
|
A sliding attack that slashes the target twice. The Slide maneuver reaches far, but lacks the ability to turn. Successfully landing the first hit or inputting the necessary command while sliding allows for a follow-up jumping attack.
|
Controls
|
Controls
|
| Switch Skills Set 2 | |
Hard Basher Combo |
Switch Skill Name |
| A derivative of the Shield Slam. Shield Bash > Hard Bash. A melee attack using nothing but a shield. A direct hit to the head, however, may open up more opportunities. |
Switch Skill Description |
Controls
|
Controls |
| Switch Skills Set 3 | |
Sword/Shield Combo |
Twin Blade Combo |
| A two-hit attack that uses both the sword and shield. This traditional combo opens with a horizontal shield swipe and then follows up with a stepping downward slash.
|
A two-part attack that opens with a circular slash and follows up with a blade thrust. An easy attack to get multiple hits in with, so ideal for weapons with high elemental and status properties.
|
| Controls
|
Controls
|
| Switch Skills Set 4 (Silkbind) | |
Windmill |
Destroyer Oil |
| A multi-stage attack using a Wirebug's silk to spin the weapon around. Any incoming attack can be negated while the weapon is spinning. (Wirebug Gauge recovery speed: Fast)
|
Uses a Wirebug to cover your blade with a special ointment whose effects trigger if ignited by friction with your shield. While active, monsters flinch more easily, creating more openings for attack. (Wirebug Gauge recovery speed: Medium)
|
Controls
|
Controls
|
| Switch Skills Set 5 (Silkbind) | |
Falling Shadow |
Shield Bash |
| A technique that uses a Wirebug to leap forward and attack. If the attack lands, you will perform a Scaling Slash which can be chained into various finishing attacks. (Wirebug Gauge recovery speed: Fast)
|
A combined offensive and defensive move using a Wirebug to dash forward with your shield raised. If the attack connects with a monster, you can instantly follow up with a variety of attacks. If timed right, you can even parry an incoming attack and then continue your assault. (Wirebug Gauge recovery speed: Fast)
|
Controls
|
Controls
|
Sword & Shields are a type of Weapon in Monster Hunter Rise (MHR or MHRise). This page shows a visual gallery of all different styles for Sword & Shields. as well as a comparison table comparing the most imporant aspects such as Attack, Sharpness, Affinity, etc. Weapons are often upgraded based on previous decisions, with different paths leading to different looks and necessitating different materials. You can find detailed upgrade path information in the Sword & Shield Weapon Tree or by clicking each individual weapon below.
For a comprehensive guide on how to use Sword & Shields, please click the following link: Sword & Shield
Sword & Shields in Monster Hunter Rise
Quick Search of All Sword & Shields
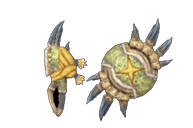
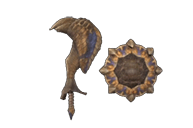
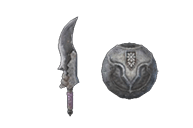
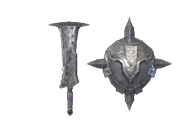
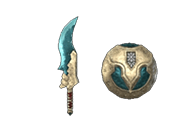
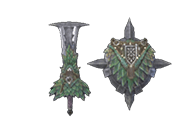
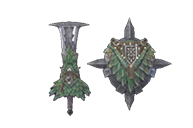
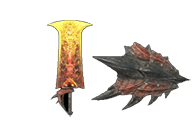
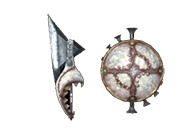
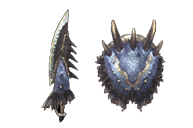
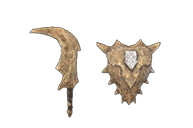
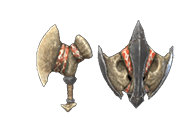
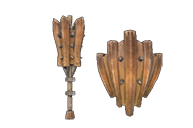
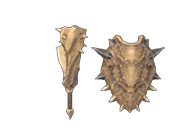
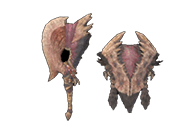
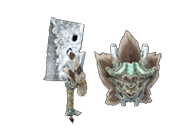
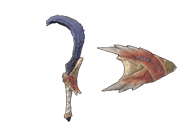
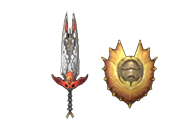
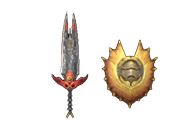
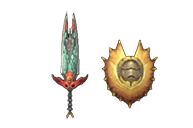
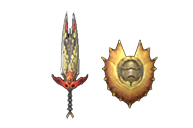
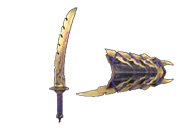
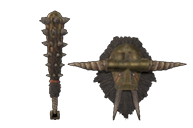
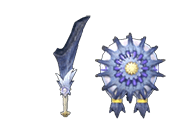
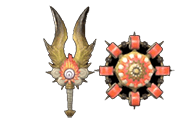
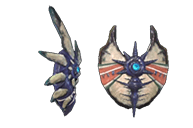
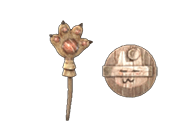
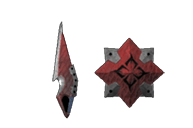
Sword & Shield Gallery
Sword and Shield Defender Weapons

Sword and Shield Kamura Weapons
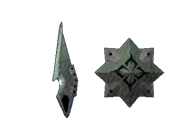
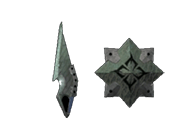


Sword and Shield Ore Weapons

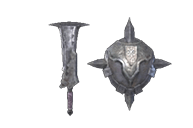

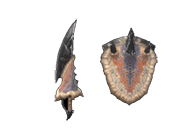
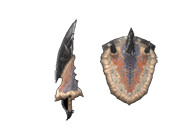


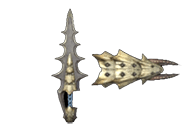


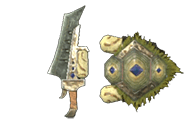


Sword and Shield Bone Weapons


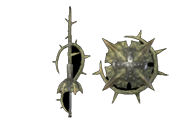


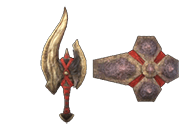


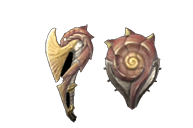

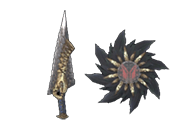
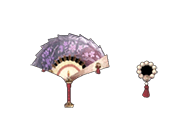
Sword and Shield Independent Weapons


Sword & Shield Weapon Tree for Monster Hunter Rise (MHR or MHRise) features the different upgrade paths for the Sword & Shield weapon. In Monster Hunter Rise, there are 14 categories of weapons that players can choose from to use for hunting Monsters. Lightweight and easy to use, the sword & shield also boasts outstanding attack speed. The shield can be used to guard, though it may not hold up to certain attacks. This page lists all of the Sword & Shields in Monster Hunter Rise, showing their effectiveness and upgrade paths.
Sword & Shield Weapon Traits
- One of the highest DPS raw weapons.
- Hunters can use Items with their weapons drawn and whilst guarding.
- Fast recovery time, allowing for the chaining of attacks and blocks, at the expense of damage.
- A blade that allows you to attack quickly and up close while evading most incoming blows. Comes with a shield that can guard AND bludgeon too!
Master Rank Sword & Shield
You can check out the Sword & Shield Weapon Tree to find the different upgrade paths for Each Master Rank Sword & Shield weapon. Note that these Weapons can only be accessed by players that have purchased and installed the Sunbreak Expansion. For those who own the expansionless version of Monster Hunter, these Weapons are unobtainable.
Sword & Shield Switch Skills
Switch Skills in Monster Hunter Rise (MHR or MHRise) refer to swappable moves in a Weapon's moveset. Each of the 14 Weapon-types have 3 sets of 2 moves that can be switched out with each other, allowing for a diverse, customizable approach to combat. Switch Skills are unlocked by progressing in the game, with each set having a default move that is available from the beginning.
- Each Weapon-type has a set of swappable Silkbind Attacks and 2 sets of swappable standard moves in the base game.
- The first set of Switch Skills are unlocked by completing the Lv. 3⭐Urgent Village Quest Feathered Frenzy
- The second set of Switch Skills are unlocked by forging or upgrading 8 Weapons within a Weapon-type. Note that this needs to be done for every Weapon-type that you want to unlock Switch Skills for.
- The third set of Switch Skills are unlocked by completing the associated High Rank Hub Quest from Master Utsushi. These quests are unlocked by gaining access to the required Hub Quest rank.
- Lv. 4⭐ Study the Sword & Shield for the Sword & Shield.
- Once unlocked, Switch Skills can be swapped at any Item Box and Switch Skill combinations can be saved to Item Loadouts as well.
- The Sunbreak Expansion introduces the Switch Skill Swap mechanic, where hunters can preload 2 Switch Skill loadouts and swap between them freely during hunts. Hunters will also now have access to a total of 5 sets of swappable Switch Skills, including new Silkbind Attacks and regular moves.
- This expansion also introduces the Swap Evade, a special dodge maneuver that can be performed right after a Switch Skill Swap, allowing hunters to quickly evade and maintain distance while safely swapping skill sets.
Important: For a comprehensive guide on how to use Sword & Shields, please click the following link: Sword & Shield
MH Rise Sword & Shield Weapon Tree
Sword & Shield Defender Tree
 Defender Sword I
 110
110  30
30
 Champion Sword150 30
 Champion Sword II190 30
- Champion Sword III210 30
 Guardian Sword230 30
Sword & Shield Kamura Tree
 Kamura Sword I
50
- Kamura Sword II
60
 Kamura Sword III
90
 Kamura Sword IV
140
 Kamura Sword V
150 
 Kamura Ninja Sword
190 
 Kamura Warrior Sword 250

- Kamura Warrior Sword + 290
 Duke's Baselard 320
 31
31
 Bloodlust Blade 330 34
- Hidden Edge I
120
- Hidden Edge II
170
 Flash in the Night
180
- Nightbloom 250
 30%
30%
- Nightbloom + 280 30%
- Avidya Edge 300 30%
- Phecda's Asterism 340
 11
11
- Hana no Nagoriwo I
110  15
15
- Hana no Nagoriwo II
170 17
- Kurenawi Ougi
190 19
- Kurenawi Ougi + 300 15% 30
- Kurenawi Kunpuu 310 15% 33
- Kurenawi Kunpuu + 320 15% 36
- Exorcising Sword I
120
- Exorcising Sword II
180 
- Shaucha Pureblade
190
- Crown of the Protector 260

- Shaucha Gloryblade 240
 37
37
- Shaucha Gloryblade + 270 41
- Shaucha Divine Gloryblade 320 50
- Usurper's Firebolt I
120  15
15
- Usurper's Firebolt II
180 24
- Despot's Crookbolt
200 27
- Despot's Crookbolt + 310 39
- Oppressor's Bounty 330 44
- Dirty Baron I
90 17
- Dirty Baron II
110 23
- Dirty Marquis
140 34
- Dirty Marquis + 260 37
- Dirty Graf 350 42
- Royal Claw I
90 18
- Royal Claw II
100 20
- Royal Ludroth Claw
100 27
- Royal Ludroth Claw + 240 38
- Royal Waterclaw 290 40
- Royal Waterclaw + 330 51
- Golm Sword 310
- Golm Sword + 330
- Rex Talon I
160
- Rex Talon II
210
- Tigrex Sword
210
- Tigrex Sword + 330 -15%
- Great Tigrex Sword 340 -15%
- Great Tigrex Sword + 350 -15%
- Frost Edge I
80  18
18
- Frost Edge II
80 24
- Hi Frost Edge
150 30
- Crystallized Edge 250 48
- Crystallized Edge + 300 54
- Permafrost Edge 320 62
- Frostmoon Hatchet 300 18
- Frostmoon Hatchet + 320 22
- Winter's Feast Hatchet 330 26
Sword & Shield Ore Tree
- Hunter's Knife I
80
- Hunter's Knife II
100
- Fighter Sword
110
- Iron Beater I
140
- Iron Beater II
170
- Smithy's Pride
200
- Sarganas Rapier 300 20%
 31
31
- Sarganas Rapier + 310 20% 35
- Astalos Rapier 320 20% 39
- Soldier's Dagger I
190
- Soldier's Dagger II
200
- Commander's Dagger
200
- Commander's Dagger + 270
- Elite Dagger 350
- Odyssey Blade I
140 24
- Odyssey Blade II
160 26
- Master Odyssey
170 33
- Oresteia 280 53
- Oresteia + 310 61
- Agamemnon 320 67
- Pukei Sword I
110 15
- Pukei Sword II
170 22
- Venomedge
180 30
- Venomedge + 240 32
- Datura Splitter 270 34
- Datura Splitter + 320 36
- Djinn I
120  18
18
- Djinn II
190 23
- Blazing Falchion 200 33
- Blazing Falchion + 310 45
- Enspirited Ifrit 330 47
- Shining Wyvern Blade 310 35% 42
- Icicle Spike I
90 12
- Icicle Spike II
120 15
- Nardebosche
160 20
- Nardeglacon 260 35% 28
- Nardeglacon + 280 35% 36
- Never Event 300 35% 46
- Cunning Riposte I
100 8
- Cunning Riposte II
150 10
- Guard Breaker
160 13
- Guard Breaker + 260 20
 19
19
- True Guard Breaker 280 20 21
- True Guard Breaker + 340 30 23
- Khezu Razor I
80 21
- Khezu Razor II
100 22
- Painful Razor
140 30
- Painful Razor + 260 15% 42
- Dread Razor 290 15% 44
- Dread Razor + 330 15% 49
- Hypnos Knife I
80  17
17
- Hypnos Knife II
90 23
- Morpheus Knife
140 26
- Morpheus Knife + 250 28
- Karmanight 320 32
Sword & Shield Bone Tree
- Bone Kukri I
90
- Bone Kukri II
110
- Chief Kukri
130
- Bone Barong I
150
- Bone Barong II
180
- Grand Barong
190
- Grand Barong + 270
- Barong Kutot 320
- Barong Kutot + 360
- Dual Carapace 280 30 21
- Dual Carapace + 310 30 26
- Dual Scissors 320 30 32
- Princess Rapier I
180 14
- Princess Rapier II
210 24
- Queen Rapier
220 28
- Queen Rapier + 260 10% 29
- Empress Rapier 310 10% 30
- Empress Rapier + 330 10% 31
- Lunatic Rose 330 10% 31
- Rosenmesser 300 20% 18
- Rosenmesser + 310 20% 21
- Rosengedien 320 20% 24
- Kaktus Gedeihen 310 15% 40
- Bone Tabar I
160
- Bone Tabar II
190
- Ragdos Tabar
230
- Ragdos Tabar + 300 -25%
- Bonebreaker Tabar 350 -25%
- Bonebreaker Tabar + 370 -25%
- Naab Sword 310 10%
- Naab Sword + 320 10%
- Feral Fangs 330 10%
- Carapace Mace I
120
- Carapace Mace II
150
- Barroth Club
200
- Barrotherang 260 -20%
- Barrotherang + 280 -20%
- Pneumatic Drillblade 360 -20%
- Studded Club I
160
- Studded Club II
220
- Spiked Bat
230
- Spiked Bat + 350 -5%
- Barbarian Terror 370 -5%
- Barbarian Terror + 380 -5%
- Brash Buddies I
100
- Brash Buddies II
150
- Cocky Comrades
180
- Flammensucher I
200 15
- Flammensucher II
210 18
- Gnashing Flammensucher
220 21
- Gnashing Flammensucher + 280 -20% 27
- Lohensieger 330 -20% 28
- Lohensieger + 350 -20% 29
- Mincing Blade I
170 10
- Mincing Blade II
220 11
- Chef's Knife
230 14
- Chef's Best Knife 310 -15% 20
- Chef's Best Knife + 330 -15% 22
- Chef's Ultimate Knife 350 -15% 23
- Izuchi Sickle I
60
- Izuchi Sickle II
80
- Snapper Sickle
150
- Snapper Sickle + 240 15%
- Blower's Scythes 330 15%
- Lava Pick I
120 10
- Lava Pick II
150 15
- Burly Beak
190 17
- Burly Beak + 320 20 29
- Bruising Beak 340 30 32
Sword & Shield Independent Tree
- Silver Separator320 0% 41
- Secta Nulo I
80
- Secta Unu
90
- Secta Nulo White I
110 17
- Secta Unu White
140 19
- Secta Du White 240 25
- Secta Tre White 330 37
- Secta Nulo Black I
140 19
- Secta Nulo Black II160 21
- Secta Unu Black190 24
- Secta Du Black 260 30
- Secta Tre Black 330 38
- Secta Nulo Green I100
 14
14
- Secta Unu Green160 19
- Secta Du Green 250 21
- Secta Tre Green 320 24
- Secta Nulo Yellow I100 16
- Secta Unu Yellow170 23
- Secta Du Yellow 260 28
- Secta Tre Yellow 330 35
- Secta Nulo Red I80 11
- Secta Nulo Red II90 13
- Secta Unu Red140 19
- Secta Du Red 240 27
- Secta Tre Red 330 39
- Sinister Sword I90
 13
13
- Sinister Sword II140 18
- Sinister Shadekeeper200 26
- Sinister Shadekeeper + 290 28
- Tormented Shadekeeper 320 30
- Spirit Stealer 330 33
- Sucher-Ankh 300 15% 21
- Sucher-Ankh + 310 15% 24
- Sieger-Ankh 320 15% 28
- Le Detecteur 280 35% 40
- Le Limier 290 35% 43
- Lugen Verite 340 -30% / 15% 45
- Rajang Club I200 11
- Rajang Club II210 17
 Banned Rajang Club220 19
- Banned Rajang Club + 350 -10% 25
- Cursed Rajang Club 360 -10% 26
- Demonlord Bludgeon 330 13
- Azure Elder Sword I170 10
- Azure Elder Sword II190 12
- Abyssal Gale Shredder210 15
- Windchaser 210 21
- Thunderbolt Sword I180 33
- Abyssal Storm Shredder190 35
- Atomic Mind 310 69
- Icesteel Dagger I170 31
- Daora's Razor180 36
- Daora's Razor + 300 10% 49
- Daora's Maelstrom 310 10% 54
- Teostra's Spada I180 36
- Teostra's Emblem190 39
- Teostra's Emblem + 330 40
- Teostra's Medal 340 42
- Redwing Swiftblade I170 32
- Vermilion Orgul180 34
- Gates of Heaven 340 56
- Abyssal Sunburst 350 -25% 18
- Noble Ana Palas 340 24
- Ominous Treasure 360 41
- Sleepy Shellsword I100
 11
11
- Sleepy Shellsword II150 15
- Waking Nightmare150 19
- Waking Nightmare + 270 20 21
- Dreamwaver 330 30 22
- Catspaw I80 15
- Catspaw II100 26
- Catburglar130 33
- Catburglar + 210 34
- Catlike Tread 300 35
- Ninja Sword I190
- Hi Ninja Sword190
- Hi Ninja Sword + 250 100%
- Ninja Master Sword 300 100%
- Royal Order's Sword 250 10% 50
- Royal Order's Sword + 320 10% 50
- Antique Machina SS 330 16
- Rampage Sword I150
| MHR Weapon Types |
Bow ♦ Charge Blade ♦ Dual Blades ♦ Great Sword ♦ Gunlance ♦ Hammer ♦ Heavy Bowgun ♦ Hunting Horn ♦ Insect Glaive ♦ Lance ♦ Light Bowgun ♦ Long Sword ♦ Switch Axe |
 Anonymous
- Anonymous
Ok so after testing Zr+A i notices the blue jab has a Counter mechanic where if you use the attack at the moment a monster is about to hit your shield , you will instead trust your swield forward.
Also you are able to link Blue Jab whit your other combos
- Anonymous
demo doesn't mention it in hunter notes, nor the wiki; but Zr + A makes you burst with blue sparks what does it functionally do?
Reminder: If you hate fextralife shoving their twitch auto-player onto every webpage (And thus forcing you to be part of their viewer count without your consent); You can use Ublock Origin to remove it without crappylife behing able to extort you to 'BeCoMe a ViP!' to get rid of it!
Feel free to do this in order to stop giving bloated viewer counts to streamers too lazy to 100% ANY wiki they make!
Make sure they cannot make money off of you!
19
+11
-1