Hammer |
|
|---|---|
| Weapon Type | Melee |
| Damage Type | Blunt Damage |
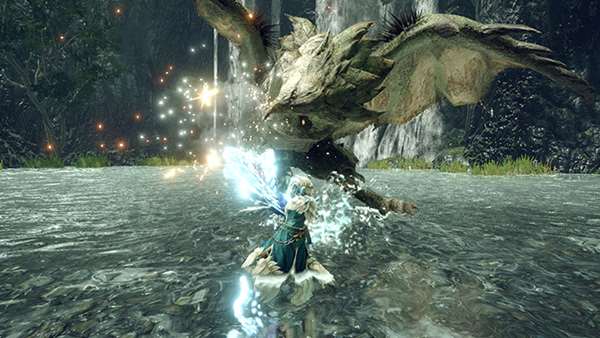
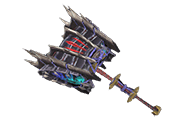
Hammer (ハンマー hanmaa, "hammer") is one of the fourteen weapon categories in Monster Hunter Rise (MHR or MHRise). Like all Weapons, it features a unique set of moves and an upgrade path that branches out depending on the materials used.
A blunt force weapon that hits hard yet doesn't hamper mobility. A smack to the head may stun enemies. Has powerful charge attacks and a variety of maneuvers.
Hammer Weapon Tree
- You can check out our Hammer Weapon Tree to find the different upgrade paths for the Hammer weapon category.
- Click here for a Comparative List of Hammers.
- Click here to see MH Rise Hammers Builds. These builds were created around the weapon types, each with a specific set of handpicked Weapons, Equipment and complementing Skills and Decorations. These builds with Specific Hammers may be paired with a set of Armor to optimize the combination in order to create a Build type focused on the Skills available with the selected equipment.
- Master Rank Hammers are the top tier Hammers available in Monster Hunter Rise, and as all Master Rank Weapons, can only be obtained by owning the Sunbreak Expansion. These weapons use Master Rank Materials that can be obtained by completing quests and doing endgame content. Click here to see all Master Rank Hammers
Best Hammer of MH Rise
Hammer Weapon Traits
- Doesn't hamper mobility despite its weight.
- Deals only blunt damage, which stuns (KO) monsters.
- Hard hitting moveset complemented by powerful charge attacks.
Hammer Weapon Features
Weapon Advantages
- Powerful attacks that can more easily stun and exhaust monsters compared to most other weapons.
- Surprisingly high mobility despite the weapon's heavy nature and unique charge mechanics.
- One of the more easy-to-learn weapons for beginners, and easy-to-master for advanced players.
Weapon Disadvantages
- Limited weapon reach, requiring more precise understanding of hitboxes and monster movesets.
- No moves that can deal Severing Damage, therefore unable to cut monster tails.
- Can be very stamina-intensive, requiring good management of the resource.
Hammer Controls
 : Overhead Smash
 : Side Smash
- Hold
 : Charge
 - While Charging

 : Charged Attack
 - Press
 while charging: Charge Switch
 - Charge Switch: Changes Charge Attack action. Activate it again to reset it. Doing so will also set your charge level to max.
- Charge: Holding down the Charge button will expend stamina to store up power. There are three charge levels, each with its own attack variation.
Silkbind Controls
- Press
 +
+  : Silkbind Spinning Bludgeon
 - Press
 +
+  : Impact Crater
 - Silkbind Spinning Bludgeon: A forward leaping attack. You can charge before unleashing the attack by holding the charge button, massively increasing its power.
- Impact Crater: Jump straight up and dish out a devastating rising attack that also hits multiple times on the way down. The number of hits you'll land and the damage you'll deal depends on how much you charge prior to activation. (Wirebug Gauge Cost: 2)
Hammer Weapon Useful Combos
Basic Combo
 ,
,  ,
,  : Overhead Smash I > Overhead Smash II > Upswing
Big Bang Combo
 ,
,  ,
,  ,
,  ,
,  : Side Smash > Big Bang I > Big Bang II > Big Bang III > Big Bang Finisher
Charged Side Blow Combo
 Hold
Hold  ,
,  ,
,  : Charged Side Blow > Charged Follow-up > Overhead Smash I
Monster-Stunning Combo
 Hold
Hold  ,
,  ,
,  ,
,  : Charge II > Side Smash > Overhead Smash II > Upswing
Spinning Bludgeon Follow-ups
- Note: Release
 at charge tier 3 while moving.
  Hold
Hold  ,
, 
 Hold
Hold  ,
,  during first spin: Charge > Spinning Bludgeon > Spinning Side Smash
 Hold
Hold  ,
, 
 Hold
Hold  ,
,  2nd to 3rd spin: Charge > Spinning Bludgeon > Spinning Follow-up
 Hold
Hold  ,
, 
 Hold
Hold  ,
,  4th to 5th spin: Charge > Spinning Bludgeon > Spinning Strong Upswing
Hammer Silkbind Attacks
Impact Burst
A Silkbind attack that wraps your weapon in Ironsilk.
For a short period of time, any charged attack performed causes the silk to vibrate, creating a shockwave that makes it easier to flinch monsters.
Silkbind Spinning Bludgeon
Unleashes a spinning attack that deals multiple hits while leaping forward. You can perform this attack from a charged state, or hold down the charge button when the move starts to charge it up and let rip anytime you want by releasing the button.
Press
Can be switched out with Dash Breaker
Hammer Switch Skills
Switch Skills in Monster Hunter Rise (MHR or MHRise) refer to swappable moves in a Weapon's moveset. Each of the 14 Weapon-types have 3 sets of 2 moves that can be switched out with each other, allowing for a diverse, customizable approach to combat. Switch Skills are unlocked by progressing in the game, with each set having a default move that is available from the beginning.
- Each Weapon-type has a set of swappable Silkbind Attacks and 2 sets of swappable standard moves in the base game.
- The first set of Switch Skills are unlocked by completing the Lv. 3⭐Urgent Village Quest Feathered Frenzy
- The second set of Switch Skills are unlocked by forging or upgrading 8 Weapons within a Weapon-type. Note that this needs to be done for every Weapon-type that you want to unlock Switch Skills for.
- The third set of Switch Skills are unlocked by completing the associated High Rank Hub Quest from Master Utsushi. These quests are unlocked by gaining access to the required Hub Quest rank.
- Lv. 5⭐ Honing Your Hammer for the Hammer.
- Once unlocked, Switch Skills can be swapped at any Item Box and Switch Skill combinations can be saved to Item Loadouts as well.
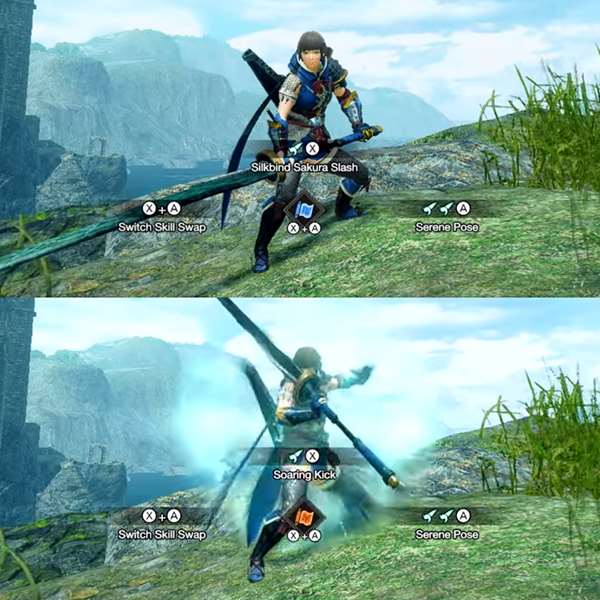
- The Sunbreak Expansion introduces the Switch Skill Swap mechanic, where hunters can preload 2 Switch Skill loadouts and swap between them freely during hunts. Hunters will also now have access to a total of 5 sets of swappable Switch Skills, including new Silkbind Attacks and regular moves.
- This expansion also introduces the Swap Evade, a special dodge maneuver that can be performed right after a Switch Skill Swap, allowing hunters to quickly evade and maintain distance while safely swapping skill sets.
- In the table below, the left column represents default moves available from the beginning, while the right represents unlockable Switch Skills.
Switch Skill Swap Mechanic
The Switch Skill Swap mechanic allows the hunter to assign Switch Skill loadouts and swap between them on the fly, whether in combat or otherwise. This allows the hunter to further expand their arsenal of available moves during hunts and to further customize their builds to accommodate their playstyle. Being able to make split-second decisions to swap loadouts and use specific moves to counter monster attacks as they wind up is sure to add an exciting new dimension to monster hunting.
With the Switch Skill Swap mechanic, hunters are given two loadouts to switch between, denoted by the ![]() Red Scroll and
Red Scroll and ![]() Blue Scroll icons on the UI. Hunters can set up each loadout from the Item Box at Kamura Village, Elgado Outpost or even at Camps while out on hunts, just as they would when assigning Switch Skills individually. When out on hunts, hunters can swap between the two loadouts by holding
Blue Scroll icons on the UI. Hunters can set up each loadout from the Item Box at Kamura Village, Elgado Outpost or even at Camps while out on hunts, just as they would when assigning Switch Skills individually. When out on hunts, hunters can swap between the two loadouts by holding ![]() and pressing the
and pressing the ![]() +
+ ![]() buttons. The character will perform a quick animation and briefly flash with energy, signifying a successful swap.
buttons. The character will perform a quick animation and briefly flash with energy, signifying a successful swap.
| NEW! Hammer Switch Skills introduced with the Sunbreak Expansion | |
|---|---|
| Switch Skill Set 1 | |
Side Smash |
Switch Skill Name |
| A side swipe with the hammer. Can be used as a starting point for a Big Bang combo. |
Switch Skill Description |
Controls
|
Controls |
| Switch Skills Set 2 | |
Charge Switch: Strength |
Switch Skill Name |
| A special action affecting charge attacks. Lengthens required charge time, but allows for more powerful actions. |
Switch Skill Description |
Controls
|
Controls |
| Switch Skills Set 3 | |
Spinning Bludgeon |
Spinning Bludgeon: Charge |
| Charge as you advance to unleash a devastating spinning attack. The attack hits with each rotation allowing you to land multiple successive blows. In addition, the number of rotations determines which attack can be performed next.
|
A technique that stores released power and funnels it into the next Charge Switch attack. Power is built up when performing a Spinning Bludgeon. The charge level is then maintained when executing a Charge Switch. Make good use of this to unleash a series of level 3 charged attacks.
|
Controls
|
Controls
|
| Switch Skills Set 4 (Silkbind) | |
Silkbind Spinning Bludgeon |
Dash Breaker |
| A spinning attack using a Wirebug. It moves along an arc pattern much like midair spinning attacks performed on a slope, but is just as effective on flat terrain. (Wirebug Gauge recover speed: Fast)
|
An attack performed by rushing forward with the help of a Wirebug. A simple skill evoking the philosophy of "beelining and then smashing." Any enemy attack damage is negated while launching forward. (Wirebug Gauge recover speed: Fast)
|
Controls
|
Controls
|
Keeping Sway |
|
| A maneuver that uses a Wirebug to quickly evade an attack at high speed. By using a Wirebug, you're able to maintain your charge during the evade. (Wirebug Gauge recovery speed: Fast)
|
|
Controls
|
|
| Switch Skills Set 5 (Silkbind) | |
Impact Crater |
Impact Burst |
| A Silkbind attack that makes you leap in the air and come down with multiple earth-shattering strikes. The power of the attack and number of hits you'll land are determined by your charge level at the start of the attack. (Wirebug Gauge recovery speed: Fast)
|
A Silkbind attack that wraps your weapon in Ironsilk. For a short period of time, any charged attack performed causes the silk to vibrate, creating a shockwave that makes it easier to flinch monsters. (Wirebug Gauge recovery speed: Medium)
|
Controls
|
Controls
|
Hammer Controls
 : Overhead Smash
 : Side Smash
- Hold
 : Charge
 - While Charging
 Hold W: Charged Attack
 - Press
 while charging: Charge Switch
 - Charge Switch: Changes Charge Attack action. Activate it again to reset it. Doing so will also set your charge level to max.
- Charge: Holding down the Charge button will expend stamina to store up power. There are three charge levels, each with its own attack variation.
Silkbind Controls
- Press
 +
+  : Silkbind Spinning Bludgeon
 - Press
 +
+  : Impact Crater
 - Silkbind Spinning Bludgeon: A forward leaping attack. You can charge before unleashing the attack by holding the charge button, massively increasing its power.
- Impact Crater: Jump straight up and dish out a devastating rising attack that also hits multiple times on the way down. The number of hits you'll land and the damage you'll deal depends on how much you charge prior to activation. (Wirebug Gauge Cost: 2)
Hammer Weapon Useful Combos
Basic Combo
 ,
,  ,
,  : Overhead Smash I > Overhead Smash II > Upswing
Big Bang Combo
 ,
,  ,
,  ,
,  ,
,  : Side Smash > Big Bang I > Big Bang II > Big Bang III > Big Bang Finisher
Charged Side Blow Combo
 Hold W,
  ,
,  : Charged Side Blow > Charged Follow-up > Overhead Smash I
Monster-Stunning Combo
 Hold W,
  ,
,  ,
,  : Charge II > Side Smash > Overhead Smash II > Upswing
Spinning Bludgeon Follow-ups
- Note: Release
 at charge tier 3 while moving.
  Hold W, W A S D +
  Hold W,
  during first spin: Charge > Spinning Bludgeon > Spinning Side Smash
 Hold W, W A S D +
  Hold W,
  2nd to 3rd spin: Charge > Spinning Bludgeon > Spinning Follow-up
 Hold W, W A S D +
  Hold W,
  4th to 5th spin: Charge > Spinning Bludgeon > Spinning Strong Upswing
Hammer Silkbind Attacks
Impact Burst
A Silkbind attack that wraps your weapon in Ironsilk.
For a short period of time, any charged attack performed causes the silk to vibrate, creating a shockwave that makes it easier to flinch monsters.
Silkbind Spinning Bludgeon
Unleashes a spinning attack that deals multiple hits while leaping forward. You can perform this attack from a charged state, or hold down the charge button when the move starts to charge it up and let rip anytime you want by releasing the button.
- While holding
 , press
Hammer Switch Skills
Switch Skills in Monster Hunter Rise (MHR or MHRise) refer to swappable moves in a Weapon's moveset. Each of the 14 Weapon-types have 3 sets of 2 moves that can be switched out with each other, allowing for a diverse, customizable approach to combat. Switch Skills are unlocked by progressing in the game, with each set having a default move that is available from the beginning.
- Each Weapon-type has a set of swappable Silkbind Attacks and 2 sets of swappable standard moves in the base game.
- The first set of Switch Skills are unlocked by completing the Lv. 3⭐Urgent Village Quest Feathered Frenzy
- The second set of Switch Skills are unlocked by forging or upgrading 8 Weapons within a Weapon-type. Note that this needs to be done for every Weapon-type that you want to unlock Switch Skills for.
- The third set of Switch Skills are unlocked by completing the associated High Rank Hub Quest from Master Utsushi. These quests are unlocked by gaining access to the required Hub Quest rank.
- Lv. 5⭐ Honing Your Hammer for the Hammer.
- Once unlocked, Switch Skills can be swapped at any Item Box and Switch Skill combinations can be saved to Item Loadouts as well.
- The Sunbreak Expansion introduces the Switch Skill Swap mechanic, where hunters can preload 2 Switch Skill loadouts and swap between them freely during hunts. Hunters will also now have access to a total of 5 sets of swappable Switch Skills, including new Silkbind Attacks and regular moves.
- This expansion also introduces the Swap Evade, a special dodge maneuver that can be performed right after a Switch Skill Swap, allowing hunters to quickly evade and maintain distance while safely swapping skill sets.
- In the table below, the left column represents default moves available from the beginning, while the right represents unlockable Switch Skills.
| NEW! Hammer Switch Skills introduced with the Sunbreak Expansion | |
|---|---|
| Switch Skill Set 1 | |
Side Smash |
Switch Skill Name |
| A side swipe with the hammer. Can be used as a starting point for a Big Bang combo. |
Switch Skill Description |
Controls
|
Controls |
| Switch Skills Set 2 | |
Charge Switch: Strength |
Switch Skill Name |
| A special action affecting charge attacks. Lengthens required charge time, but allows for more powerful actions. |
Switch Skill Description |
Controls
|
Controls |
| Switch Skills Set 3 | |
Spinning Bludgeon |
Spinning Bludgeon: Charge |
| Charge as you advance to unleash a devastating spinning attack. The attack hits with each rotation allowing you to land multiple successive blows. In addition, the number of rotations determines which attack can be performed next.
|
A technique that stores released power and funnels it into the next Charge Switch attack. Power is built up when performing a Spinning Bludgeon. The charge level is then maintained when executing a Charge Switch. Make good use of this to unleash a series of level 3 charged attacks.
|
Controls
|
Controls
|
| Switch Skills Set 4 (Silkbind) | |
Silkbind Spinning Bludgeon |
Dash Breaker |
| A spinning attack using a Wirebug. It moves along an arc pattern much like midair spinning attacks performed on a slope, but is just as effective on flat terrain. (Wirebug Gauge recover speed: Fast)
|
An attack performed by rushing forward with the help of a Wirebug. A simple skill evoking the philosophy of "beelining and then smashing." Any enemy attack damage is negated while launching forward. (Wirebug Gauge recover speed: Fast)
|
Controls
|
Controls
|
Keeping Sway |
|
| A maneuver that uses a Wirebug to quickly evade an attack at high speed. By using a Wirebug, you're able to maintain your charge during the evade. (Wirebug Gauge recovery speed: Fast)
|
|
Controls
|
|
| Switch Skills Set 5 (Silkbind) | |
Impact Crater |
Impact Burst |
| A Silkbind attack that makes you leap in the air and come down with multiple earth-shattering strikes. The power of the attack and number of hits you'll land are determined by your charge level at the start of the attack. (Wirebug Gauge recovery speed: Fast)
|
A Silkbind attack that wraps your weapon in Ironsilk. For a short period of time, any charged attack performed causes the silk to vibrate, creating a shockwave that makes it easier to flinch monsters. (Wirebug Gauge recovery speed: Medium)
|
Controls
|
Controls
|
Hammers are a type of Weapon in Monster Hunter Rise (MHR or MHRise). This page shows a visual gallery of all different styles for Hammers. as well as a comparison table comparing the most imporant aspects such as Attack, Sharpness, Affinity, etc. Weapons are often upgraded based on previous decisions, with different paths leading to different looks and necessitating different materials. You can find detailed upgrade path information in the Hammer Weapon Tree or by clicking each individual weapon below.
For a comprehensive guide on how to use Hammers, please click the following link: Hammer
Hammers in Monster Hunter Rise
Quick Search of All Hammers
Hammer Gallery
Hammer Defender Weapons
Hammer Kamura Weapons
Master Rank Hammer Kamura Weapons
Hammer Ore Weapons
Master Rank Hammer Ore Weapons
Hammer Bone Weapons
Master Rank Hammer Bone Weapons
Hammer Independent Weapons
Master Rank Hammer Independet Weapons
Hammer Weapon Tree for Monster Hunter Rise (MHR or MHRise) features the different upgrade paths for the Hammer weapon. In Monster Hunter Rise, there are 14 categories of weapons that players can choose from to use for hunting Monsters. The Hammer is a blunt force weapon that hits hard yet doesn't hamper mobility, a smack to the head may stun enemies. The Hammer has powerful charge attacks and a variety of maneuvers. This page lists all of the Hammers in Monster Hunter Rise, showing their effectiveness and upgrade paths.
Hammer Weapon Traits
- Doesn't hamper mobility despite its weight.
- Deals only blunt damage, which stuns (KO) monsters.
- Hard hitting moveset complemented by powerful charge attacks.
- A blunt force weapon that hits hard yet doesn't hamper mobility.
- A smack to the head may stun enemies. Has powerful charge attacks and a variety of maneuvers.
Master Rank Hammer Weapons
Introduced with the release of the Sunbreak Expansion, Master Rank Weapons are a brand new and more powerful tier of Weaapons available to hunters to help them deal with the deadlier Monsters that can be found on the Sunbreak Expansion.
Note that these Weapons can only be accessed by players that have purchased and installed the Sunbreak Expansion. For those who own the expansionless version of Monster Hunter, these Weapons are unobtainable.
- You can check out the Hammer Weapon Tree to find the different upgrade paths for each Master Rank Hammer weapon.
Hammer Weapon Features
Weapon Advantages
- Powerful attacks that can more easily stun and exhaust monsters compared to most other weapons.
- Surprisingly high mobility despite the weapon's heavy nature and unique charge mechanics.
- One of the more easy-to-learn weapons for beginners, and easy-to-master for advanced players.
Weapon Disadvantages
- Limited weapon reach, requiring more precise understanding of hitboxes and monster movesets.
- No moves that can deal Severing Damage, therefore unable to cut monster tails.
- Can be very stamina-intensive, requiring good management of the resource.
Important: For a comprehensive guide on how to use Hammers, please click the following link: Hammer
MH Rise Hammer Weapon Tree
Hammer Defender Weapon Tree
 Defender Hammer I
 110
110  30
30
 Champion Hammer
 150
150  30
30
 Champion Hammer II
 190
190  30
30
 Champion Hammer III
 210
210  30
30
 Guardian Hammer
 230
230  30
30
Hammer Kamura Tree
 Kamura Hammer I
 50
50
 Kamura Hammer II
 60
60
 Kamura Hammer III
 90
90
 Kamura Hammer IV
 140
140
 Kamura Hammer V
 150
150 
 Kamura Ninja Hammer
 190
190 

 Kamura Warrior Hammer
  240
240 


 Kamura Warrior Hammer +
  280
280 


 Duke Smiter
  310
310 

 30
30
 Tooth Grinder
  310
310 

 30
30
 Purity Hammer I
 120
120  21
21
 Purity Hammer II
 170
170 
 26
26
 Sinter Hammer
 200
200 
 31
31
 Sinter Hammer +
  290
290 20%
20% 

 33
33
 Enlightenment Hammer
  300
300 20%
20% 

 35
35
 Enlightenment Hammer +
  310
310 20%
20% 

 38
38
 Pure Hammer Mitama
  310
310 10%
10% 


 21
21
 Binding Bludgeon I
 90
90  23
23
 Binding Bludgeon II
 160
160 
 27
27
 Armored Gogue
 170
170 
 30
30
 Armored Gogue +
  230
230 

 31
31
 Armored Megagogue
  240
240 

 32
32
 Armored Megagogue +
  320
320 

 34
34
 Almudron Hammer I
 130
130  40
40
 Almudron Hammer II
 140
140 

 48
48
 Doom Bringer Hammer
 190
190 

 51
51
 Hell Bringer Hammer
  260
260 


 64
64
 Hell Bringer Hammer +
  300
300 


 69
69
 Doomsday Hammer
  310
310 


 74
74
 Magma Masher
  280
280 

 67
67
 Magma Masher +
  300
300 

 70
70
 Volcanic Impact
  310
310 

 75
75
 Five-Pronged Hammer I
 120
120
 Five-Pronged Hammer II
 180
180 
 Great Pronged Hammer
 190
190 
 Higher Pronged Hammer
  260
260 

 15
15
 Higher Pronged Hammer +
  280
280 

 18
18
 Peak Pronged Hammer
  320
320 

 24
24
 Wroggi Hammer I
 90
90  27
27
 Wroggi Hammer II
 130
130  31
31
 Dirty Hammer
 140
140 


 36
36
 Dirty Hammer +
  230
230


 37
37
 Heavy Hammer
  320
320 


 38
38
 Gun Hammer I
 90
90  37
37
 Gun Hammer II
 150
150 


 45
45
 Deadeye Revolver
 160
160 


 50
50
 Break Revolver
  230
230 15
15 


 53
53
 Break Revolver +
  250
250 20
20 


 56
56
 Burst Revolver
  320
320 30
30


 61
61
Hammer Ore Tree
 Iron Hammer I
 80
80
 Iron Devil
 100
100
 War Hammer I
 110
110
 War Mace
 140
140
 War Stamp I
 160
160 
 War Basher
 180
180 
 Astalos Sparkler
  290
290 20%
20% 

 28
28
 Astalos Sparkler +
  300
300 20%
20% 

 32
32
 Astalos Striker
  310
310 20%
20% 

 36
36
 Great Nova I
 160
160 


 35
35
 Great Nova II
 180
180 


 37
37
 Super Nova
 200
200 


 40
40
 Super Nova +
  250
250 10
10 


 46
46
 Hyper Nova
  280
280 15
15 


 52
52
 Hyper Nova +
  320
320 20
20 


 59
59
 Striped Striker I
 150
150
 Striped Striker II
 210
210
 Tigrex Hammer
 220
220
 Tigrex Hammer +
  330
330 -20%
-20% 
 Huge Tigrex Hammer
  340
340 -20%
-20% 
 Huge Tigrex Hammer +
  350
350 -20%
-20% 
 Flaming Fury I
 140
140  17
17
 Flaming Fury II
 210
210 

 20
20
 Phoenix Fury
 230
230 

 22
22
 Phoenix Fury +
  280
280  -20%
-20% 


 26
26
 Phoenix Testament
  320
320  -20%
-20% 


 29
29
 Phoenix Testament +
  350
350  -20%
-20% 


 32
32
 Glacial Bash I
 90
90  21
21
 Glacial Bash II
 100
100  23
23
 Glacial Crunch
 160
160 

 27
27
 Glacial Blanche
  260
260  35%
35%


 32
32
 Glacial Blanche +
  280
280  35%
35%


 35
35
 Avalanche Ritter
  300
300  35%
35%


 38
38
 Kulu Bludgeon I
 100
100
 Kulu Bludgeon II
 110
110
 Kulu Crusher
 160
160 


 Kulu Crusher +
  230
230 20%
20% 


 Kulu Katolos Stick
  320
320 20%
20% 


 Devil Masher I
 160
160 

 10
10
 Devil Masher II
 180
180 

 14
14
 Iron Devil's Soul
 220
220 

 17
17
 Iron Devil's Respect
  260
260 


 18
18
 Iron Devil's Respect +
  310
310 


 19
19
 Iron Giant's Soul
  330
330 


 22
22
 Unbearable Hammer I
 120
120 Unbearable Hammer II
 130
130
 Barbearic Hammer
 180
180 
 Barbearic Hammer +
  250
250 

 Bearly Eyhammer
  340
340 


 Frilled Blow I
  90
90  18
18
 Frilled Blow II
 120
120  21
21
 Illusory Frilled Blow
 180
180 

 26
26
 Illusory Frilled Blow +
  260
260 


 28
28
 Nightmare Frilled Blow
  290
290 


 30
30
 Nightmare Frilled Blow +
  320
320 


 32
32
 Bloom Snow Blow
  270
270 

 67
67
 Bloom Snow Blow +
  300
300 

 72
72
 Flicker Blizzard Blow
  310
310 

 76
76
 Bag o' Horrors I
  80
80  42
42
 Bag o' Horrors II
 90
90  43
43
 Bag o' Thunder
 140
140 
 46
46
 Bag o' Thunder +
  240
240 

 47
47
 Bag o' Booms
  270
270 

 48
48
 Bag o' Booms +
  310
310 

 50
50
 Frozen Core I
 90
90  20
20
 Frozen Core II
 100
100  22
22
 Cocytus
 150
150 


 32
32
 Niflheim
  250
250 


 39
39
 Niflheim +
  290
290 


 46
46
 Pykrete Punisher
  320
320 


 54
54
 Hammer of Winter Moon
  290
290 


 22
22
 Hammer of Winter Moon +
  310
310 


 25
25
 Hammer of Snowfallen
  320
320 


 28
28
Hammer Bone Tree
 Bone Hammer I
 90
90
 Bone Hammer II
 110
110
 Hard Bone Hammer
 130
130
 Bone Bludgeon I
 150
150
 Bone Bludgeon II
 170
170
 Heavy Bone Bludgeon
 190
190
 Diablos Hammer I
 220
220
 Diablos Hammer II
 230
230
 Diablos Tail
 240
240
 Diablos Maul +
  240
240 -25%
-25% 15
15
 Finishing Hammer
  350
350 -25%
-25% 15
15
 Finishing Hammer +
  360
360 -25%
-25% 30
30
 Cyclo-Hammer I
 160
160
 Cyclo-Hammer II
 220
220 

 Atlas Hammer
 230
230 
 Atlas Hammer +
  270
270 

 Atlas Crusher
  310
310 

 Atlas Crusher +
  340
340 

 Ceanataur Head Axe
  280
280 
 15
15
 Ceanataur Head Axe +
  300
300 
 16
16
 Big Blue Chopper
  320
320 
 18
18
 Matraca Hammer
  300
300 10%
10% 

 Matraca Hammer +
  310
310 10%
10% 

 Argyl Hammer
  320
320 10%
10% 

 Pukei Hammer I
 160
160 

 40
40
 Pukei Hammer II
 180
180 

 47
47
 Datura Club
 190
190 

 54
54
 Datura Club +
  240
240 


 56
56
 Datura Pounder
  270
270 


 58
58
 Datura Pounder +
  310
310 


 66
66
 Basarios Blow I
 120
120
 Basarios Blow II
 160
160
 Basarios Bash
 190
190 
 Red Bludgeon I
 190
190  27
27
 Red Bludgeon II
 200
200  31
31
 Huracan Hammer
 210
210  34
34
 Huracan Hammer +
  300
300  5%
5%
 38
38
 Rathalos Cosh
  310
310  10%
10%
 45
45 Leonid Starcrusher
  300
300  35%
35% 

 68
68
 Rosenhammer
  290
290  20%
20%

 15
15
 Rosenhammer +
  300
300  20%
20%

 19
19
 Rosenunwetter
  310
310  20%
20%

 23
23
 Kaktus Unwetter
  310
310  15%
15%


 55
55
 Yeti Hammer I
 170
170  13
13
 Yeti Hammer II
 190
190 
 15
15
 Yeti Hammer III
 220
220 
 17
17
 Abominable Hammer
 230
230 
 20
20
 Abominable Buster
  310
310  -15%
-15% 

 25
25
 Abominable Buster +
  330
330  -15%
-15% 

 28
28
 Abominable Avalanche
  350
350  -15%
-15% 

 31
31
 Usurper's Thunder I
 120
120  25
25
 Usurper's Thunder II
 190
190 

 28
28
 Despot's Crackle
 210
210 

 33
33
 Despot's Crackle +
  300
300 


 37
37
 Oppressor's Sway
  320
320 


 42
42
 Calamitous Portent I
 110
110  12
12
 Calamitous Portent II
 120
120  14
14
 Catastrophic Portent
 170
170  16
16
 Catastrophic Portent +
  300
300  10%
10% 
 21
21
 Cataclysmic Portent
  320
320  15%
15% 
 24
24
 Droth Splashhammer I
 100
100  25
25
 Droth Splashhammer II
 100
100  31
31
 Ludroth Dousehammer
 170
170 


 37
37
 Ludroth Dousehammer +
  230
230 


 40
40
 Lorelei
  280
280 


 43
43
 Lorelei +
  320
320 


 49
49
 Golm Gavel
  300
300 


 Golm Gavel +
  320
320 


 Gornir
  350
350 


 Izuchi Hammer I
 70
70
 Izuchi Hammer II
 90
90
 Snapper Hammer
 160
160 

 Snapper Hammer +
  160
160 15%
15% 


 Blower's Hammer
  310
310 20%
20% 


 Hidden Breaker I
 130
130
 Hidden Breaker II
 170
170 
 Night Eternal
 180
180 
 Endless Eternia
  250
250  45%
45% 


 Endless Eternia +
  270
270  45%
45% 


 Avidya Breaker
  290
290  45%
45% 


 Ascella's Asterism
  330
330 


 19
19
 Carapace Hammer I
 120
120
 Carapace Hammer II
 150
150
 Barroth Hammer
 200
200 
 Barroth Charger
  250
250 -5%
-5% 20
20 

 Barroth Charger +
  260
260 -5%
-5% 25
25 

 Barroth Momentum
  340
340 -5%
-5% 30
30 

Hammer Independent Tree
 Silver Splatterer
 310
310 0%
0% 


 48
48 Sinister Hammer I
 130
130  15
15
 Sinister Hammer II
 140
140  18
18
 Sinister Shade Hammer
 200
200 

 25
25
 Sinister Shade Hammer +
  310
310 


 28
28
 Mighty Souldevourer
  310
310 


 31
31
 Devil's Die
  320
320 


 34
34
 Wuchtblick
  290
290  20%
20%
 23
23
 Wuchtblick +
  300
300  20%
20%

 25
25
 Achtungsblick
  310
310  20%
20%

 27
27
 Le Judgement
  280
280  40%
40%
 28
28
 La Terre
  290
290  40%
40%
 32
32
 Vergehen Naissance
  330
330  -30% / 20%


 43
43
 Egg Hammer I
 200
200 


 Egg Hammer II
 240
240 


 Gargwa Hammer
 260
260 


 Gargwa Hammer +
  360
360 -25%
-25% 


 Gargegg Hammer
  380
380 -25%
-25% 


 Mane Malice I
 190
190  11
11
 Mane Malice II
 220
220 
 13
13
 Mane Malice Rajang
 230
230 
 16
16
 Mane Malice Rajang +
  330
330 -10%
-10% 

 21
21
 Mane Master Rajang
  340
340 -10%
-10% 

 23
23
 Demonlord Sledge
  320
320 


 18
18 Azure Elder Hammer I
 180
180  15
15
 Azure Elder Hammer II
 200
200  16
16
 Abyssal Gale Mauler
 210
210  17
17
 Skyfold Boldblow
  330
330 
 19
19
 Thunderbolt Hammer I
 190
190  47
47
 Abyssal Storm Mauler
 200
200  49
49
 Skyfold Furyflash
  200
200
 73
73
 Icesteel Hammer I
 180
180 
 36
36
 Daora's Colossus
 190
190 
 42
42
 Daora's Colossus +
  300
300  10%
10% 

 47
47
 Daora's Hyperborea
  310
310  10%
10% 

 50
50
 Teostra Cratermaker I
 180
180 

 40
40
 Teostra Cratergouger
 190
190 

 46
46
 Teostra Cratergouger +
  300
300 5%
5% 


 57
57
 Teostra de la Torre
  310
310 10%
10% 


 61
61
 Genie's Expanse I
 190
190 
 28
28
 Diamalto's Dream
 200
200 
 32
32
 Diamalto's Dream +
  310
310 

 37
37
 Diamgolgo's Phantasm
  320
320 

 45
45
 Redwing Drill I
  170
170 
 40
40
 Reddnaught Hammer
 180
180 
 43
43
 Crimson Forcewing
  330
330 

 45
45
 Abyssal Windstorm
  340
340 -20%
-20% 
 21
21 Victorious Northlein
  330
330 

 26
26 Incubus Hammer
  350
350 
 54
54 Teddybear I
 110
110  30
30
 Teddybear II
 120
120 
 34
34
 Sleepy Bear
 130
130 
 38
38
 Sleepy Bear +
 210
210 
 39
39
 Dreamy Bear
 320
320 
 43
43
 Graceful Death I
 110
110  18
18
 Graceful Death II
 140
140  22
22
 Graceful Death III
 170
170 

 29
29
 Yadora Morte
 180
180 

 34
34
 Yadora Morte +
  250
250 15
15 


 39
39
-
 Dark Morte
  320
320 20
20 


 52
52
-
 Pumpking I
 120
120  8
8
 Pumpking II
 150
150  11
11
 Jack-'o-Lantern King
 190
190 

 14
14
 Jack-'o-Lantern King +
  290
290 


 20
20
 Magic Pumpking
  330
330 


 27
27
 Royal Order's Bludgeon
  280
280 10%
10% 50
50 

 Royal Order's Bludgeon +
  310
310 10%
10% 50
50 


 Antique Machina H
  330
330 
 17
17 Rampage Hammer I
 150
150
| MHR Weapon Types |
Bow ♦ Charge Blade ♦ Dual Blades ♦ Great Sword ♦ Gunlance ♦ Heavy Bowgun ♦ Hunting Horn ♦ Insect Glaive ♦ Lance ♦ Light Bowgun ♦ Long Sword ♦ Switch Axe ♦ Sword & Shield |
 Anonymous
 Anonymous
 Anonymous
I dont know what's so hard to get about if you dont want knocked up stay out of my head hit box area......

 Anonymous
Hammer buff works differently now and doesn't get cancelled anymore. Basically you charge it once and it stays active for the rest of the mission (your hammer symbol in the upper left corner turns blue).
The only way to cancel it is to activate the charge again, which immediately gives you a full tier 3 charge of your right trigger abilities like spinning bludgeon or impact crater. So this can be useful to get the most out of these attacks if you have enough of a timing to pull them off, but not to charge the weapon up.
 Anonymous
Does anyone know for certain if Hammer has the same drawback as it did in World, where your buff would get cancelled if you received any sort of knockback, stun, etc, from a monster? I've been trying to find out, but can't find any conclusive answers.

 Anonymous












































Fextralife is full of lazy people who do the bare minimum needed to drag people into their awful Twitch channel via their never-completed wikis.
Fun fact; UBlock Origin can remove their twitch auto-player without fextralife being able to extort you!
23
+12
-1