

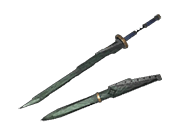
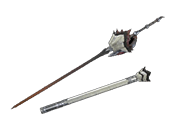
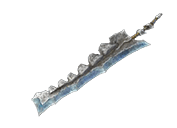
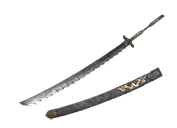
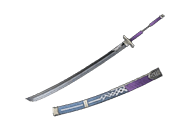
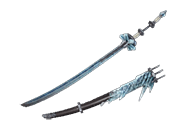
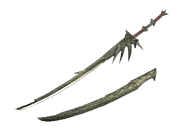
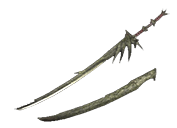
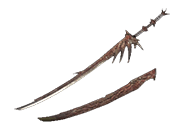
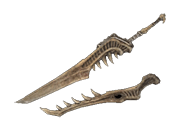
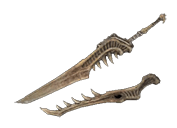
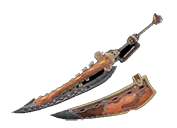
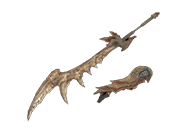
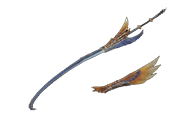
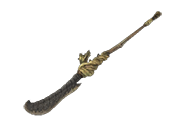
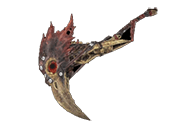
Long Sword |
|
|---|---|
| Weapon Type | Melee |
| Damage Type | Cut Damage |
Long Sword (太刀 tachi) is one of the fourteen weapon categories in Monster Hunter Rise (MHR or MHRise). Like all Weapons, it features a unique set of moves and an upgrade path that branches out depending on the materials used.
A sharp weapon that charges up the Spirit Gauge as you cut into your prey, and can unleash powerful Spirit Blade attacks. Also allows for technical dodge and counterattack combat.
Long Sword Weapon Tree
- You can check out our Long Sword Weapon Tree to find the different upgrade paths for the Long Sword weapon category.
- Click here to see a Comparative List of Long Swords.
- Click here to see Long Sword Builds. These builds were created around the weapon types, each with a specific set of handpicked Weapons, Equipment and complementing Skills and Decorations. These builds with Specific Long Sword may be paired with a set of Armor to optimize the combination in order to create a Build type focused on the Skills available with the selected equipment.
- Master Rank Long Swords are the top tier Long Swords available in Monster Hunter Rise, and as all Master Rank Weapons, can only be obtained by owning the Sunbreak Expansion. These weapons use Master Rank Materials that can be obtained by completing quests and doing endgame content. Click here to see all Master Rank Long Swords.
Best Long Sword of MH Rise
Raw Damage
Long Sword Weapon Traits
- Able to roll out of most attack chains.
- Well rounded moveset with good reach and vertical ability.
- Attacks charge up a Spirit Gauge that increases attack damage and unlocks Spirit Blade attacks.
Long Sword Weapon Features
Weapon Advantages
- Great weapon to be used for countering a Monster's attack.
- Triggering the Spirit Blade will make the weapon and attacks stronger.
- The Long Sword has a great reach considering it to be a melee weapon.
- Iai Slashes does not cost consume the Spirit Gauge if the attack doesn't connect.
Weapon Disadvantages
- The movement of the weapon has average mobility.
- Inputting the Plunging Thrust attack now requires the player to trigger Soaring Kick first.
- The Plunging Thrust Attack seems to be a lesser version of an attack, compared to MHW.
Long Sword Controls
 : Overhead Slash
 : Thrust
 + + : Attack while moving
 : Spirit Blade
- + during a combo: Foresight Slash
- +
 after an attack: Special Sheathe
 - Spirit Gauge: Landing hits fill the Spirit Gauge, which can be expended to perform Spirit Blade attacks. Landing Spirit Roundslashes will also change the gauge's color, increasing the attack power.
- Foresight Slash: Foresight Slash can be performed mid-combo, and provides a long invulnerability window. Land it after dodging an enemy attack to fill the Spirit Gauge, then press to chain it into a Spirit Roundslash.
- Special Sheathe: After an attack, press + to perform a Special Sheathe. Pressing will perform an Iai Slash, while pressing will perform an Iai Spirit Slash. After a period of time, the Special Sheathe will revert to a normal sheathe. The Quick Sheathe skill affects Special Sheathe, while the skills, Critical Draw, and Punishing Draw, affect Iai attacks.
- Iai Slash: If you land a hit with an Iai Slash, your Spirit Gauge will start to increase automatically.
- Iai Spirit Slash: A mad attack that increases the Spirit Gauge by one level if it successfully counters an attack. Time this against a monster's attack to repeatedly connect with the attack and keep your Gauge up to follow up with powerful combos. Minor attacks won't interrupt you.
Silkbind Controls
 + : Serene Pose
- + : Soaring Kick
- Serene Pose: Taking a hit while your weapon is at the ready will swiftly lead to a counterattack. (Wirebug Gauge Cost: 2)
- Soaring Kick: Uses a Wirebug to launch yourself into a jump kick that, if it connects, will trigger a Plunging Thrust. Landing the Thrust auto-fills your Spirit Gauge for a short period of time. If you press after landing the kick, you'll perform a Spirit Helm Breaker at a cost of one level of Spirit Gauge.
Long Sword Useful Combos
Basic Combo
- , , ,
- Step Slash > Overhead Slash > Thrust > Rising Slash
Spirit Blade Combo
- NOTE: Requires Spirit Gauge
- , , ,
- Spirit Blade I > Spirit Blade II > Spirit Blade III > Spirit Roundslash
Fade Slash Combos
- NOTE: Requires Spirit Gauge
- + , , ,
- Fade Slash > Spirit Jumping Slash > Spirit Blade III > Spirit Roundslash
Special Sheathe Combo I
- , + , ,
- Step Slash > Special Sheathe > Iai Slash > Spirit Blade II
Foresight Slash Combo I
- When successful
- , + ,
- Step Slash > Foresight Slash > Spirit Roundslash
Special Sheathe Combo II
- , + , +
- Step Slash > Foresight Slash > Special Sheathe
Long Sword Silkbind Attacks
Harvest Moon

A move that casts out an Ironsilk ring that narrows your range of attack, but boosts spirit so you can go on the offensive.
Within the ring, your Spirit Gauge won't deplete, and if you perform any counter attacks, it will add additional hits.
Serene Pose

Taking a hit while your weapon is at the ready will swiftly lead to a counterattack.
Press
Soaring Kick
Uses a Wirebug to launch you into a jump kick that, if connects, will trigger a Plunging Thrust. Landing the Thrust auto-fills your Spirit Gauge for a short period of time. Press the corresponding button after landing the kick to perform a Spirit Helm Breaker at a cost of one level of Spirit Gauge.
Press
Can be switched out with Silkbind Sakura Slash
Silkbind Sakura Slash

Press
Can be switched out with Soaring Kick
Long Sword Switch Skills
Switch Skills in Monster Hunter Rise (MHR or MHRise) refer to swappable moves in a Weapon's moveset. Each of the 14 Weapon-types have 3 sets of 2 moves that can be switched out with each other, allowing for a diverse, customizable approach to combat. Switch Skills are unlocked by progressing in the game, with each set having a default move that is available from the beginning.
- Each Weapon-type has a set of swappable Silkbind Attacks and 2 sets of swappable standard moves in the base game.
- The first set of Switch Skills are unlocked by completing the Lv. 3⭐Urgent Village Quest Feathered Frenzy
- The second set of Switch Skills are unlocked by forging or upgrading 8 Weapons within a Weapon-type. Note that this needs to be done for every Weapon-type that you want to unlock Switch Skills for.
- The third set of Switch Skills are unlocked by completing the associated High Rank Hub Quest given by Master Utsushi. These quests are unlocked by gaining access to the required Hub Quest rank.
- Lv. 6⭐ Learn the Long Sword for the Long Sword.
- Once unlocked, Switch Skills can be swapped at any Item Box and Switch Skill combinations can be saved to Item Loadouts as well.
- The Sunbreak Expansion introduces the Switch Skill Swap mechanic, where hunters can preload 2 Switch Skill loadouts and swap between them freely during hunts. Hunters will also now have access to a total of 5 sets of swappable Switch Skills, including new Silkbind Attacks and regular moves.
- This expansion also introduces the Swap Evade, a special dodge maneuver that can be performed right after a Switch Skill Swap, allowing hunters to quickly evade and maintain distance while safely swapping skill sets.
- In the table below, the left column represents default moves available from the beginning, while the right represents unlockable Switch Skills.
Switch Skill Swap Mechanic
The Switch Skill Swap mechanic allows the hunter to assign Switch Skill loadouts and swap between them on the fly, whether in combat or otherwise. This allows the hunter to further expand their arsenal of available moves during hunts and to further customize their builds to accommodate their playstyle. Being able to make split-second decisions to swap loadouts and use specific moves to counter monster attacks as they wind up is sure to add an exciting new dimension to monster hunting.
With the Switch Skill Swap mechanic, hunters are given two loadouts to switch between, denoted by the ![]() Red Scroll and
Red Scroll and ![]() Blue Scroll icons on the UI. Hunters can set up each loadout from the Item Box at Kamura Village, Elgado Outpost or even at Camps while out on hunts, just as they would when assigning Switch Skills individually. When out on hunts, hunters can swap between the two loadouts by holding
Blue Scroll icons on the UI. Hunters can set up each loadout from the Item Box at Kamura Village, Elgado Outpost or even at Camps while out on hunts, just as they would when assigning Switch Skills individually. When out on hunts, hunters can swap between the two loadouts by holding ![]() and pressing the
and pressing the ![]() +
+ ![]() buttons. The character will perform a quick animation and briefly flash with energy, signifying a successful swap.
buttons. The character will perform a quick animation and briefly flash with energy, signifying a successful swap.

![]()
![]()
![]()
| NEW! Long Sword Switch Skills introduced with the Sunbreak Expansion | |
|---|---|
| Switch Skills Set 1 | |
Step Slash |
Drawn Double Slash |
| A top-down slash while moving forward. The blade takes a vertical path, making it a useful technique when aiming up high.
|
A drawn attack that unleashes a vertical then horizontal slash. As you move forward, you're able to absorb a hit while attacking. Although it deals more damage than a Step Slash, there are few attacks that you can use to follow up. Use at your discretion
|
Controls
|
Controls
|
| Switch Skills Set 2 | |
Spirit Roundslash Combo |
Spirit Reckoning Combo |
| Changes into a Spirit Blade on its third strike and onwards. Follows from a Spirit Blade III into a Spirit Roundslash. A basic Spirit Blade combo. Easy to hit the target while damaging any other enemies close by. |
Changes into a Spirit Blade on its third strike and onwards. Dividing Slash > Spirit Reckoning. A Spirit Blade combo belonging to an offshoot combat style. Difficult to use, but has enough power to make up for this shortfall. |
Controls
|
Controls |
| Switch Skills Set 3 | |
Special Sheathe Combo |
Sacred Sheathe Combo |
| A special sheath that can be performed after attacking. Both of its follow-up attacks fill the Spirit Gauge. An Iai Slash automatically increases Spirit Gauge. Successfully countering a monster attack with an Iai Spirit Slash unleashes a powerful flash and raises the Spirit Gauge by one level.
|
A slow methodical movement that can be executed following an attack.
|
Controls
|
Controls
|
| Switch Skills Set 4 (Silkbind) | |
Soaring Kick |
Silkbind Sakura Slash |
| A quick Wirebug-induced jump kick. A missed kick ends the attack with a single slash, while a successful kick can be followed with one of two moves. The Plunging Thrust increases Spirit Gauge, while the Spirit Helm breaker reduces the Spirit Gauge by one level. (Wirebug Gauge recovery speed: Slow)
|
A whirlwind-like attack, dashing and slicing past the target with a Wirebug. The hit causes multiple lacerations over time, inducing additional damage. The hit raises the Spirit Gauge by 1. (Wirebug Gauge recovery speed: Slow)
|
| Controls
|
Controls
|
Tempered Spirit Blade |
|
| A decisive Silkbind maneuver that parries any incoming monster attack with a Spirit Blade. Timing is key if you want to successfully parry an attack, but doing so will fill your Spirit Gauge and raise it one level. (Wirebug Gauge recovery speed: Fast)
|
|
| Controls
|
|
| Switch Skills Set 5 (Silkbind) | |
Serene Pose |
Harvest Moon |
| A move that casts out Ironsilk, and automatically counters any incoming attack. Like a reflection of the moon, it's visible, but untouchable. If a hit is countered, one level of Spirit Gauge will be consumed. (Wirebug Gauge recovery speed: Fast)
|
A move that casts out an Ironsilk ring that narrows your range of attack, but boosts spirit so you can go on the offensive. Within the ring, your Spirit Gauge won't deplete, and if you perform any counter attacks, it will add additional hits. (Wirebug Gauge recovery speed: Medium)
|
Controls
|
Controls
|


Long Sword Controls
 : Overhead Slash
 : Thrust
- W A S D + + : Attack while moving
 : Spirit Blade
- + during a combo: Foresight Slash
- + Space after an attack: Special Sheathe
- Spirit Gauge: Landing hits fill the Spirit Gauge, which can be expended to perform Spirit Blade attacks. Landing Spirit Roundslashes will also change the gauge's color, increasing the attack power.
- Foresight Slash: Foresight Slash can be performed mid-combo, and provides a long invulnerability window. Land it after dodging an enemy attack to fill the Spirit Gauge, then press to chain it into a Spirit Roundslash.
- Special Sheathe: After an attack, press + Space to perform a Special Sheathe. Pressing will perform an Iai Slash, while pressing will perform an Iai Spirit Slash. After a period of time, the Special Sheathe will revert to a normal sheathe. The Quick Sheathe skill affects Special Sheathe, while the skills, Critical Draw, and Punishing Draw, affect Iai attacks.
- Iai Slash: If you land a hit with an Iai Slash, your Spirit Gauge will start to increase automatically.
- Iai Spirit Slash: A mad attack that decreases the Spirit Gauge to one level. Time this against a monster's attack to repeatedly connect with the attack and keep your Gauge up. Minor attacks won't interrupt you.
Silkbind Controls
 + : Serene Pose
- + : Soaring Kick
- Serene Pose: Taking a hit while your weapon is at the ready will swiftly lead to a counterattack. (Wirebug Gauge Cost: 2)
- Soaring Kick: Uses a Wirebug to launch yourself into a jump kick that, if it connects, will trigger a Plunging Thrust. Landing the Thrust auto-fills your Spirit Gauge for a short period of time. If you press after landing the kick, you'll perform a Spirit Helm Breaker at a cost of one level of Spirit Gauge.
Long Sword Useful Combos
Basic Combo
- , , ,
- Step Slash > Overhead Slash > Thrust > Rising Slash
Spirit Blade Combo
- NOTE: Requires Spirit Gauge
- , , ,
- Spirit Blade I > Spirit Blade II > Spirit Blade III > Spirit Roundslash
Fade Slash Combos
- NOTE: Requires Spirit Gauge
- + , , ,
- Fade Slash > Spirit Jumping Slash > Spirit Blade III > Spirit Roundslash
Special Sheathe Combo I
- , + Space, ,
- Step Slash > Special Sheathe > Iai Slash > Spirit Blade II
Foresight Slash Combo I
- When successful
- , + ,
- Step Slash > Foresight Slash > Spirit Roundslash
Special Sheathe Combo II
- , + , + Space
- Step Slash > Foresight Slash > Special Sheathe
Long Sword Silkbind Attacks
Harvest Moon
A move that casts out an Ironsilk ring that narrows your range of attack, but boosts spirit so you can go on the offensive.
Within the ring, your Spirit Gauge won't deplete, and if you perform any counter attacks, it will add additional hits.
Serene Pose
Taking a hit while your weapon is at the ready will swiftly lead to a counterattack.
- While holding , press
Soaring Kick
Uses a Wirebug to launch you into a jump kick that, if connects, will trigger a Plunging Thrust. Landing the Thrust auto-fills your Spirit Gauge for a short period of time. Press the corresponding button after landing the kick to perform a Spirit Helm Breaker at a cost of one level of Spirit Gauge.
Can be switched out with Silkbind Sakura Slash
Silkbind Sakura Slash
Can be switched out with Soaring Kick
Long Sword Switch Skills
Switch Skills in Monster Hunter Rise (MHR or MHRise) refer to swappable moves in a Weapon's moveset. Each of the 14 Weapon-types have 3 sets of 2 moves that can be switched out with each other, allowing for a diverse, customizable approach to combat. Switch Skills are unlocked by progressing in the game, with each set having a default move that is available from the beginning.
- Each Weapon-type has a set of swappable Silkbind Attacks and 2 sets of swappable standard moves.
- The first set of Switch Skills are unlocked by completing the Lv. 3⭐Urgent Village Quest Feathered Frenzy
- The second set of Switch Skills are unlocked by forging or upgrading 8 Weapons within a Weapon-type. Note that this needs to be done for every Weapon-type that you want to unlock Switch Skills for.
- The third set of Switch Skills are unlocked by completing the associated High Rank Hub Quest given by Master Utsushi. These quests are unlocked by gaining access to the required Hub Quest rank.
- Lv. 6⭐ Learn the Long Sword for the Long Sword.
- Once unlocked, Switch Skills can be swapped at any Item Box and Switch Skill combinations can be saved to Item Loadouts as well.
- The Sunbreak Expansion introduces the Switch Skill Swap mechanic, where hunters can preload 2 Switch Skill loadouts and swap between them freely during hunts. Hunters will also now have access to a total of 5 sets of swappable Switch Skills, including new Silkbind Attacks and regular moves.
- This expansion also introduces the Swap Evade, a special dodge maneuver that can be performed right after a Switch Skill Swap, allowing hunters to quickly evade and maintain distance while safely swapping skill sets.
- In the table below, the left column represents default moves available from the beginning, while the right represents unlockable Switch Skills.
| NEW! Long Sword Switch Skills introduced with the Sunbreak Expansion | |
|---|---|
| Switch Skills Set 1 | |
Step Slash |
Drawn Double Slash |
| A top-down slash while moving forward. The blade takes a vertical path, making it a useful technique when aiming up high.
|
A drawn attack that unleashes a vertical then horizontal slash. As you move forward, you're able to absorb a hit while attacking. Although it deals more damage than a Step Slash, there are few attacks that you can use to follow up. Use at your discretion
|
Controls
|
Controls
|
| Switch Skills Set 2 | |
Spirit Roundslash Combo |
Switch Skill Name |
| Changes into a Spirit Blade on its third strike and onwards. Follows from a Spirit Blade III into a Spirit Roundslash. A basic Spirit Blade combo. Easy to hit the target while damaging any other enemies close by. |
Switch Skill Description |
Controls
|
Controls |
| Switch Skills Set 2 | |
Special Sheathe Combo |
Sacred Sheathe Combo |
| A special sheath that can be performed after attacking. Both of its follow-up attacks fill the Spirit Gauge. An Iai Slash automatically increases Spirit Gauge. Successfully countering a monster attack with an Iai Spirit Slash unleashes a powerful flash and raises the Spirit Gauge by one level.
|
A slow methodical movement that can be executed following an attack.
|
Controls
|
Controls
|
| Switch Skills Set 4 (Silkbind) | |
Soaring Kick |
Silkbind Sakura Slash |
| A quick Wirebug-induced jump kick. A missed kick ends the attack with a single slash, while a successful kick can be followed with one of two moves. The Plunging Thrust increases Spirit Gauge, while the Spirit Helm breaker reduces the Spirit Gauge by one level. (Wirebug Gauge recovery speed: Slow)
|
A whirlwind-like attack, dashing and slicing past the target with a Wirebug. The hit causes multiple lacerations over time, inducing additional damage. The hit raises the Spirit Gauge by 1. (Wirebug Gauge recovery speed: Slow)
|
| Controls
|
Controls
|
Tempered Spirit Blade |
|
| A decisive Silkbind maneuver that parries any incoming monster attack with a Spirit Blade. Timing is key if you want to successfully parry an attack, but doing so will fill your Spirit Gauge and raise it one level. (Wirebug Gauge recovery speed: Fast)
|
|
| Controls
|
|
| Switch Skills Set 5 (Silkbind) | |
Serene Pose |
Harvest Moon |
| A move that casts out Ironsilk, and automatically counters any incoming attack. Like a reflection of the moon, it's visible, but untouchable. If a hit is countered, one level of Spirit Gauge will be consumed. (Wirebug Gauge recovery speed: Fast)
|
A move that casts out an Ironsilk ring that narrows your range of attack, but boosts spirit so you can go on the offensive. Within the ring, your Spirit Gauge won't deplete, and if you perform any counter attacks, it will add additional hits. (Wirebug Gauge recovery speed: Medium)
|
Controls
|
Controls
|
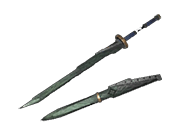
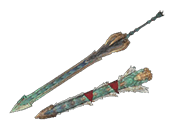
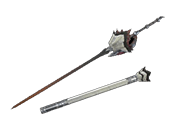
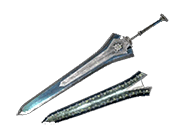
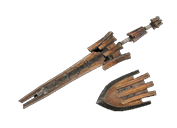
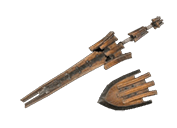
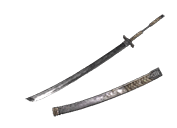
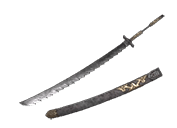
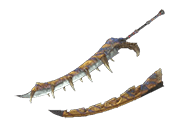
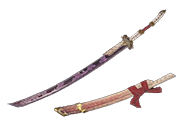
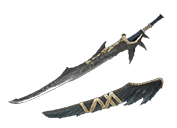
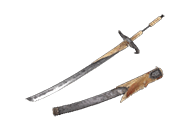
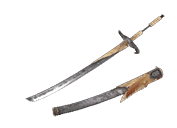
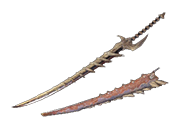
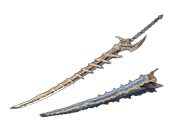
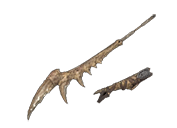
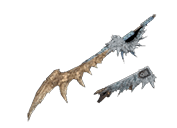
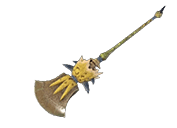
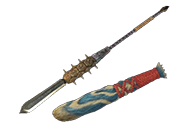
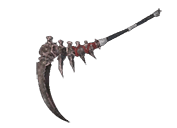
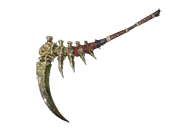
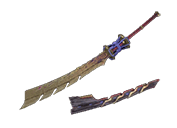
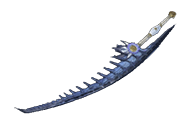
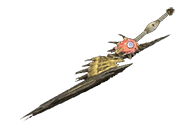
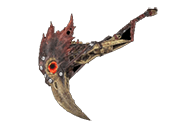
Long Swords are a type of Weapon in Monster Hunter Rise (MHR or MHRise). This page shows a visual gallery of all different styles for Long Swords. as well as a comparison table comparing the most imporant aspects such as Attack, Sharpness, Affinity, etc. Weapons are often upgraded based on previous decisions, with different paths leading to different looks and necessitating different materials. You can find detailed upgrade path information in the Long Sword Weapon Tree or by clicking each individual weapon below.
For a comprehensive guide on how to use Long Swords, please click the following link: Long Sword
Long Swords in Monster Hunter Rise
Quick Search of All Long Swords
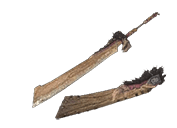
Long Sword Gallery
Long Swords Defender Tree


Master Rank Long Swords Kamura Tree


Long Sword Kamura Weapons


Master Rank Long Swords Ore Tree


Long Sword Ore Weapons


Master Rank Long Swords Bone Tree


Long Sword Bone Weapons


Master Rank Long Swords Independent Tree


Long Sword Independent Weapons


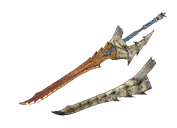
Long Sword Weapon Tree for Monster Hunter Rise (MHR or MHRise) features the different upgrade paths for the Long Sword weapon. In Monster Hunter Rise, there are 14 categories of weapons that players can choose from to use for hunting Monsters. The Long Sword enables fast, fluid movement and combos, but be cautious when using this weapon since it cannot be used to guard. This page lists all of the Long Swords in Monster Hunter Rise, showing their effectiveness and upgrade paths
Long Sword Weapon Traits
- Able to roll out of most attack chains.
- Well rounded moveset with good reach and vertical ability.
- Attacks charge up a Spirit Gauge that increases attack damage and unlocks Spirit Blade attacks.
- A sharp weapon that charges up the Spirit Gauge as you cut into your prey, and can unleash powerful Spirit Blade attacks. Also allows for technical dodge and counterattack combat.
Master Rank Long Sword Weapons
- You can check out the Long Sword Weapon Tree to find the different upgrade paths for each Master Rank Long Sword weapon
- Master Rank Long Swords are the top tier Long Swords available in Monster Hunter Rise, and as all Master Rank Weapons, can only be obtained by owning the Sunbreak Expansion. These weapons use Master Rank Materials that can be obtained by completing quests and doing endgame content. Click here to see all Master Rank Long Swords.
- Note that these Weapons can only be accessed by players that have purchased and installed the Sunbreak Expansion. For those who own the expansionless version of Monster Hunter, these Weapons are unobtainable.
Long Sword Weapon Features
Weapon Advantages
- Great weapon to be used for countering a Monster's attack.
- Triggering the Spirit Blade will make the weapon and attacks stronger.
- The Long Sword has a great reach considering it to be a melee weapon.
- Iai Slashes does not cost consume the Spirit Gauge if the attack doesn't connect.
Weapon Disadvantages
- The movement of the weapon has average mobility.
- Inputting the Plunging Thrust attack now requires the player to trigger Soaring Kick first.
- The Plunging Thrust Attack seems to be a lesser version of an attack, compared to MHW.
Important: For a comprehensive guide on how to use Long Swords, please click the following link: Long Sword
MH Rise Long Sword Weapon Tree
Long Sword Defender Tree
 Defender Long Sword I
 110
110  30
30
 Champion Long Sword150 30
 Champion Long Sword II190 30
- Champion Long Sword III210 30
 Guardian Long Sword230 30
Long Sword Kamura Tree
- Kamura Blade I50
- Kamura Blade II60
- Kamura Blade III90
 Kamura Blade IV
140
- Kamura Blade V
150
- Kamura Ninja Blade
190 

 Kamura Warrior Rapier 240

- Kamura Warrior Rapier +280
 Duke's Sinclair310
 28
28
 Fissureforce 32030
- Usurper Boltslicer I
120  16
16
- Usurper Boltslicer II
180 31
 Despot Boltbreaker
200 34
- Despot Boltbreaker +300 47
- Oppressor's Abbys320 55
- Aknosom Sabre I100
 13
13
- Aknosom Sabre II
160 19
- Daybreak Blade
170 26
- Dayspring Blade
230 37
- Dayspring Blade +
250 37
- Dawnlight Blade
230 48
- Ivory Rabbit I100
 10
10  -10%
-10%
- Ivory Rabbit II
110 12 -10%
- Iced Rabbit
180 15 -10%
- Iced Rabbit +
260 22 -10%
- Inaba's Thorns
340 27 -10%
- Guardian Sword I90 5%
- Guardian Sword II
100 5%
- Imperial Sword
140 5%
- Imperial Sword II
250 10%
- Imperial Sword III
290 10%
- Adamantine Lodestar
310 15%
- Castello Saif I120 -20%
- Castello Saif II
150 -20%
- Castellum Long Sword
200 -20%
- Barroth Castillo
250 -20%
- Barroth Castillo +
260 -20%
- Barroth Velberg
350 -20%
- Gigant Makra I110 12 20
- Gigant Makra II150 18 20
- Titanic Makra180 22 20
- Titanic Makra +260 32 20
- Makra's Basalt330 40 20
- Almudron Blade I120
 33
33
- Almudron Blade II
160 41
- Doom Bringer Blade
180 48
- Death Bringer Blade
260 59 
- Death Bringer Blade +
300 63
- Abyss Bringer Blade
310 72
- Magma Disaster
280 63 
- Magma Disaster +
300 65
- Volcanic Apocalypse
310 75
Long Sword Ore Tree
- Iron Katana I80
- Iron Katana II100
- Iron Gospel120
- Keen Edge I
140
- Keen Edge II
170
- Julienne Blade
180
- Wyvern Blade "Peridot"
290  23 20%
- Wyvern Blade "Peridot" +
300 27 20%
- Wyvern Blade "Alexa"
310 30 20%
- Tigrine Edge I
160 -20%
- Tigrine Edge II
220 -20%
- Tigrine Need
230 -20%
- Tigrine Need +
320 -20%
- Desperate Roar
330 -20%
- Desperate Roar +
350 -15%
- Kakaru Kumo Naki I
120 16 10%
- Kakaru Kumo Naki II
190 19 10%
 Tamonowo
210 22 10%
- Tamonowo +
290 30 15%
- Tamonowo Zekkarei
300 33 15%
- Tamonowo Zekkarei +
310 36 15%
- Pure Sword Ichimonji
310 24 10%
- Hidden Saber I
120 30%
- Hidden Saber II
160 30%
- Deepest Night
180 30%
- Darkest Night
240 40%
- Darkest Night +
270 40%
- Avidya Saber
280 40%
- Megrez's Asterism
330  14
14
- Eager Cleaver I
80 18
- Eager Cleaver II160 24
- Devil Slicer180 27
- Devil Slicer +250 35
- True Devil Slicer270 38
- True Devil Slicer +320 50
- Kulu Katana I
100 10%
- Kulu Katana II130 15%
- Kulu Slicer160 20%
- Kulu Slicer +230 20%
- Kulu Katolos Seif320 20%
- Chillblade I
160 18
- Chillblade II
180 20
- Rimeblossom
210 27
- Icebloom
250 35
- Icebloom +
300 40
- Frostveldt
320 48
- Frostmoon Paleblade
290 24
- Frostmoon Paleblade +
300 28
- Moonbrand "Lua Cheia"
320 31
- Wyvern Blade Verde I
90 18
- Wyvern Blade Verde II
170 20
- Wyvern Blade Holly200 22
- Wyvern Blade Holly +250 36
- Wyvern Blade "Jade"300 43
- Wyvern Blade "Jade" +320 48
- Wyvern Blade "Luna"330 39
- Rosenfader290 15 20%
- Rosenfader +300 19 20%
- Rosenhimmel310 23 20%
- Kaktus Himmel300 43 20%
- Wyvern Blade Blood I
190 25
- Wyvern Blade Blood II
200 32
- Wyvern Blade Maple
210 36
- Wyvern Blade "Maple" +
290 45
- Wyvern Blade "Scarlet"
320 55 - Wyvern Blade "Pale"
300 65
Long Sword Bone Tree
- Serrated Jaw I90
- Serrated Jaw II110
- Serrated Maw130
- Canine Katana I
180
- Canine Katana II
200
- Gnash Katana
230
- Gnash Katana +
250
- Sunderer
310
- Sunderer +
340
- Khanga Edge
300
- Khanga Edge +
310
- Khanga Rebellion
320
- Black Katana Mk.I230 5% 10
- Black Katana Mk.I +270 5% 10
- Final Black Katana320 5% 30
- Flammenschwert I
140 11
- Flammenschwert II
210 20
- Fervid Flammenschwert
230 24
- Fervid Flammenschwert +
270 26 -20%
- Lonhenschwert
320 28 -20%
- Lonhenschwert +
340 30 -15%
- Bastine Edge I90 15
- Bastine Edge II
120 19
- Bastizan Edge
160 27
- Bastiana Saber
250 32 35%
- Bastiana Saber +
270 35 35%
- Amberfang Gelfidall
300 39 35%
- Wroggi Sword I80 19
- Wroggi Sword II
110 23
- Poison Barb
150 28
- Poison Barb +
230 43
- Belladonna's Bite
330 60
- Ananta Blade I80
 9
9
- Ananta Blade II
90 12
- Shadow Slasher
150 17
- Shadow Slasher +
220 22
- Spiritbinder
320 26
- Bone Scythe I90
- Bone Scythe II110
- Bone Reaper120
- Spark Slicer I
100 19
- Spark Slicer II
140 21
- Shocking Slicer
180 24
- Shocking Slicer +
240 31 15%
- Shockstrike
270 35 15%
- Shockstrike +
310 42 15%
- Jyura Saber I
190 14
- Jyura Saber II
200 15
- Jyura Reaver
220 16
- Jyura Reaver +
270 21 -10%
- Valtos Slough
300 25 -10%
- Valtos Slough +
340 29 -10%
- Anteka Blade I
170
- Anteka Blade II
190
- Anteka Rack
200
- Great Anteka Blade
240 30
- Great Anteka Blade +
300 30
- King Anteka Blade
330 40
- Frilled Slash I
100  12
12
- Frilled Slash II
120 15
- Illusory Frilled Slash
190 19
- Illusory Frilled Slash +
260 22
- Nightmare Frilled Slash
280 25
- Nightmare Frilled Slash +
320 28
- Bloom Snow Slash
260  62
62
- Bloom Snow Slash +
300 65
- Flicker Blizzard Slash
310 69
- Drowning Shaft I
90 20
- Drowning Shaft II
100 23
- Douser Bardiche
160 28
- Douser Bardiche +
230 37
- Wasserfallis
280 42
- Wasserfallis +
320 46
- Golm Cutter
300
- Golm Cutter +
320
- Titanfeller
350
- Arzuros Naginata I
90
- Wind Thief Scimitar I
70
- Wind Thief Scimitar II
100
- Gale Scimitar
140
- Gale Scimitar +
230 15%
- Reaper Blade Boldus
310 25%
- Dark Scythe I
180
- Tormentor
220
- Tormentor +
250 -10%
- Darkness Within
310 -10%
- Darkness Within +
340 -10%
- Crab Cutter
240  21 30
21 30
- Crab Cutter +
290 25 30
- Daimyo Cutter
330 28 30
- Ceanataur Cutter
280 15
- Ceanataur Cutter +
300 17
- Killer's Sickle
320 18
- Scythe of Menace I
170 25
- Scythe of Menace II
190 29
- Big Menacing Scythe210 34
- Jynxmonger260 40 -10%
- Jynxmonger +290 44 -10%
- Malicemonger330 52 -10%
Long Sword Independent Tree
- Silver Severer310 49 0%

- Sinister Long Sword I130
 13
13
- Sinister Long Sword II150 16
- Sinister Shade Sword200 23
- Sinister Shade Sword +280 28
- Tormented Shade Sword290 33
- Devil's Deal 320 38
- Stahlfakt310 20%22
- Stahlfakt +300 20%26
- Stahlurteil310 20%28
- La Justiciere280 35%38
- Le Decalogue290 35%45
- Chaos Loi330 -30% / 15% 42
- Demon Halberd I190 10 -10%
- Demon Halberd II200 12 -10%
- Great Demon Halberd220 15 -10%
- Great Demon Halberd +330 20 -10%
- Evil Demon Halberd340 25 -10%
- Demonlord Halberd310 17
- Azure Elder Long Sword I180 10
- Azure Elder Long Sword II190 12
- Abyssal Gale Sword200 13
- Pandemonium330 22
- Thunderbolt Long Sword I180 38
- Abyssal Storm Sword190 42
- Torrential Hail310 63
- Rookslayer Saber I200 13 -10%
- Rookslayer Saber II210 15 -10%
- Bazel Varga Rookslayer220 15 -10%
- Bazel Jarre Blazer330 23 -10%
- Bazel Prozio Rooksearer340 28 -10%
- Icesteel Blade I180 43
- Daora's Raid180 45
- Daora's Raid +300 52
- Daora's Storm320 56
- Imperial Saber I190 35
- Imperial Shimmer200 41
- Imperial Shimmer +310 54
- Imperial Flickerflame330 60
- Mirage Finsword I210 15%
- Phantom Mirage220 15%
- Phantom Mirage +290 15% 15
- Skulduggery300 15% 20
- Redwing Long Sword I170 35
- Reddnaught Blade180 39
- Red Flash320 53
- Abyssal Flicker340 19 -25%
- Reverent Elusarca330 33
- Ominous Spring350 43
- Cawscythe I100 20
- Cawscythe II140 21
- Cawscythe III160 25
- Squawkscythe180 27
- Squawkscythe +250 34
- Screakscythe320 48
- Hand-Me-Down Sword I120 7 10%
- Hand-Me-Down Sword II180 10 10%
- Kamura's Inheritance190 15 40%
- Kamura's Inheritance +280 25 40%
- Kamura's Legacy290 32 40%
- Royal Order's Claymore300 10% 50
- Royal Order's Claymore +310 10% 50
- Antique Machina LS320 18
- Rampage Blade I150
| MHR Weapon Types |
Bow ♦ Charge Blade ♦ Dual Blades ♦ Great Sword ♦ Gunlance ♦ Hammer ♦ Heavy Bowgun ♦ Hunting Horn ♦ Insect Glaive ♦ Lance ♦ Light Bowgun ♦ Switch Axe ♦ Sword & Shield |
 Anonymous
When the spirit and technique is flawless and firm.
-Gigi (he’s still here)
- Anonymous
I miss old Longsword, or even World's Longsword. I feel like counters shouldn't be Longswords main thing. A weapon really doesn't need 3+ counters (Minimum: Serene Pose / Harvest Moon, Special Sheath / Sacred Sheath, and Foresight Slash). No matter how you play longsword now, you will need counters somewhere in your playstyle.
- Anonymous
Wish the page would list xbox controller controls. Every guide I find does only Switch and KB&M controls. It's like they all forgot people play the PC port with other controllers.
Then a gain; what did I expect from someone so underhanded and insecure that he shoves wiki browsers into his crappy twitch audience unwillingly?
- Anonymous
Lai spirit slash does not consume spirit gauge; it raises by one if counter is successful
- Anonymous
They were really going out of their way to look for weapon disadvantages weren't they.
- Anonymous
If you cannot counter with iai slash please stop using this weapon and obnoxiously proclaiming how facile it is. Thank you.
- Anonymous
Fextralife is full of lazy people who do the bare minimum needed to drag people into their awful Twitch channel via their never-completed wikis.
Fun fact; UBlock Origin can remove their twitch auto-player without fextralife being able to extort you!
35
+14
-1