Charge Blade |
|
|---|---|
| Weapon Type | Melee |
| Damage Type | Cut Damage |
Charge Blade (チャージアックス chyaaji akkusu, "charge axe") is one of the fourteen weapon categories in Monster Hunter Rise (MHR or MHRise). Like all Weapons, it features a unique set of moves and an upgrade path that branches out depending on the materials used.
A weapon that is both sword and axe. Charge it up in sword mode, then combine sword and shield into an axe and unleash the energy as a devastating attack.
Charge Blade Weapon Tree
- You can check out our Charge Blade Weapon Tree to find the different upgrade paths for the Charge Blade weapon category.
- Click here for a Comparative List of Charge Blades.
- Click here to see MH Rise Charge Blade Builds. These builds were created around the weapon types, each with a specific set of handpicked Weapons, Equipment and complementing Skills and Decorations. These builds with Specific Charge Blades may be paired with a set of Armor to optimize the combination in order to create a Build type focused on the Skills available with the selected equipment.
- Master Rank Charge Blades are the top tier Charge Blades available in Monster Hunter Rise, and as all Master Rank Weapons, can only be obtained by owning the Sunbreak Expansion. These weapons use Master Rank Materials that can be obtained by completing quests and doing endgame content. Click here to see all Master Rank Charge Blades.
Charge Blade Weapon Traits
- Sword & shield form strikes a balance between mobility, defense, and attack.
- Axe form trades out defense for powerful attacks, good reach, and the phial's bonus.
- A complex weapon with a sword & shield form and an axe form that both use a phial system.
- Sword mode boasts mobility and high guard capabilities, while axe mode boasts more powerful attacks. Store up energy while in sword mode, and then use it to deal high damage in axe mode.
Charge Blade Weapon Features
Weapon Advantages
- Switching to the axe allows for strong and deadly attacks.
- The Silkbind Guard move is a great way to quickly max up your Phials.
- A versatile weapon where you can use the shield, sword, and switch to the axe.
- The new Silkbind Attack is a great use to glide around the battlefield and to quickly morph into axe mode.
Weapon Disadvantages
- Movement speed of the hunter is quite slow.
- Axe mode significantly slows the hunter's movement.
Charge Blade Controls
Sword
 : Sword Weak Slash
 +
+  : Sword Forward Slash
 +
+  during combo: Sword Fade Slash
 +
+  : Sword Morph Slash
 +
+  : Charge
 : Guard
- Hold
 : Sword Charged Double Slash
 - Charge Gauge: Attack in Sword Mode to build up Sword Energy. Build up too much energy and attacks will bounce off. Perform Charge Phials while the gauge is yellow or above to fill a phial, which can be used in Axe Mode to perform powerful attacks.
- Attacks that Block: Some sword mode attacks have blocking frames, like the end of Spinning Slash or the start of Morph Slash. If an attack hits while your shield is facing forward, you'll block automatically.
- Charged Attack: Condensed Element Slash and Charged DOuble Slash will not execute properly if you hold the button for too long. Release the button at the right time to use these moves successfully.
- Sword Boost Mode: Perform a Sword: Condensed Element Slash during an Elemental Boost to enter Sword Boost Mode. In this mode, your sword will not be deflected and you will gain additional attacks.
Axe
 : Axe Rising Slash
 : Axe Elemental Discharge
 +
+  : Axe Amped Element Discharge
 : Axe Morph Slash
- Element Discharge: While in Axe Mode, you can use phials to perform powerful attacks.
- Element Boost: With at least 1 phial applied, perform an Axe Elemental Roundslash, and your shield will be elementally boosted, improving power and guard capacity in Axe Mode. Axe Amped Element Discharge becomes Axe Super Element Discharge. Successfully blocking an attack in this state triggers a shield explosion.
Silkbind Controls
 +
+  : Morphing Advance
 +
+  : Counter Peak Performance
- Morphing Advance: Uses a Wirebug to launch yourself forward while your charge blade switches to axe form. While in motion, monster attacks won't knock you back or stun you.
- Counter Peak Performance: Being hit while your weapon is readied will fill your phials to maximum.
Chargeblade Useful Combos
Sword: Basic Combo
 +
+ ,
,  ,
, 
- Sword: Forward Slash > Sword: Return Stroke > Sword: Spinning Slash
Elemental Roundslash Combo
- Power Mode requires more than 1 Phial.
- Hold
 ,
,  +
+ ,
,  +
+ ,
, 
- Sword: Charged Double Slash > Sword: Shield Thrust > Axe: Amped Element Discharge > Axe: Element Boost Spinning Slash
Sword: Sword Mode-boosting Combo
- During Elemental Boost only.
- Hold
 ,
,  +
+ ,
, 
- Sword: Charged Double Slash > While Charging > Sword: Condensed Element Slash
Axe Combo into Amped Element Discharge
 +
+ ,
,  ,
, 
- Axe: Dash Slam > Axe: Element Discharge II > Axe: Amped Element Discharge
Axe: Combos from Axe Mode into Element Discharge
 ,
,  ,
,  ,
, 
- Axe: Rising Slash > Axe: Element Discharge II > Axe: Rising Slash > Axe: Element Discharge II
Charge Blade Silkbind Attacks
Ready Stance
A Silkbind maneuver that binds sword and axe together with Ironsilk.
After guarding, a heavy knockback leaves you in Sword Mode, and lowers your guard reaction so you're able to chain sword/axe attacks.
Counter Peak Performance
Ready your shield while stretching silk to the ground. Being hit while your shield is readied will fill your phials to the maximum.
Press
Can be switched out with Axe Hopper
Charge Blade Switch Skills
Switch Skills in Monster Hunter Rise (MHR or MHRise) refer to swappable moves in a Weapon's moveset. Each of the 14 Weapon-types have 3 sets of 2 moves that can be switched out with each other, allowing for a diverse, customizable approach to combat. Switch Skills are unlocked by progressing in the game, with each set having a default move that is available from the beginning.
- Each Weapon-type has a set of swappable Silkbind Attacks and 2 sets of swappable standard moves in the base game.
- The first set of Switch Skills are unlocked by completing the Lv. 3⭐Urgent Village Quest Feathered Frenzy
- The second set of Switch Skills are unlocked by forging or upgrading 8 Weapons within a Weapon-type. Note that this needs to be done for every Weapon-type that you want to unlock Switch Skills for.
- The third set of Switch Skills are unlocked by completing the associated High Rank Hub Quest given by Master Utsushi. These quests are unlocked by gaining access to the required Hub Quest rank.
- Lv. 5⭐ Charge Blade Coalescing for the Charge Blade.
- Once unlocked, Switch Skills can be swapped at any Item Box and Switch Skill combinations can be saved to Item Loadouts as well.
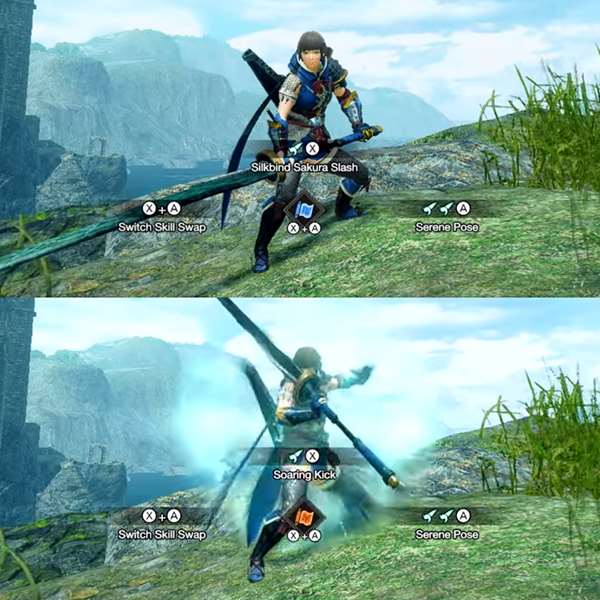
- The Sunbreak Expansion introduces the Switch Skill Swap mechanic, where hunters can preload 2 Switch Skill loadouts and swap between them freely during hunts. Hunters will also now have access to a total of 5 sets of swappable Switch Skills, including new Silkbind Attacks and regular moves.
- This expansion also introduces the Swap Evade, a special dodge maneuver that can be performed right after a Switch Skill Swap, allowing hunters to quickly evade and maintain distance while safely swapping skill sets.
- In the table below, the left column represents default moves available from the beginning, while the right represents unlockable Switch Skills.
Switch Skill Swap Mechanic
The Switch Skill Swap mechanic allows the hunter to assign Switch Skill loadouts and swap between them on the fly, whether in combat or otherwise. This allows the hunter to further expand their arsenal of available moves during hunts and to further customize their builds to accommodate their playstyle. Being able to make split-second decisions to swap loadouts and use specific moves to counter monster attacks as they wind up is sure to add an exciting new dimension to monster hunting.
With the Switch Skill Swap mechanic, hunters are given two loadouts to switch between, denoted by the ![]() Red Scroll and
Red Scroll and ![]() Blue Scroll icons on the UI. Hunters can set up each loadout from the Item Box at Kamura Village, Elgado Outpost or even at Camps while out on hunts, just as they would when assigning Switch Skills individually. When out on hunts, hunters can swap between the two loadouts by holding
Blue Scroll icons on the UI. Hunters can set up each loadout from the Item Box at Kamura Village, Elgado Outpost or even at Camps while out on hunts, just as they would when assigning Switch Skills individually. When out on hunts, hunters can swap between the two loadouts by holding ![]() and pressing the
and pressing the ![]() +
+ ![]() buttons. The character will perform a quick animation and briefly flash with energy, signifying a successful swap.
buttons. The character will perform a quick animation and briefly flash with energy, signifying a successful swap.
| NEW! Charge Blade Switch Skills introduced with the Sunbreak Expansion | |
|---|---|
| Switch Skills Set 1 | |
Morph Slash |
Switch Skill Name |
| Sword to axe, axe to sword. This switching attack forms the basis of a Charge Blade. Right as the weapon begins switching to an axe, or right as it is about to finish switching to a sword, the shield is raised to block incoming attacks. |
Switch Skill Description |
Controls
|
Controls |
| Switch Skills Set 2 | |
Condensed Element Slash |
Condensed Spinning Slash |
| While Charging, elemental energy gathers on the sword to strengthen it and generate a powerful bash effect. The damage dealt by the sword temporarily increases, and incurs additional damage. Reinforcing the sword with this skill, however, requires the shield to also be elementally boosted.
|
Activates the Element Regeneration system while charging. The shield rotates and acts as a spinning saw blade. This technique switches the weapon into Axe Mode, allowing multiple hits until the mode is disengaged. Longer hits in Axe Mode turn the energy into phials.
|
Controls
|
Controls
|
| Switch Skills Set 3 | |
Phial Follow-up |
Phial Follow-up: Firing Pin |
| A mechanism in which a small explosion is triggered by Shield Thrust during Elemental Boost or by sword attacks while in Sword Boost Mode. Functions as support when attacking in Sword Mode.
|
A mechanism that lowers the pressure of elemental energy generated through Shield Thrust during Elemental Boost, or by sword attacks while in Sword Boost Mode. The elemental energy generated builds up on your target, but disappears over time. It can be detonated by any attack in Axe Mode, and extending the time limit of the Elemental Boost.
|
Controls
|
Controls
|
| Switch Skills Set 4 (Silkbind) | |
Counter Peak Performance |
Ready Stance |
| A Guard technique using Wirebug silk. If an attack is successfully blocked, phials are filled, and you can lead into various attack-focused actions. (Wirebug Gauge recovery speed: Medium)
|
A Silkbind maneuver that binds sword and axe together with Ironsilk. After guarding, a heavy knockback leaves you in Sword Mode, and lowers your guard reaction so you're able to chain sword/axe attacks. (Wirebug Gauge recovery speed: Fast)
|
Controls
|
Controls
|
| Switch Skills Set 5 (Silkbind) | |
Morphing Advance |
Air Dash |
| A Silkbind technique for quickly closing the distance to your target while morphing into Axe Mode. While advancing, you're immune to knockback and attacks that send you flying. You can also follow up by morphing back into Sword Mode. (Wirebug Gauge recovery speed: Fast)
|
A Wirebug-based technique where you rise up while whirling an axe, then propel yourself away with a Phial Explosion. Damage often leaves monsters mountable, and you can control your fall direction to some degree. If no Phial Explosion is detonated, you'll fall straight down. (Wirebug Gauge recovery speed: Fast)
|
Controls
|
Controls
|
Charge Blade Controls
Sword
 : Sword Weak Slash
 +
+  : Sword Forward Slash
- W A S D +
 during combo: Sword Fade Slash
  +
+  : Sword Morph Slash
 +
+  : Charge
 : Guard
- Hold
 : Sword Charged Double Slash
 - Charge Gauge: Attack in Sword Mode to build up Sword Energy. Build up too much energy and attacks will bounce off. Perform Charge Phials while the gauge is yellow or above to fill a phial, which can be used in Axe Mode to perform powerful attacks.
- Attacks that Block: Some sword mode attacks have blocking frames, like the end of Spinning Slash or the start of Morph Slash. If an attack hits while your shield is facing forward, you'll block automatically.
- Charged Attack: Condensed Element Slash and Charged DOuble Slash will not execute properly if you hold the button for too long. Release the button at the right time to use these moves successfully.
- Sword Boost Mode: Perform a Sword: Condensed Element Slash during an Elemental Boost to enter Sword Boost Mode. In this mode, your sword will not be deflected and you will gain additional attacks.
Axe
 : Axe Rising Slash
 : Axe Elemental Discharge
 +
+  : Axe Amped Element Discharge
 : Axe Morph Slash
- Element Discharge: While in Axe Mode, you can use phials to perform powerful attacks.
- Element Boost: With at least 1 phial applied, perform an Axe Elemental Roundslash, and your shield will be elementally boosted, improving power and guard capacity in Axe Mode. Axe Amped Element Discharge becomes Axe Super Element Discharge. Successfully blocking an attack in this state triggers a shield explosion.
Silkbind Controls
 +
+  : Morphing Advance
 +
+  : Counter Peak Performance
- Morphing Advance: Uses a Wirebug to launch yourself forward while your charge blade switches to axe form. While in motion, monster attacks won't knock you back or stun you.
- Counter Peak Performance: Being hit while your weapon is readied will fill your phials to maximum.
Chargeblade Useful Combos
Sword: Basic Combo
 +
+  ,
,  ,
, 
- Sword: Forward Slash > Sword: Return Stroke > Sword: Spinning Slash
Elemental Roundslash Combo
- Power Mode requires more than 1 Phial.
- Hold
 ,
,  +
+  ,
,  +
+  ,
, 
- Sword: Charged Double Slash > Sword: Shield Thrust > Axe: Amped Element Discharge > Axe: Element Boost Spinning Slash
Sword: Sword Mode-boosting Combo
- During Elemental Boost only.
- Hold
 ,
,  +
+  , Hold
- Sword: Charged Double Slash > While Charging > Sword: Condensed Element Slash
Axe Combo into Amped Element Discharge
- W A S D +
 ,
,  ,
, 
- Axe: Dash Slam > Axe: Element Discharge II > Axe: Amped Element Discharge
Axe: Combos from Axe Mode into Element Discharge
 ,
,  ,
,  ,
, 
- Axe: Rising Slash > Axe: Element Discharge II > Axe: Rising Slash > Axe: Element Discharge II
Charge Blade Silkbind Attacks
Ready Stance
A Silkbind maneuver that binds sword and axe together with Ironsilk.
After guarding, a heavy knockback leaves you in Sword Mode, and lowers your guard reaction so you're able to chain sword/axe attacks.
Counter Peak Performance
Ready your shield while stretching silk to the ground. Being hit while your shield is readied will fill your phials to the maximum.
While holding
Can be switched out with Axe Hopper
Charge Blade Switch Skills
Switch Skills in Monster Hunter Rise (MHR or MHRise) refer to swappable moves in a Weapon's moveset. Each of the 14 Weapon-types have 3 sets of 2 moves that can be switched out with each other, allowing for a diverse, customizable approach to combat. Switch Skills are unlocked by progressing in the game, with each set having a default move that is available from the beginning.
- Each Weapon-type has a set of swappable Silkbind Attacks and 2 sets of swappable standard moves in the base game.
- The first set of Switch Skills are unlocked by completing the Lv. 3⭐Urgent Village Quest Feathered Frenzy
- The second set of Switch Skills are unlocked by forging or upgrading 8 Weapons within a Weapon-type. Note that this needs to be done for every Weapon-type that you want to unlock Switch Skills for.
- The third set of Switch Skills are unlocked by completing the associated High Rank Hub Quest given by Master Utsushi. These quests are unlocked by gaining access to the required Hub Quest rank.
- Lv. 5⭐ Charge Blade Coalescing for the Charge Blade.
- Once unlocked, Switch Skills can be swapped at any Item Box and Switch Skill combinations can be saved to Item Loadouts as well.
- The Sunbreak Expansion introduces the Switch Skill Swap mechanic, where hunters can preload 2 Switch Skill loadouts and swap between them freely during hunts. Hunters will also now have access to a total of 5 sets of swappable Switch Skills, including new Silkbind Attacks and regular moves.
- This expansion also introduces the Swap Evade, a special dodge maneuver that can be performed right after a Switch Skill Swap, allowing hunters to quickly evade and maintain distance while safely swapping skill sets.
- In the table below, the left column represents default moves available from the beginning, while the right represents unlockable Switch Skills.
| NEW! Charge Blade Switch Skills introduced with the Sunbreak Expansion | |
|---|---|
| Switch Skills Set 1 | |
Morph Slash |
Switch Skill Name |
| Sword to axe, axe to sword. This switching attack forms the basis of a Charge Blade. Right as the weapon begins switching to an axe, or right as it is about to finish switching to a sword, the shield is raised to block incoming attacks. |
Switch Skill Description |
Controls
|
Controls |
| Switch Skills Set 2 | |
Condensed Element Slash |
Condensed Spinning Slash |
| While Charging, elemental energy gathers on the sword to strengthen it and generate a powerful bash effect. The damage dealt by the sword temporarily increases, and incurs additional damage. Reinforcing the sword with this skill, however, requires the shield to also be elementally boosted.
|
Activates the Element Regeneration system while charging. The shield rotates and acts as a spinning saw blade. This technique switches the weapon into Axe Mode, allowing multiple hits until the mode is disengaged. Longer hits in Axe Mode turn the energy into phials.
|
Controls
|
Controls
|
| Switch Skills Set 3 | |
Phial Follow-up |
Phial Follow-up: Firing Pin |
| A mechanism in which a small explosion is triggered by Shield Thrust during Elemental Boost or by sword attacks while in Sword Boost Mode. Functions as support when attacking in Sword Mode.
|
A mechanism that lowers the pressure of elemental energy generated through Shield Thrust during Elemental Boost, or by sword attacks while in Sword Boost Mode. The elemental energy generated builds up on your target, but disappears over time. It can be detonated by any attack in Axe Mode, and extending the time limit of the Elemental Boost.
|
Controls
|
Controls
|
| Switch Skills Set 4 (Silkbind) | |
Counter Peak Performance |
Ready Stance |
| A Guard technique using Wirebug silk. If an attack is successfully blocked, phials are filled, and you can lead into various attack-focused actions. (Wirebug Gauge recovery speed: Medium)
|
A Silkbind maneuver that binds sword and axe together with Ironsilk. After guarding, a heavy knockback leaves you in Sword Mode, and lowers your guard reaction so you're able to chain sword/axe attacks. (Wirebug Gauge recovery speed: Fast)
|
Controls
|
Controls
|
| Switch Skills Set 5 (Silkbind) | |
Morphing Advance |
Air Dash |
| A Silkbind technique for quickly closing the distance to your target while morphing into Axe Mode. While advancing, you're immune to knockback and attacks that send you flying. You can also follow up by morphing back into Sword Mode. (Wirebug Gauge recovery speed: Fast)
|
A Wirebug-based technique where you rise up while whirling an axe, then propel yourself away with a Phial Explosion. Damage often leaves monsters mountable, and you can control your fall direction to some degree. If no Phial Explosion is detonated, you'll fall straight down. (Wirebug Gauge recovery speed: Fast)
|
Controls
|
Controls
|
Charge Blades are a type of Weapon in Monster Hunter Rise (MHR or MHRise). This page shows a visual gallery of all different styles for Charge Blades. as well as a comparison table comparing the most imporant aspects such as Attack, Sharpness, Affinity, etc. Weapons are often upgraded based on previous decisions, with different paths leading to different looks and necessitating different materials. You can find detailed upgrade path information in the Charge Blade Weapon Tree or by clicking each individual weapon below.
For a comprehensive guide on how to use Charge Blades, please click the following link: Charge Blade
Charge Blades in Monster Hunter Rise
Quick Search of All Master Rank Charge Blades
Name |
|
|
|
Phial |
|
Rare |
Rampage Skills |
Crafting |
|---|---|---|---|---|---|---|---|---|
| Defender Charge Blade I | 110 | None | 0% | Impact Phial | 30 | Rarity 1 |
|
|
| Champion Charge Blade | 150 | None | 0% | Impact Phial | 30 | Rarity 2 |
|
|
| Champion Charge Blade II | 190 | None | 0% | Impact Phial | 30 | Rarity 4 |
|
|
| Champion Charge Blade III | 210 | None | 0% | Impact Phial | 30 | Rarity 4 |
|
|
| Guardian Charge Blade | 230 | None | 0% | Impact Phial | 30 | Rarity 5 |
|
|
| Kamura C. Blade I | 50 | None | 0% | Impact Phial | 0 | Rarity 1 |
|
|
| Kamura C. Blade II | 60 | None | 0% | Impact Phial | 0 | Rarity 1 |
|
|
| Kamura C. Blade III | 90 | None | 0% | Impact Phial | 0 | Rarity 2 |
|
|
| Kamura C. Blade IV | 140 | None | 0% | Impact Phial | 0 | Rarity 3 |
|
|
| Kamura C. Blade V |
150 | None | 0% | Impact Phial | 0 | Rarity 4 |
|
|
| Kamura Ninja C. Blade |
150 | None | 0% | Impact Phial | 0 | Rarity 5 |
|
|
| Kamura Warrior C. Blade |
250 | None | 0% | Impact Phial | 0 | Rarity 8 | None |
|
| Kamura Warrior C. Blade + |
300 | None | 0% | Impact Phial | 0 | Rarity 8 | None |
|
| Kamura Fine C. Blade |
330 | None | 0% | Impact Phial | 0 | Rarity 10 | None |
|
| Duke's Shield |
320 | 0% | Impact Phial | 0 | Rarity 9 | None |
|
|
| Bloodeagle Adler |
330 | 0% | Impact Phial | 0 | Rarity 10 | None |
|
|
| Silver Splitter |
320 | 0% | Element Phial | 0 | Rarity 10 | None |
|
|
| Dear Lutemis I | 100 | 0% | Element Phial | 0 | Rarity 2 |
|
||
| Dear Lutemis II |
150 | 0% | Element Phial | 0 | Rarity 4 |
|
||
| Dear Lutemia |
170 | 0% | Element Phial | 0 | Rarity 5 |
|
||
| Dear Lutemia + |
260 | 0% | Element Phial | 0 | Rarity 8 | None |
|
|
| Dear Lutemineva |
310 | 0% | Element Phial | 0 | Rarity 9 | None |
|
|
| Dear Lutemineva + |
330 | 0% | Element Phial | 0 | Rarity 10 | None |
|
|
| Luna Eostre |
330 | 10% | Impact Phial | 0 | Rarity 10 | None |
|
|
| Rosenrupe |
300 | 20% | Impact Phial | 0 | Rarity 9 | None |
|
|
| Rosenrupe + |
310 | 20% | Impact Phial | 0 | Rarity 9 | None |
|
|
| Rosenomolgia |
320 | 20% | Impact Phial | 0 | Rarity 10 | None |
|
|
| Kaktusemolgia |
310 | 20% | Element Phial | 0 | Rarity 10 | None | ||
| Weissritter I | 90 | 20% | Element Phial | 0 | Rarity 2 |
|
||
| Weissritter II | 110 | 20% | Element Phial | 0 | Rarity 3 |
|
||
| Weissritter III |
130 | 25% | Element Phial | 0 | Rarity 4 |
|
||
| Paladire Charge Blade |
170 | 25% | Element Phial | 0 | Rarity 5 |
|
||
| Frostrail |
270 | 25% | Element Phial | 0 | Rarity 8 | None |
|
|
| Frostrail + |
290 | 25% | Element Phial | 0 | Rarity 9 | None |
|
|
| Dreadfeller |
310 | 25% | Element Phial | 0 | Rarity 10 | None |
|
|
| Usurper's Lightning I | 120 | 0% | Element Phial | 0 | Rarity 3 |
|
||
| Usurper's Lightning II | 190 | 0% | Element Phial | 0 | Rarity 5 |
|
||
| Despot's Thundergale |
210 | 0% | Element Phial | 0 | Rarity 6 |
|
||
| Despot's Thundergale + |
310 | 0% | Element Phial | 0 | Rarity 9 | None |
|
|
| Oppresor's Thunderclap |
330 | 0% | Element Phial | 0 | Rarity 10 | None |
|
|
| Shovedown Blade I | 100 | 0% | Impact Phial | 10 | Rarity 2 |
|
||
| Shovedown Blade II |
170 | 0% | Impact Phial | 10 | Rarity 4 |
|
||
| Spinning Takedown |
210 | 0% | Impact Phial | 20 | Rarity 5 |
|
||
| Spinning Takedown + |
250 | 0% | Impact Phial | 20 | Rarity 8 | None |
|
|
| Whirling Takedown |
270 | 0% | Impact Phial | 20 | Rarity 8 | None |
|
|
| Whirling Takedown + |
340 | 0% | Impact Phial | 20 | Rarity 10 | None |
|
|
| Giga Grips I | 100 | 0% | Impact Phial | 15 | Rarity 2 |
|
||
| Giga Grips II | 140 | 0% | Impact Phial | 15 | Rarity 3 |
|
||
| Giga Grips III |
140 | 0% | Impact Phial | 20 | Rarity 5 |
|
||
| Titan's Vise |
200 | 0% | Impact Phial | 20 | Rarity 6 |
|
||
| Titan's Vise + |
260 | 0% | Impact Phial | 20 | Rarity 8 | None |
|
|
| Goliath Arms |
330 | 0% | Impact Phial | 20 | Rarity 10 | None |
|
|
| Surprise Axe I | 160 | -20% | Impact Phial | 0 | Rarity 3 |
|
||
| Surprise Axe II |
190 | -20% | Impact Phial | 0 | Rarity 5 |
|
||
| Stunning Axe |
230 | -20% | Impact Phial | 0 | Rarity 6 |
|
||
| Striking Axe |
310 | -20% | Impact Phial | 0 | Rarity 8 | None |
|
|
| Striking Axe + |
330 | -20% | Impact Phial | 0 | Rarity 9 | None |
|
|
| Shocking Axe |
350 | -20% | Impact Phial | 0 | Rarity 10 | None |
|
|
| Hyperguard I | 80 | None | 0% | Impact Phial | 0 | Rarity 1 |
|
|
| Hyperguard II | 100 | None | 0% | Impact Phial | 0 | Rarity 1 |
|
|
| Regas Hyper | 120 | None | 0% | Impact Phial | 0 | Rarity 2 |
|
|
| Elite Blade I | 140 | None | 0% | Impact Phial | 0 | Rarity 3 |
|
|
| Elite Blade II | 170 | None | 0% | Impact Phial | 0 | Rarity 4 |
|
|
| Kaiser Blade | 190 | None | 0% | Impact Phial | 0 | Rarity 5 |
|
|
| Kaiser Blade + |
260 | None | 0% | Impact Phial | 0 | Rarity 8 | None |
|
| Kaiser Kommandant |
310 | None | 0% | Impact Phial | 0 | Rarity 8 | None |
|
| Kaiser Kommandant + |
340 | None | 0% | Impact Phial | 0 | Rarity 10 | None |
|
| Frostmoon Icecutioner |
300 | 0% | Impact Phial | 0 | Rarity 9 | None |
|
|
| Frostmoon Icecutioner + |
310 | 0% | Impact Phial | 0 | Rarity 9 | None |
|
|
| Gluttonous Glacier |
330 | 0% | Impact Phial | 0 | Rarity 10 | None |
|
|
| K. Captain's Blade I | 150 | 15% | Elemental Phial | 0 | Rarity 4 |
|
||
| K. Captain's Blade II |
160 | 20% | Elemental Phial | 0 | Rarity 5 |
|
||
| Die Walküre |
170 | 20% | Elemental Phial | 0 | Rarity 6 |
|
||
| Die Walkure + |
250 | 20% | Element Phial | 0 | Rarity 8 | None |
|
|
| Tristan and Isolde |
300 | 20% | Element Phial | 0 | Rarity 9 | None |
|
|
| Tristan and Isolde + |
320 | 20% | Element Phial | 0 | Rarity 10 | None |
|
|
| Vajraklex Blade |
290 | 30% | Impact Phial | 0 | Rarity 9 | None |
|
|
| Amagarex Blade |
300 | 30% | Impact Phial | 0 | Rarity 9 | None |
|
|
| Amagarex Blade + |
310 | 30% | Impact Phial | 0 | Rarity 10 | None |
|
|
| Biting Edge I |
150 | 25% | Elemental Phial | 0 | Rarity 6 |
|
||
| Biting Edge II |
160 | 25% | Elemental Phial | 0 | Rarity 6 |
|
||
| Araknablade |
170 | 30% | Elemental Phial | 0 | Rarity 7 |
|
||
| Araknasmasher |
270 | 30% | Element Phial | 0 | Rarity 8 | None |
|
|
| Araknasmasher + |
290 | 30% | Element Phial | 0 | Rarity 9 | None |
|
|
| Crawling Crusher |
300 | 30% | Element Phial | 0 | Rarity 10 | None |
|
|
| Roujatov Gate |
290 | 15% | Impact Phial | 0 | Rarity 9 | None |
|
|
| Roujatov Gate + |
310 | 15% | Impact Phial | 0 | Rarity 9 | None |
|
|
| Ent Da Lavater |
320 | 15% | Impact Phial | 0 | Rarity 10 | None |
|
|
| Tigrex Divide I | 160 | None | -20% | Impact Phial | 0 | Rarity 3 |
|
|
| Tigrex Divide II |
160 | None | -15% | Impact Phial | 0 | Rarity 6 |
|
|
| Tigrex Blade |
220 | None | -15% | Impact Phial | 0 | Rarity 6 |
|
|
| Tigrex Blade + |
330 | None | -15% | Impact Phial | 0 | Rarity 9 | None |
|
| Huge Tigrex Blade |
340 | None | -15% | Impact Phial | 0 | Rarity 9 | None |
|
| Huge Tigrex Blade + |
350 | None | -15% | Impact Phial | 0 | Rarity 10 | None |
|
| Mizuniya Drill I | 110 | 10% | Impact Phial | 0 | Rarity 3 |
|
||
| Mizuniya Drill II |
170 | 15% | Impact Phial | 0 | Rarity 5 |
|
||
| Final Fieldblade |
190 | 20% | Impact Phial | 0 | Rarity 6 |
|
||
| Final Fieldblade + |
290 | 20% | Impact Phial | 0 | Rarity 9 | None |
|
|
| Divine Fieldblade |
300 | 20% | Impact Phial | 0 | Rarity 9 | None |
|
|
| Divine Fieldblade + |
310 | 20% | Impact Phial | 0 | Rarity 10 | None |
|
|
| Pure Axe Omonshiro |
310 | 10% | Impact Phial | Rarity 10 | None |
|
||
| Kadachi Slasher I | 100 | 10% | Impact Phial | 0 | Rarity 2 |
|
||
| Kadachi Slasher II | 140 | 15% | Impact Phial | 0 | Rarity 3 |
|
||
| Kadachi Otenta |
180 | 15% | Impact Phial | 0 | Rarity 5 |
|
||
| Kadachi Otenta + |
250 | 15% | Impact Phial | 0 | Rarity 8 | None |
|
|
| Thunderclap Otenta |
290 | 15% | Impact Phial | 0 | Rarity 8 | None |
|
|
| Thunderclap Otenta + |
330 | 15% | Impact Phial | 0 | Rarity 10 | None |
|
|
| Wind Thief Sickle I | 70 | None | 10% | Impact Phial | 0 | Rarity 1 |
|
|
| Wind Thief Sickle II | 90 | None | 15% | Impact Phial | 0 | Rarity 2 |
|
|
| Gale Sickle |
140 | None | 15% | Impact Phial | 0 | Rarity 4 |
|
|
| Gale Sickle + |
240 | None | 15% | Impact Phial | 0 | Rarity 8 | None |
|
| Reaper Axe Helliot |
320 | None | 20% | Impact Phial | 0 | Rarity 10 | None |
|
| Hidden Arsenal I | 120 | None | 30% | Impact Phial | 0 | Rarity 3 |
|
|
| Hidden Arsenal II |
180 | None | 35% | Impact Phial | 0 | Rarity 5 |
|
|
| Scream in the Night |
190 | None | 40% | Impact Phial | 0 | Rarity 6 |
|
|
| Howl in the Rain |
270 | None | 40% | Impact Phial | 0 | Rarity 8 | None |
|
| Howl in the Rain + |
280 | None | 40% | Impact Phial | 0 | Rarity 9 | None |
|
| Adivya Charger |
300 | None | 40% | Impact Phial | 0 | Rarity 10 | None |
|
| Nunki's Asterism |
340 | 0% | Impact Phial | 0 | Rarity 10 | None |
|
|
| Bone Sgrongarm I | 90 | None | 0% | Impact Phial | 0 | Rarity 1 |
|
|
| Bone Sgrongarm II | 110 | None | 0% | Impact Phial | 0 | Rarity 1 |
|
|
| Hard Bone Strongarm | 120 | None | 0% | Impact Phial | 0 | Rarity 2 |
|
|
| Bone Blade I Charge Blade | 150 | None | 0% | Impact Phial | 0 | Rarity 3 |
|
|
| Bone Blade II | 180 | None | 0% | Impact Phial | 0 | Rarity 4 |
|
|
| Bonesilt Veil | 200 | None | 0% | Impact Phial | 0 | Rarity 5 |
|
|
| Bonesilt Veil + |
260 | None | 0% | Impact Phial | 0 | Rarity 8 | None |
|
| Bonebreaker Veil |
320 | None | 0% | Impact Phial | 0 | Rarity 8 | None |
|
| Bonebreaker Veil + |
350 | None | 0% | Impact Phial | 0 | Rarity 10 | None |
|
| Aslat Charger |
310 | None | 10% | Impact Phial | 0 | Rarity 9 | None |
|
| Aslat Charger + |
320 | None | 10% | Impact Phial | 0 | Rarity 9 | None |
|
| Rebellious Charger |
330 | None | 10% | Impact Phial | 0 | Rarity 10 | None |
|
| Guardian Blade |
290 | 0% | Impact Phial | 0 | Rarity 8 | None |
|
|
| Guardian Blade + |
310 | 0% | Impact Phial | 0 | Rarity 9 | None |
|
|
| Nadegiri |
320 | 0% | Impact Phial | 0 | Rarity 10 | None |
|
|
| Jyura Silt I |
190 | -10% | Element Phial | 0 | Rarity 5 |
|
||
| Jyura Silt II |
190 | -10% | Element Phial | 0 | Rarity 6 |
|
||
| Clutch of the Deep |
230 | -10% | Element Phial | 0 | Rarity 6 |
|
||
| Clutch of the Deep + |
280 | -10% | Element Phial | 0 | Rarity 8 | None |
|
|
| Valtos Bow |
320 | -10% | Element Phial | 0 | Rarity 9 | None |
|
|
| Valtos Bow + |
350 | -10% | Element Phial | 0 | Rarity 10 | None |
|
|
| Axelion Blade I | 120 | 0% | Impact Phial | 0 | Rarity 3 |
|
||
| Axelion Blade II |
190 | 0% | Impact Phial | 0 | Rarity 5 |
|
||
| Bardichion Blade |
210 | 0% | Impact Phial | 0 | Rarity 6 |
|
||
| Bardichion Blade + |
300 | 0% | Impact Phial | 0 | Rarity 9 | None |
|
|
| Flamlion Blade |
320 | 0% | Impact Phial | 0 | Rarity 10 | None |
|
|
| Hellsire Blade |
330 | 15% | Element Phial | 0 | Rarity 10 | None |
|
|
| Bellowing Blow I | 90 | 0% | Impact Phial | 0 | Rarity 2 |
|
||
| Bellowing Blow II | 130 | 0% | Impact Phial | 0 | Rarity 3 |
|
||
| Illusory Frilled Wail |
180 | 0% | Impact Phial | 0 | Rarity 5 |
|
||
| Illusory Frilled Wail + |
260 | 0% | Impact Phial | 0 | Rarity 8 | None |
|
|
| Nightmare Frilled Wail |
290 | 0% | Impact Phial | 0 | Rarity 8 | None |
|
|
| Nightmare Frilled Wail + |
340 | 0% | Impact Phial | 0 | Rarity 10 | None |
|
|
| Bloom Snow Wail |
280 | 0% | Element Phial | Rarity 8 | None |
|
||
| Bloom Snow Wail + |
310 | 0% | Element Phial | Rarity 9 | None |
|
||
| Flicker Blizzard Wail |
320 | 0% | Element Phial | Rarity 10 | None |
|
||
| Poisonous Veil I | 110 | -10% | Impact Phial | 0 | Rarity 2 |
|
||
| Poisonous Veil II | 170 | -10% | Impact Phial | 0 | Rarity 4 |
|
||
| Infected Veil |
210 | -10% | Impact Phial | 0 | Rarity 5 |
|
||
| Infected Veil + |
270 | -10% | Impact Phial | 0 | Rarity 8 | None |
|
|
| Malefico Veil |
320 | -10% | Impact Phial | 0 | Rarity 8 | None |
|
|
| Malefico Veil + |
350 | -10% | Impact Phial | 0 | Rarity 10 | None |
|
|
| Dragon Veil I |
170 | -10% | Element Phial | 0 | Rarity 4 |
|
||
| Dragon Veil II |
180 | -10% | Element Phial | 0 | Rarity 5 |
|
||
| Dragonsong |
200 | -5% | Element Phial | 0 | Rarity 6 |
|
||
| Dragonsong + |
260 | -5% | Element Phial | 0 | Rarity 8 | None |
|
|
| Draquila Reaver |
290 | -5% | Element Phial | 0 | Rarity 8 | None |
|
|
| Draquila Reaver + |
330 | -5% | Element Phial | 0 | Rarity 10 | None |
|
|
| Barroth Anchor I | 120 | None | -20% | Impact Phial | 0 | Rarity 2 |
|
|
| Barroth Anchor II | 170 | None | -20% | Impact Phial | 0 | Rarity 3 |
|
|
| Rugged Anchor | 210 | None | -20% | Impact Phial | 0 | Rarity 5 |
|
|
| Barroth Guardian |
280 | None | -20% | Impact Phial | 0 | Rarity 8 | None |
|
| Barroth Guardian + |
290 | None | -20% | Impact Phial | 0 | Rarity 8 | None |
|
| Barroth Reanchor |
360 | None | -20% | Impact Phial | 0 | Rarity 10 | None |
|
| Golm Heart |
310 | None | 0% | Impact Phial | 0 | Rarity 8 | None |
|
| Golm Heart + |
330 | None | 0% | Impact Phial | 0 | Rarity 9 | None |
|
| Grand Gordlock |
360 | None | 0% | Impact Phial | 0 | Rarity 10 | None |
|
| Diablos Strongarm I | 220 | None | -30% | Impact Phial | 10 | Rarity 6 |
|
|
| Diablos Strongarm II | 230 | None | -30% | Impact Phial | 10 | Rarity 6 |
|
|
| Cera Strongarm |
240 | None | -30% | Impact Phial | 20 | Rarity 7 |
|
|
| Cera Strongarm + |
340 | None | -30% | Impact Phial | 20 | Rarity 9 | None |
|
| Cera Cediment |
350 | None | -30% | Impact Phial | 20 | Rarity 9 | None |
|
| Cera Cediment + |
370 | None | -30% | Impact Phial | 20 | Rarity 10 | None |
|
| Rough Roller I | 100 | 0% | Impact Phial | 0 | Rarity 2 |
|
||
| Rough Roller II |
170 | 0% | Impact Phial | 0 | Rarity 5 |
|
||
| Rotaxion |
200 | 0% | Impact Phial | 0 | Rarity 6 |
|
||
| Rotaxion + |
240 | 0% | Impact Phial | 0 | Rarity 8 | None |
|
|
| Vortax |
260 | 0% | Impact Phial | 0 | Rarity 8 | None |
|
|
| Vortax + |
320 | 0% | Impact Phial | 0 | Rarity 10 | None |
|
|
| Sinister Slasher I | 130 | 0% | Impact Phial | 0 | Rarity 3 |
|
||
| Sinister Slasher II | 140 | 0% | Impact Phial | 0 | Rarity 3 |
|
||
| Sinister Shade Axe |
200 | 0% | Impact Phial | 0 | Rarity 6 |
|
||
| Sinister Shade Axe + |
290 | 0% | Impact Phial | 0 | Rarity 8 | None |
|
|
| Mighty Soulcrusher |
320 | 0% | Impact Phial | 0 | Rarity 9 | None |
|
|
| Elendskraft |
290 | 20% | Impact Phial | 0 | Rarity 9 | None |
|
|
| Elendskraft + |
310 | 20% | Impact Phial | 0 | Rarity 9 | None |
|
|
| Unheilskraft |
320 | 20% | Impact Phial | 0 | Rarity 10 | None |
|
|
| L'Oppresseur |
290 | 35% | Impact Phial | 0 | Rarity 9 | None |
|
|
| Le Salut |
300 | 35% | Impact Phial | 0 | Rarity 10 | None |
|
|
| Friede Desastre |
340 | -30% / 15% * | Impact Phial | 0 | Rarity 10 | None |
|
|
| Undying Blade I | 190 | 0% | Impact Phial | 0 | Rarity 5 |
|
||
| Undying Blade II | 230 | 0% | Impact Phial | 0 | Rarity 6 |
|
||
| Ikaji Immortal | 240 | 0% | Impact Phial | 0 | Rarity 7 |
|
||
| Ikaji Immortal + |
330 | 0% | Impact Phial | 0 | Rarity 9 | None |
|
|
| Unyielding Honor |
340 | 0% | Impact Phial | 0 | Rarity 10 | None |
|
|
| Demonlord Blade |
330 | 0% | Impact Phial | 0 | Rarity 10 | None |
|
|
| Azure Elder Blade I | 180 | 0% | Impact Phial | 0 | Rarity 5 |
|
||
| Azure Elder Blade II | 190 | 0% | Impact Phial | 0 | Rarity 6 |
|
||
| Abyssal Gale Ward | 200 | 0% | Impact Phial | 0 | Rarity 7 |
|
||
| Asylum Bellow |
340 | 0% | Impact Phial | 0 | Rarity 10 | None |
|
|
| Thunderbolt Sawtooth I | 180 | 0% | Element Phial | 0 | Rarity 6 |
|
||
| Abyssal Storm Ward | 190 | 0% | Elemental Phial | 0 | Rarity 7 |
|
||
| Asylum Peal |
310 | 0% | Element Phial | 0 | Rarity 10 | None |
|
|
| Daora's Casca I |
180 | 10% | Impact Phial | 0 | Rarity 6 |
|
||
| Daora's Thwartoise |
190 | 10% | Impact Phial | 0 | Rarity 7 |
|
||
| Daora's Thwartoise + |
310 | 10% | Impact Phial | 0 | Rarity 9 | None |
|
|
| Daora's Worldbearer |
320 | 10% | Impact Phial | 0 | Rarity 10 | None |
|
|
| Teostra's Striker I | 180 | 0% | Impact Phial | 0 | Rarity 6 |
|
||
| Teostra's Nova | 190 | 0% | Impact Phial | 0 | Rarity 7 |
|
||
| Teostra's Nova + |
320 | 0% | Impact Phial | 0 | Rarity 9 | None |
|
|
| Teostra's Redeemer |
330 | 0% | Impact Phial | 0 | Rarity 10 | None |
|
|
| Arcane Draw I |
180 | 0% | Impact Phial | 0 | Rarity 6 |
|
||
| Etherward |
190 | 0% | Impact Phial | 0 | Rarity 7 |
|
||
| Etherward + |
310 | 0% | Impact Phial | 0 | Rarity 9 | None |
|
|
| Phantom Providence |
320 | 0% | Impact Phial | 0 | Rarity 10 | None |
|
|
| Redwing Edge I |
170 | 0% | Elemental Phial | 0 | Rarity 6 |
|
||
| Skaltecore |
180 | 0% | Elemental Phial | 0 | Rarity 7 |
|
||
| Crimson Mechwing |
340 | 0% | Element Phial | 0 | Rarity 10 | None |
|
|
| Abyssal Splitter |
350 | -25% | Impact Phial | 0 | Rarity 10 | None |
|
|
| Regal Daruq |
340 | 0% | Element Phial | 0 | Rarity 10 | None |
|
|
| Altostratus Blade |
360 | -25% | Impact Phial | 0 | Rarity 10 | None |
|
|
| Ricebane I | 160 | None | 0% | Impact Phial | 15 | Rarity 3 |
|
|
| Ricebane II |
200 | None | 0% | Impact Phial | 15 | Rarity 4 |
|
|
| Pounder of Rice |
210 | None | 0% | Impact Phial | 20 | Rarity 5 |
|
|
| Pounder of Rice + |
270 | None | 0% | Impact Phial | 30 | Rarity 8 | None |
|
| Ricebane Emperor |
340 | None | 0% | Impact Phial | 30 | Rarity 10 | None |
|
| Cuddly Cat I | 80 | 0% | Impact Phial | 0 | Rarity 1 |
|
||
| Cuddly Cat II | 130 | 0% | Impact Phial | 0 | Rarity 3 |
|
||
| Felyne Fancy |
140 | 0% | Impact Phial | 0 | Rarity 4 |
|
||
| Felyne Fancy + |
230 | 0% | Impact Phial | 0 | Rarity 8 | None |
|
|
| Ominous Puss |
330 | 0% | Impact Phial | 0 | Rarity 10 | None |
|
|
| Mandible Blade I | 120 | 10% | Impact Phial | 0 | Rarity 3 |
|
||
| Mandible Blade II | 130 | 10% | Impact Phial | 0 | Rarity 3 |
|
||
| Maxilla Edge |
180 | 15% | Impact Phial | 0 | Rarity 5 |
|
||
| Maxilla Edge + |
290 | 15% | Impact Phial | 0 | Rarity 8 | None |
|
|
| Skull Edge |
330 | 15% | Impact Phial | 0 | Rarity 10 | None |
|
|
| Vaik Veil I | 100 | 0% | Element Phial | 0 | Rarity 2 |
|
||
| Vaik Veil II | 140 | 0% | Element Phial | 0 | Rarity 3 |
|
||
| Shieldraad |
150 | 0% | Element Phial | 0 | Rarity 4 |
|
||
| Shieldraad + |
290 | 0% | Element Phial | 0 | Rarity 8 | None |
|
|
| Armordraad |
320 | 0% | Element Phial | 0 | Rarity 10 | None |
|
|
| Royal Order's Battleaxe |
250 | None | 10% | Impact Phial | 50 | Rarity 8 | None |
|
| Royal Order Battleaxe + |
320 | None | 10% | Impact Phial | 50 | Rarity 10 | None |
|
| Antique Machina CB |
330 | 0% | Impact Phial | 0 | Rarity 10 | None |
|
|
| Rampage C. Blade I | 150 | None | 0% | Impact Phial | 0 | Rarity 4 |
|
|
| Rampage C. Blade II | 170 | None | 0% | Impact Phial | 0 | Rarity 5 |
|
|
| Rampage C. Blade III | 180 | None | 0% | Impact Phial | 0 | Rarity 5 |
|
|
| Rampage C. Blade IV | 190 | None | 0% | Impact Phial | 0 | Rarity 6 |
|
|
| Rampage C. Blade V | 200 | None | 0% | Impact Phial | 0 | Rarity 6 |
|
|
| Rampage C.Blade S | 210 | None | 0% | Impact Phial | 0 | Rarity 7 |
|
|
Charge Blade Gallery
Charge Blade Defender Weapons
Charge Blade Kamura Weapons
Master Rank Charge Blade Kamura Weapons
Charge Blade Ore Weapons
Master Rank Charge Blade Ore Weapons
Charge Blade Bone Weapons
Master Rank Charge Blade Bone Weapons
Charge Blade Independent Weapons
Master Rank Charge Blade Independet Weapons
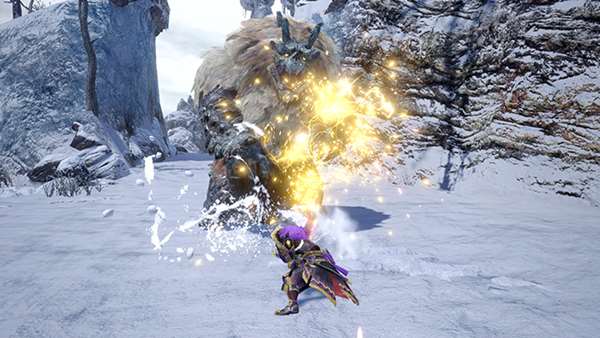
Charge Blade Weapon Tree for Monster Hunter Rise (MHR or MHRise) features the different upgrade paths for the Charge Blade weapon. In Monster Hunter Rise, there are 14 categories of weapons that players can choose from to use for hunting Monsters. The Charge Blade is a weapon that is both sword and axe. Charge it up in sword mode, then combine sword and shield into an axe and unleash the energy as a devastating attack. This page lists all of the Charge Blades in Monster Hunter Rise, showing their effectiveness and upgrade paths.
Charge Blade Weapon Traits
- Sword & shield form strikes a balance between mobility, defense, and attack.
- Axe form trades out defense for powerful attacks, good reach, and the phial's bonus.
- A complex weapon with a sword & shield form and an axe form that both use a phial system.
- Sword mode boasts mobility and high guard capabilities, while axe mode boasts more powerful attacks. Store up energy while in sword mode, and then use it to deal high damage in axe mode.
Master Rank Charge Blade Weapons
Introduced with the release of the Sunbreak Expansion, Master Rank Weapons are a brand new and more powerful tier of Weaapons available to hunters to help them deal with the deadlier Monsters that can be found on the Sunbreak Expansion.
Note that these Weapons can only be accessed by players that have purchased and installed the Sunbreak Expansion. For those who own the expansionless version of Monster Hunter, these Weapons are unobtainable.
- You can check out the Charge Blade Weapon Tree to find the different upgrade paths for each Master Rank Charge Blade weapon.
Charge Blade Weapon Features
Weapon Advantages
- Switching to the axe allows for strong and deadly attacks.
- The Silkbind Guard move is a great way to quickly max up your Phials.
- A versatile weapon where you can use the shield, sword, and switch to the axe.
- The new Silkbind Attack is a great use to glide around the battlefield and to quickly morph into axe mode.
Weapon Disadvantages
- Movement speed of the hunter is quite slow.
- Axe mode significantly slows the hunter's movement.
Important: For a comprehensive guide on how to use Charge Blades, please click the following link: Charge Blade
MH Rise Charge Blade Weapon Tree
Charge Blade Defender Tree
 Defender Charge Blade I
 110
110  Impact
 Champion Charge Blade
 150
150  Impact
 Champion Charge Blade II
 190
190  Impact
 Champion Charge Blade III
 210
210  Impact
 Guardian Charge Blade
 230
230  Impact
Charge Blade Kamura Tree
 Kamura C. Blade I
 50
50  Impact
 Kamura C. Blade II
 60
60  Impact
 Kamura C. Blade III
 90
90  Impact
 Kamura C. Blade IV
 140
140  Impact
 Kamura C. Blade V
 150
150 
 Impact
 Kamura Ninja C. Blade
 190
190 

 Impact
 Kamura Warrior C. Blade
 250
250 
 -
- 
 Impact
 Kamura Warrior C. Blade +
 300
300 
 -
- 
 Impact
 Kamura Fine C. Blade
 330
330 
 -
- 
 Impact
 Duke's Shield
 320
320  -
- 
 Impact
  24
24
 Bloodeagle Adler
  330
330  -
- 
 Impact
  27
27
 Dear Lutemis I
 100
100  Elem
Elem  22
22
 Dear Lutemis II
 150
150 
 Elem
Elem  26
26
 Dear Lutemia
 170
170 

 Elem
Elem  30
30
 Dear Lutemia +
 260
260 
 -
- 
 Elem
Elem  44
44
 Dear Lutemineva
 310
310 
 -
- 
 Elem
Elem  48
48
 Dear Lutemineva +
 330
330 
 -
- 
 Elem
Elem  54
54
 Luna Eostre
 330
330  -
- 
 Impact
  46
46 Rosenrupe
 300
300  -
- 
 Impact
  20
20
 Rosenrupe +
 310
310  -
- 
 Impact
  21
21
 Rosenomolgia
 320
320  -
- 
 Impact
  23
23
 Kaktusemolgia
 310
310 

 -
- 
 Elemental
  45
45
 Weissritter I
 90
90  Elem
Elem  17
17
 Weissritter II
 110
110  Elem
Elem  19
19
 Weissritter III
 130
130 


 Elem
Elem  22
22
 Pavadira
 170
170 


 Elem
Elem  26
26
 Frostrail
 270
270 

 -
- 
 Elem
Elem  36
36
 Frostrail +
 290
290 

 -
- 
 Elem
Elem  42
42
 Dreadfeller
 310
310 

 -
- 
 Elem
Elem  48
48
 Usurper's Lightning I
 120
120  Elem
Elem  20
20
 Usurper's Lightning II
 190
190  Elem
Elem  23
23
 Despot's Thundergale
 210
210  Elem
Elem 
 26
26
 Despot's Thundergale +
 310
310  Elem
Elem 
 -
- 
 47
47
 Oppressor's Thunderclap
 330
330  Elem
Elem 
 -
- 
 52
52
 Shovedown Blade I
 100
100  Impact
  13
13
 Shovedown Blade II
 170
170  Impact

 13
13
 Spinning Takedown
 210
210  Impact

 18
18
 Spinning Takedown +
 250
250  Impact
 -
- 
 28
28
 Whirling Takedown
 270
270  Impact
 -
- 
 30
30
 Whirling Takedown +
 340
340  Impact
 -
- 
 36
36
 Giga Grips I
 100
100  Impact
  22
22
 Giga Grips II
 140
140  Impact
  23
23
 Giga Grips III
 170
170 
 Impact
  25
25
 Titan's Vise
 200
200 
 Impact
  29
29
 Titan's Vise +
 260
260  -
- 
 Impact
  35
35
 Goliath Arms
 330
330  -
- 
 Impact
  40
40
 Surprise Axe I
 160
160  Impact
  9
9  15
15
 Surprise Axe II
 190
190  Impact
 11
11  15
15
 Stunning Axe
 230
230  Impact
 13
13  20
20
 Striking Axe
 310
310  Impact
  -
- 
 19
19 20
20
 Striking Axe +
 330
330  Impact
  -
- 
 21
21  20
20
 Shocking Axe
 350
350  Impact
  -
- 
 23
23 30
30
Charge Blade Ore Tree
 Hyperguard I
 80
80  Impact
 Hyperguard II
 100
100  Impact
 Regas Hyper
 120
120  Impact
 Elite Blade I
 140
140  Impact
 Elite Blade II
 170
170 
 Impact
 Kaiser Blade
 190
190 
 Impact
 Kaiser Blade +
 260
260  -
- 
 Impact
 Kaiser Kommandant
 310
310  -
- 
 Impact
 Kaiser Kommandant +
 340
340 
 -
- 
 Impact
 Frostmoon Icecutioner
 300
300 
 -
- 
 Impact
  27
27
 Frostmoon Icecutioner +
 310
310 
 -
- 
 Impact
  29
29
 Gluttonous Glacier
 330
330 
 -
- 
 Impact
  32
32
 K. Captain's Blade I
 150
150 
 Elem
Elem  29
29
 K. Captain's Blade II
 160
160 
 Elem
Elem  33
33
 Die Walkure
 170
170 
 Elem
Elem  37
37
 Die Walkure +
 250
250  -
- 
 Elem
Elem  45
45
 Tristan and Isolde
 300
300  -
- 
 Elem
Elem  50
50
 Tristan and Isolde +
 320
320  -
- 
 Elem
Elem  58
58
 Vajraklex Blade
 290
290  -
- 
 Impact
  25
25
 Amagarex Blade
 300
300  -
- 
 Impact
  30
30
 Amagarex Blade +
 310
310  -
- 
 Impact
  35
35
 Biting Edge I
 150
150 


 Elem
Elem  29
29
 Biting Edge II
 160
160 


 Elem
Elem  31
31
 Araknablade
  170
170 


 Elem
Elem  34
34
 Araknasmasher
  270
270 

 -
- 
 Elem
Elem  40
40
 Araknasmasher +
  290
290 

 -
- 
 Elem
Elem  52
52
 Crawling Crusher
  300
300 

 -
- 
 Elem
Elem  66
66
 Roujatov Gate
  290
290  -
- 
 Impact
  17
17
 Roujatov Gate +
  310
310  -
- 
 Impact
  19
19
 Ent Da Lavater
  320
320  -
- 
 Impact
  22
22
 Tigrex Divide I
 160
160  Impact
 Tigrex Divide II
 210
210 
 Impact
 Tigrex Blade
  220
220 
 Impact
 Tigrex Blade +
 330
330  -
- 
 Impact
 Huge Tigrex Blade
 340
340  -
- 
 Impact
 Huge Tigrex Blade +
 350
350  -
- 
 Impact
 Mizuniya Drill I
 110
110  Impact
  21
21
 Mizuniya Drill II
 170
170 
 Impact
  24
24
 Final Fieldblade
  190
190 
 Impact
  30
30
 Final Fieldblade +
  290
290  -
- 
 Impact
  42
42
 Divine Fieldblade
  300
300  -
- 
 Impact
  50
50
 Divine Fieldblade +
  300
300  -
- 
 Impact
  50
50
 Pure Axe Omonshiro
  320
320 

 -
- 
 Impact
  18
18
 Kadachi Slasher I
 100
100  Impact
  15
15
 Kadachi Slasher II
 140
140  Impact
  18
18
 Kadachi Otenta
 180
180 

 Impact
  20
20
 Kadachi Otenta +
 250
250 
 -
- 
 Impact
  33
33
 Thunderclap Otenta
 290
290 
 -
- 
 Impact
  36
36
 Thunderclap Otenta +
 330
330 

 -
- 
 Impact
  42
42
 Wind Thief Sickle I
 70
70  Impact
 Wind Thief Sickle II
 90
90  Impact
 Gale Sickle
 140
140 

 Impact
 Gale Sickle +
 240
240 
 -
- 
 Impact
 Reaper Axe Helliot
 320
320 
 -
- 
 Impact
 Hidden Arsenal I
 120
120  Impact
 Hidden Arsenal II
 180
180 
 Impact
 Scream in the Night
 190
190 
 Impact
 Howl in the Rain
 270
270  -
- 
 Impact
 Howl in the Rain +
 280
280  -
- 
 Impact
 Adivya Charger
 300
300  -
- 
 Impact
 Nunki's Asterism
 340
340 
 -
- 
 Impact
Charge Blade Bone Tree
 Bone Strongarm I
 90
90  Impact
 Bone Strongarm II
 110
110  Impact
 Hard Bone Strongarm
 120
120  Impact
 Bone Blade I
 150
150  Impact
 Bone Blade II
 180
180  Impact
 Bonesilt Veil
 200
200  Impact
 Bonesilt Veil +
 260
260 
 Impact
 Bonebreaker Veil
 320
320 
 Impact
 Bonebreaker Veil +
 350
350 
 Impact
 Aslat Charger
 310
310  -
- 
 Impact
 Aslat Charger +
 320
320  -
- 
 Impact
 Rebellious Charger
 330
330  -
- 
 Impact
 Guardian Blade
 290
290  -
- 
 Impact
  18
18
 Guardian Blade +
 310
310  -
- 
 Impact
  25
25
 Nadegiri
 320
320  -
- 
 Impact
  33
33
 Jyura Silt I
 190
190 


 Elem
Elem  10
10
 Jyura Silt II
 220
220 


 Elem
Elem  11
11
 Clutch of the Deep
 230
230 


 Elem
Elem  12
12
 Clutch of the Deep +
 280
280 

 -
- 
 Elem
Elem  21
21
 Valtos Bow
 320
320 

 -
- 
 Elem
Elem  24
24
 Valtos Bow +
 350
350 

 -
- 
 Elem
Elem  29
29
 Axelion Blade I
 120
120  Impact
  24
24
 Axelion Blade II
 190
190 
 Impact
  26
26
 Bardichion Blade
  210
210 
 Impact
  27
27
 Bardichion Blade +
  300
300  -
- 
 Impact
  52
52
 Flamlion Blade
  320
320  -
- 
 Impact
  60
60 Hellsire Blade
  330
330  -
- 
 Elem
Elem  48
48
 Bellowing Blow I
 90
90  Impact
  12
12
 Bellowing Blow II
 130
130  Impact
  15
15
 Illusory Frilled Wail
 180
180 

 Impact
  18
18
 Illusory Frilled Wail +
 260
260 
 -
- 
 Impact
  20
20
 Nightmare Frilled Wail
 290
290 
 -
- 
 Impact
  22
22
 Nightmare Frilled Wail +
 340
340 
 -
- 
 Impact
  25
25
 Bloom Snow Wail
 280
280 
 -
- 
 Elem
Elem  65
65
 Bloom Snow Wail +
 310
310 
 -
- 
 Elem
Elem  67
67
 Flicker Blizzard Wail
 320
320 
 -
- 
 Elem
Elem  71
71
 Poisonous Veil I
 110
110  Impact
  8
8
 Poisonous Veil II
 170
170  Impact
  11
11
 Infected Veil
 210
210 

 Impact
  14
14
 Infected Veil +
 270
270 
 -
- 
 Impact
  16
16
 Malefico Veil
 320
320 
 -
- 
 Impact
  17
17
 Malefico Veil +
 350
350 
 -
- 
 Impact
  25
25
 Dragon Veil I
 170
170 
 Elem
Elem  12
12
 Dragon Veil II
 180
180 

 Elem
Elem  24
24
 Dragonsong
 200
200 


 Elem
Elem  36
36
 Dragonsong +
 260
260 

 -
- 
 Elem
Elem  44
44
 Draquila Reaver
 290
290 

 -
- 
 Elem
Elem  49
49
 Draquila Reaver +
 330
330 

 -
- 
 Elem
Elem  55
55
 Barroth Anchor I
 120
120  Impact
 Barroth Anchor II
 170
170  Impact
 Rugged Anchor
 210
210  Impact
 Barroth Guardian
 280
280  -
- 
 Impact
 Barroth Guardian +
 290
290  -
- 
 Impact
 Barroth Reanchor
 360
360  -
- 
 Impact
 Golm Heart
 310
310 

 -
- 
 Impact
 Golm Heart +
 330
330 

 -
- 
 Impact
 Grand Gordlock
 360
360 

 -
- 
 Impact
 Diablos Strongarm I
 220
220  Impact
 Diablos Strongarm II
 230
230  Impact
 Cera Strongarm
 240
240 
 Impact
 Cera Strongarm +
 340
340  -
- 
 Impact
 Cera Cediment
 350
350  -
- 
 Impact
 Cera Cediment +
 370
370  -
- 
 Impact
 Rough Roller I
 100
100  Impact
  15
15
 Rough Roller II
 170
170 
 Impact
  17
17
 Rotaxion
 200
200 
 Impact
  19
19
 Rotaxion +
 240
240  -
- 
 Impact
  20
20
Charge Blade Independent Tree
 Silver Splitter
 320
320  Elem
Elem 

 -
- 
 Dragon 51
 Sinister Slasher I
 130
130  Impact
  20
20
 Sinister Slasher II
 140
140  Impact
  23
23
 Sinister Shade Axe
 200
200 

 Impact
  26
26
 Sinister Shade Axe +
 290
290 
 -
- 
 Impact
  28
28
 Mighty Soulcrusher
 320
320 
 -
- 
 Impact
  29
29
 Elendskraft
 290
290 
 Impact
  16
16
 Elendskraft +
 310
310  -
- 
 Impact
  23
23
 Unheilskraft
 320
320  -
- 
 Impact
  30
30
 L'Oppresseur
 290
290 
 Impact
  35
35
 Le Salut
 300
300 
 Impact
  42
42
 Friede Desastre
 340
340 
 -
- 
 Impact
  48
48
 Undying Blade I
 190
190  Impact
  10
10
 Undying Blade II
 230
230  Impact
  14
14
 Ikaji Immortal
 240
240  Impact
  16
16
 Ikaji Immortal +
 330
330 
 Impact
  22
22
 Unyielding Honor
 340
340 
 Impact
  24
24
 Demonlord Blade
 330
330 
 -
- 
 Impact
  18
18 Azure Elder Blade I
 180
180  Impact
  6
6
 Azure Elder Blade II
 190
190  Impact
  9
9
 Abyssal Gale Ward
 200
200  Impact
  17
17
 Asylum Bellow
 340
340 
 Impact
  23
23
 Thunderbolt Sawtooth I
 180
180  Elem
Elem  34
34
 Abyssal Storm Ward
 190
190  Elem
Elem  38
38
 Asylum Peal
 310
310 
 Elem
Elem  75
75
 Daora's Casca I
 180
180  Impact
 30
30
 Daora's Thwartoise
 190
190  Impact
 36
36
 Daora's Thwartoise +
 310
310  Impact
  -
- 
 49
49
 Daora's Worldbearer
 320
320  Impact
  -
- 
 62
62
 Teostra's Striker I
 180
180  Impact
  38
38
 Teostra's Nova
 190
190  Impact
  43
43
 Teostra's Nova +
 320
320 
 Impact
  49
49
 Teostra's Redeemer
 330
330 
 Impact
  55
55
 Arcane Draw I
 180
180  Impact
 33
33
 Etherward
 190
190  Impact
 39
39
 Etherward +
 310
310  Impact
  -
- 
 46
46
 Phantom Providence
 320
320  Impact
  -
- 
 52
52
 Redwing Edge I
 170
170  Elem
Elem 
 Dragon 30
 Skaltecore
 180
180  Elem
Elem 
 Dragon 35
 Crimson Mechwing
 340
340  Elem
Elem  -
- 
 Dragon 60
 Abyssal Splitter
 350
350  Impact
 Dragon 17
 Regal Daruq
 340
340  Elem
Elem  -
- 
 28
28 Altostratus Blade
 360
360  Impact
 44
44 Ricebane I
 160
160  Impact
 Ricebane II
 200
200 
 Impact
 Pounder of Rice
 210
210 
 Impact
 Pounder of Rice +
 270
270  -
- 
 Impact
 Ricebane Emperor
 340
340  -
- 
 Impact
 Cuddly Cat I
 80
80  Impact
  20
20
 Cuddly Cat II
 130
130  Impact
  24
24
 Felyne Fancy
  140
140 


 Impact
  28
28
 Felyne Fancy +
 230
230 

 -
- 
 Impact
  29
29
 Ominous Puss
 330
330 

 -
- 
 Impact
  30
30
 Mandible Blade I
 120
120  Impact
  14
14
 Mandible Blade II
 130
130  Impact
  17
17
 Maxilla Edge
  180
180 
 Impact
  22
22
 Maxilla Edge +
 290
290  -
- 
 Impact
  27
27
 Skull Edge
 330
330  -
- 
 Impact
  34
34
 Vaik Veil I
 100
100  Elem
Elem  17
17
 Vaik Veil II
 140
140  Elem
Elem  22
22
 Shieldraad
 150
150 

 Elem
Elem  27
27
 Shieldraad +
 290
290 
 -
- 
 Elem
Elem  48
48
 Armordraad
 320
320 
 -
- 
 Elem
Elem  57
57
 Royal Order's Battleaxe
 250
250  -
- 
 Impact
 Royal Order's Battleaxe +
 320
320 
 -
- 
 Impact
 Antique Machina CB
 330
330 
 Impact
  22
22 Rampage C. Blade I
 150
150  Impact
 Rampage C. Blade II
 170
170  Impact
 Rampage C. Blade III
 180
180  Impact
 Rampage C. Blade IV
 190
190  Impact
 Rampage C. Blade V
  200
200  Impact
 Rampage C. Blade S
  210
210  Impact
| MHR Weapon Types |
Bow ♦ Dual Blades ♦ Great Sword ♦ Gunlance ♦ Hammer ♦ Heavy Bowgun ♦ Hunting Horn ♦ Insect Glaive ♦ Lance ♦ Light Bowgun ♦ Long Sword ♦ Switch Axe ♦ Sword & Shield |
 Anonymous
Does anyone else think CB in rise feels a lot worse than world? I can’t exactly pinpoint why, but it certainly feels like a mix of SAED being weirdly hard to adjust mid swing, and also savage axe going away the moment you go back to sword and shield (meaning you can’t just quickly AED during a short opening with it, or do a full elemental discharge combo without worrying about the long freaking start ip that is condensed spinning slash)

 Anonymous
So as a player coming from World, is the switch skill 1 alt (Condensed Spinning Slash) like Savage Axe mode in Iceborne? That's kinda what I'm thinking when I read the description. I can't quite get my hands on this game yet to find out, but I'm still kinda curious.

 Anonymous
Holding A no longer guards effectively ruining the survivability of the user drastically



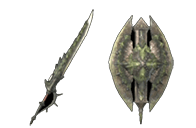


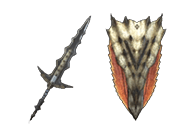

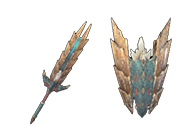

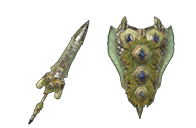

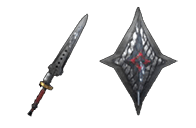
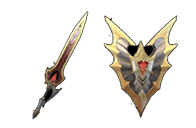
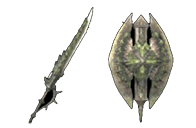
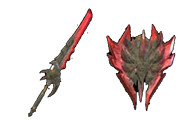
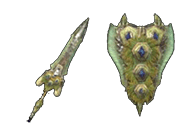


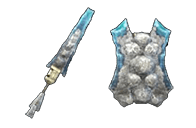
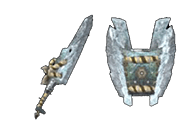

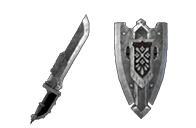

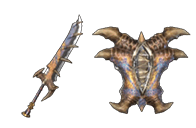
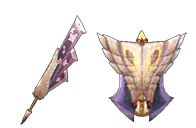
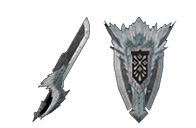
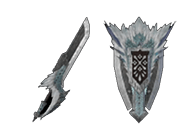




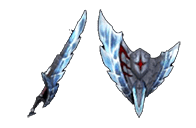
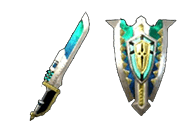
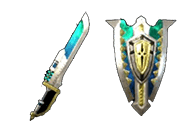
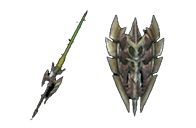

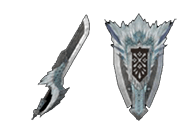
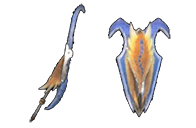

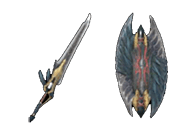
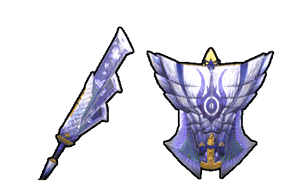














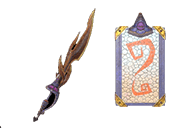

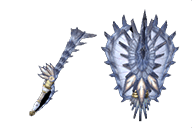
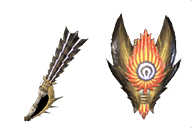
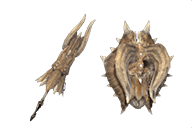
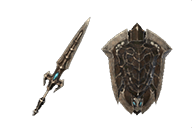
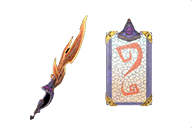
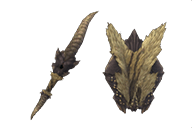
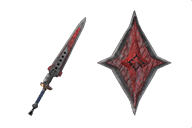
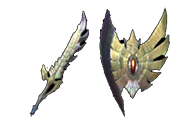
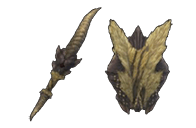
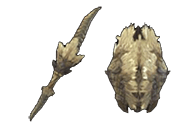
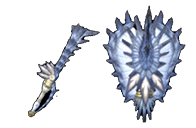


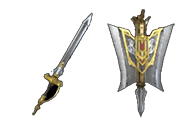
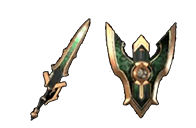
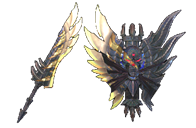
WHY SO MANY IMPACT PHIALS DEAR GOD
2
+10
-1