Manual for Monster Hunter Rise (MHR or MHRise) contains various information regarding the mechanics of the game. On this page, players who are both veterans and who are new to the Monster Hunter series can find new and old gameplay systems for exploration, battle, and character, equipment progression.
Monster Hunter Rise Manual
MHR Sunbreak Tutorial
Rampage Decorations
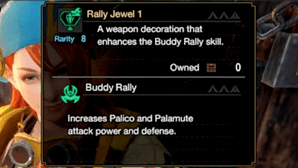
Rampage Decorations are decorations that possess Rampage Skills. Equip them as you would regular armor skill decorations. Rampage Decorations can be equipped to weapons, but only weapons with dedicated slots.
Note: Some decorations may offer different upgrades than when Ramping-up weapons.
Buddy Recon
You can deploy buddies to a specific spot in a locale in order to perform Buddy Recon. Deploying a Buddy to a Buddy Recon Point allows you to fast travel to that point once during a quest.
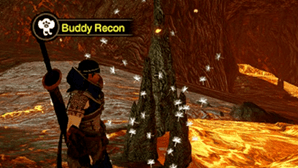
You can only deploy a buddy to one spot per locale. Keep exploring to open up more spots for you to send your Buddies to.
Managing Switch Skills
To alter specific moves for your weapons, select the Manage Switch Skills option from any item Box or inside your tent.
Manage Switch Skills allows you to change Switch Skills and manage Switch Skill Loadouts.
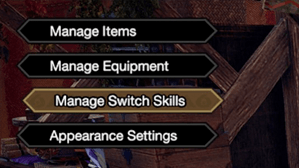
Manage Switch Skills Allows you to change Switch Skills loadouts. You can register a loadout of five Switch Skills to either the Red Switch Skill Swap Scroll or the Blue Switch Skill Swap Scroll.
The Switch Skill loadout registered to the Red Switch Skill Swap Scroll is the default loadout at the start of the quest.
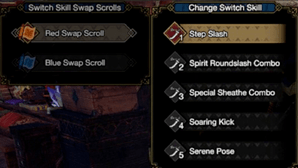
Switch Skill Loadouts allow you to register a set of five Switch Skills to one of two Switch Skill Swap Scrolls.
Though you can only use two loadouts at a time, you may save and later recall different Switch Skill Loadouts depending on the situation. Forty eight Switch Skill Loadout slots are available.
Forging Buddy Layered Armor
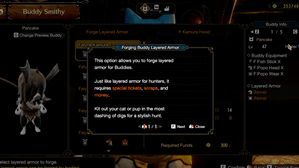
The option allows you to forge layered armor for buddies. Just like layered armor for hunters, it requires special tickets, scraps, and money.
Kit out your cat or pup in the most dashing of digs for a stylish hunt.
Unlocking MR Limits
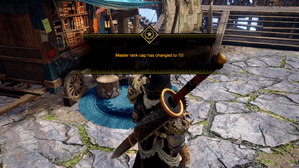
After unlocking a master rank limit, completing MR quests will raise your master rank. As your master rank increases, new urgent quests will become available. Completing these quests will unlock your MR limit even further.
Melding Pot Catalyst
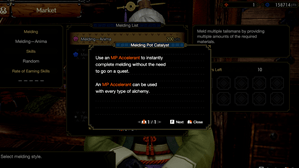
Use and MP Accelerant to instantly complete melding without the need to go on a quest. An MP Accelerant can be used with every type of alchemy.
Increasing Skill Memory
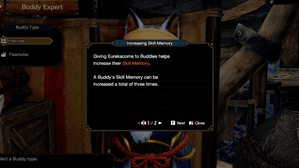
Giving Eurekacorns to buddies helps increase their Skill Memory. A Buddy's Skill Memory can be increased a total of three times.
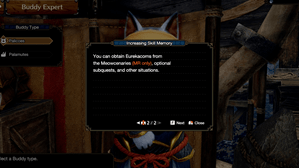
You can obtain Eurekacorns from the Meowcenaries (MR only), optional subquests, and other situations.
Traveling Between Bases
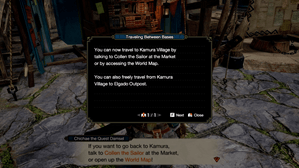
You can now travel to Kamura Village by talking to Collen the Sailor at the Market or by accessing the World Map. You can also freely travel from Kamura Village to Elgado Outpost.
Switch Skills you can Learn
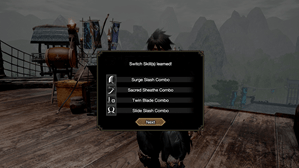
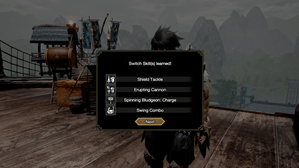
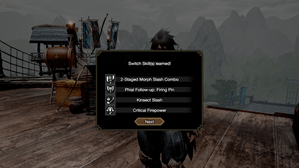
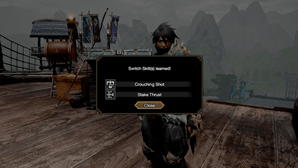
There are 14 Switch Skills that you can learn in MHR. These are:
- Surge Slash Combo
- Sacred Sheathe Combo
- Twin Blade Combo
- Slide Slash Combo
- Shield Tackle
- Erupting Cannon
- Spinning Bludgeon: Charge
- Swing Combo
- 2-staged Morph Slash Combo
- Phial Follow-up: Firing Pin
- Kinsect Slash
- Critical Firepower
- Crouching Shot
- Stake Thrust
Qurio Discovery
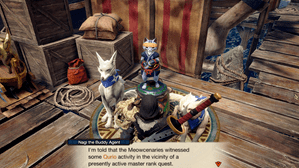
The meowcenaries will sometimes discover Quirio during their Master Rank Surveys. Upon discovery, Quirio Probes will be added to the Scout Location. These surveys are far more dangerous than normal, as the Quirio cause more monsters to appear, but they're also a great chance to find more monster materials! Give it a shot if you come across one.
Hunter Info
The Player
Health
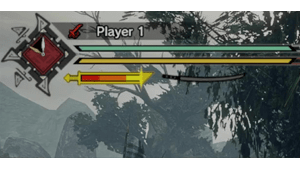
The green bar indicates your health. Run out of health, and you'll faint. When you faint, you'll be taken back to the main camp. When you take damage from monsters, your health will decrease and a portion of the Health Gauge will turn red. This temporary damage or recoverable damage automatically restores over time. You can also use recovery items or Endemic Life with healing effects to regain lost health.
Stamina
Actions such as dashing and evading will consume stamina (the yellow gauge under your Health Gauge). Stamina will recover naturally over time, but its maximum value will slowly decrease.
Eating a well-done steak, rations, or other foods will immediately restore your stamina and allow you to maintain your maximum stamina. You can also increase your maximum stamina by obtaining a Spiribird, and endemic lifeform. Your maximum stamina will also vary based on your equipped Petalace.
Attack
Your Attack determines how much damage you deal towards Monsters. The greater this value, the more damage your strikes. The attack is determined by the weapon you have equipped. The stronger your current weapon, the higher your Attack.
Elements
Weapons can have Fire, Water, Thunder, Ice, and Dragon elemental properties. Using a weapon with a monster's elemental weakness will make your hunt go much more smoothly. In addition to elements, there are also four additional status effects: Poison, Paralysis, Sleep, and Blast.
Defense
Your defense determines how much damage you take from the monsters' attacks. The higher your defense, the better.
Resistances
Armor has resistance value for Fire, Water, Thunder, Ice, and Dragon. High values protect against these elements. For example, a high fire resistance reduces the severity of fireblight damage you take when you catch on fire.
Affinity
When your affinity is positive, you'll have a greater chance to deliver a critical hit, which deals far more damage than a normal hit. When your affinity is negative, your chance of delivering weaker hits will increase.
Defense Bonuses
While one piece of gear may have the same defense value as another, it will have different properties depending on its weapon class. Equipping a melee weapon will reduce incoming physical damage; while equipping a ranged weapon will reduce incoming elemental damage.
Equipment
Blademaster
You have eleven different weapons at your disposal to get up close and personal with monsters: Great Sword, Long Sword, Sword & Shield, Dual Blades, Gunlance, Lance, Hammer, Hunting Horn, Switch Axe, Charge Blade, and Insect Glaive. Hunters who use these are called "Blademasters".
- Sharpness: The higher a weapon's sharpness, the more damage it will deal. Sharpness decreases as you use a weapon.
Gunner
There are three types of weapons that attack monsters from afar: Light Bowgun, Heavy Bowgun, and the Bow. Hunters that employ these long-ranged weapons are known as "Gunners".
- Rapid Fire: Some Light Bowguns are able to use Rapid Fire with certain types of ammo. Rapid Fire allows you to fire multiple shots with a single round of ammunition.
- Recoil: Bowguns are affected by recoil when fired. The severity of a bowgun's recoil varies depending on the bowgun you have equipped and the ammo with which it's loaded.
- Deviation: A bowgun's precision in hitting its targets depends on its deviation. The magnitude and direction of a bowgun's deviation vary depending on the bowgun used.
- Reloading: Once all of its shots are fired, a bowgun must be reloaded. The higher a bowgun's reload rating, the more quickly its ammunition can be reloaded. Each bowgun's Reload rating varies per bowgun.
Petalaces
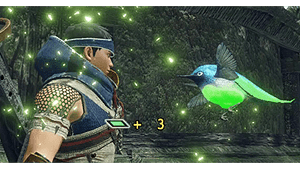
A Petalace is a type of a charm made of woven Sending Sprigs. In Kamura Village, they are typically worn by hunters. Like any other piece of gear, you can only equip one at a time. Petalaces absorb the fragrant pollen fron any Spiribirds you encounter during a quest, granting you special status boosts.
Buddies
Issuing Commands
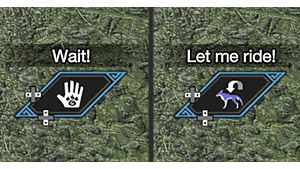
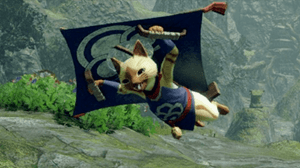
You can give commands to your Buddies. "Wait!" is one such order that you can issue, which directs your buddy to stop in place. "Let me Ride!" is another, which allows you to ride a Palamute. Skillfull command of your Buddies will help make for a smooth hunting collaboration.
Communicating with Buddies
Use the "Wait!" command to put your Buddy into standby. If you walk up to Buddies that are on standby, you can interact with them. Follow the button prompts to see all the fun things you can do with your furry friends!
Palicoes

Palicoes are animal companions that possess skills on par with those of hunters. They are adept at providing hunting support in the form of placing traps and healing you.
Felvine Bulb
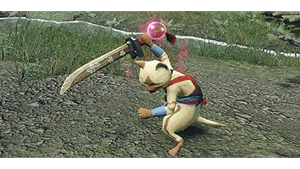
A Felvine Bulb is an item that hunters can use during a quest. These dango-shaped snacks are made of ripened ingreditens that Felynes love; using on will grant special buffs to your Palico. If you take a Palico with you on a quest, you'll get on Felvine Bulb, using this item will allow your Palico to purr-form a step above the rest!.
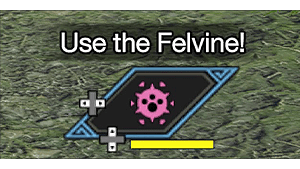
Felvine Bulbs can be used via the Action Bar. Throw one on the ground, and it will splatter and spread Felvine ingredients all around, empowering your Palicoes. Try it out! Your Palicoes will appreciate it! The following Palico buffs can occur:
- Health Restoration
- Increases support action frequency
- Evasive maneuvers against attacks
- Stronger attacks
Palamutes
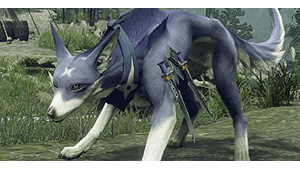
Palamutes are Canynes that have received special training in Kamura Village to become a faithful hunting companion. They'll let you ride on their back, and even participate in coordinated attacks. They're a must-have ally for any hunter.
Riding Palamutes
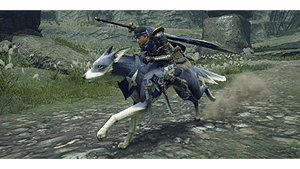
When accompanied by a Palamute, you'll have access to the Let me Ride! command, allowing for rapid transport within a locale. Hop on your Palamute and you'll arrive at your destination in no time! There are two ways to ride a Palamute:
- Hold down
 while near a Palamute.
 - Issue the "Let me Ride!" command from the action bar.
Palamute Riding Controls are as follows:
- Use the
 to move around.
 - Hold
 to dash forward.
 - Press
 to jump.
 - Press
 and use the
  to drift while dashing
 - Press
 to attack.
 - Press
 to dismount.
 - Press
 to perform a jumping dismount while dashing.
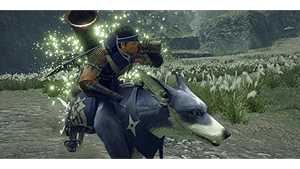
Recovery Items , Whetstones, and some other items can be used while riding a Palamute. When riding, select a usable item from the Item Bar and press ![]() to use it. Try it out, it can be pretty handy!
to use it. Try it out, it can be pretty handy!
Hunter Hints
Hunter Info
Hunter Info in the Start Menu provides tutorials, hints, basic infomration, and other valuable things. Information added as the game progresses will be displayed in the Tutorial Window and Chat Log. Display settings for the Tutotrial Window can be changed from Options.
The Hunter Info and Hunter's Notes found in the Start Menu contain a variety of helpfuil infomration such as an instruction manual outlining basic game information, characteristics of monsters, controls, and weapon use. If you are looking for anwers, be sure to look there!
Large Monsters
The Large Monster list keeps track of various useful information regarding large monsters' characteristics, habitats, part and hide details, hunting advice, status susceptibility, and obtainable Materials. The list and details will update as you encounter and hunt more monsters.
Small Monsters
The Small Monster list keeps track of various useful information regarding large monsters' characteristics, habitats, part and hide details, hunting advice, status susceptibility, and obtainable Materials. The list and details will update as you encounter and hunt more monsters.
Endemic Life
The Endemic Life list keeps track of the fauna in each area, as well as any related information that might serve you in your hunts. The list will be updated as you encounter and capture different creatures or fulfill other conditions.
Poses
Allows the player to perform certain poses. Selecting the same Pose Set repeatedly will change it to a different pose. Pose Sets can be brought up from the camera, as well as the start menu.
Radial Menu Settings
Change radial menu shortcuts and edit menu loadouts. Multiple shortcuts and loadouts can be stored, so if you set some up in advance, you'll be able to quickly swap between them. You can also rename them as you see fit.
Action Bar Settings
You can toggle which actions to display in your Action Bar and change thier order. Displayed actions can be toggled per category as well. If Hide All is selected, the Action Bar will be entirely hidden.
Fast Travel
Select a camp within a locale from the Detailed Map to fast travel there. However, you cannot fast travel during a hunt.
Fishing
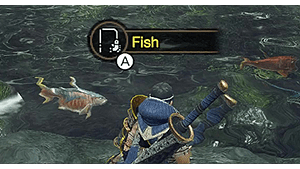
You can cast your fishing line at various points in the wild. At fishing points, there will be fish swimming around, and these types of fish present will differ based on the location. When you find a fishing point, first, make sure your weapon is sheathed.
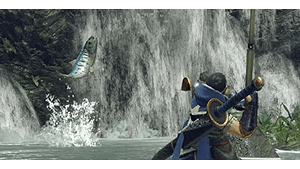
Approach the point, and when prompted, press ![]() to pull out your fishing rod. Use the
to pull out your fishing rod. Use the ![]() to aim and press
to aim and press ![]() to cast your lure into the water. When fishing, wait until a fish takes the bait and pulls the lure below the surface, then press
to cast your lure into the water. When fishing, wait until a fish takes the bait and pulls the lure below the surface, then press ![]() to reel it in! Sometimes, you'll even be able to catch multiple fish in the same cast.
to reel it in! Sometimes, you'll even be able to catch multiple fish in the same cast.
Sending Sprigs
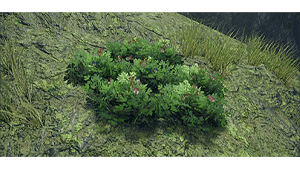
While out in the field, you'll come across shrubs of plants called Sending Sprigs. Attack these bushes to cut them down and reveal any Spiribirds hiding inside. Hunting Helpers can also be found in this way.
Luring
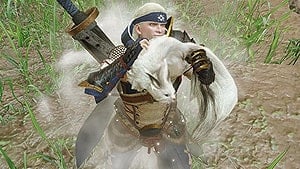
Stinkminks excrete a type of pheromone capable of attracting monsters. You can lure monsters by first using a Stinkmink and then approaching a monster. Once they detect the pheromone, they'll follow you until the effect wears off. Monsters in a lured state, achieved either by enraging them or using a Stinkmink, will go after the player for a limited amount of time.
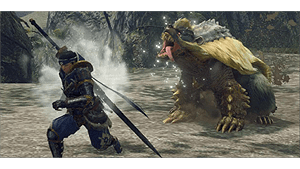
You can thus lead the monster, but it may lose track of you when moving to areas where it can no longer pursue or when you're too far away. By luring a monster into the proximity of another monster, you may be able to start a Turf War. This can result in massive damage between them, or even have them go into a Mountable State. If you come across a Stinkmink, use it to lure your target to another monster and watch the mayhem unfold!
Endemic Life
Endemic Life
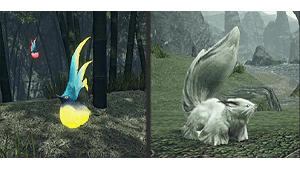
Endemic Life refers broadly to all small lifeforms that inhabit an area. Some Endemic Life can be used like items to provide lasting buffs to you during a quest. These include Permabuffers and Hunting Helpers which can come in hand when used effectively. As some of these lifeforms are rather rare and potent, they are worth seeking out.
Endemic Life Types
Permabuffers
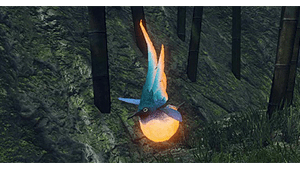
Permabuffers are endemic lifeforms that power up your abilities until the current quest is complete. When approached or touched, they will increase your health, stamina, attack, or defense. The color of the Permabuffer will determine which stat is increased.
The amount by which it will increase, as well as the maximum value, will vary based on the Petalace you have equipped.
Hunting Helpers
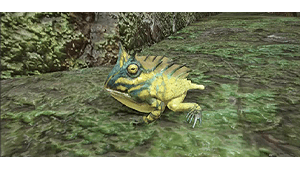
Hunting Helpers are endemic lifeforms that can be used as items once captured. Captured Hunting Helpers are stored in the Helper Cage and can be used via the Item Bar. Some Hunting Helpers grant beneficial effects just by holding them. You can hold up to five Hunting Helpers at once.
Temp Buffers
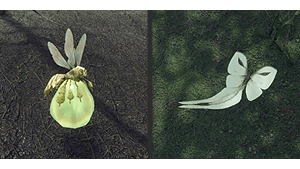
Temp Buffers are endemic lifeforms that, once interacted with, will temporarily impart a beneficial effect. Each locale is home to a variety of Temp Buffers. Clever use of them could make all the difference during a quest.
Ensnaring Life
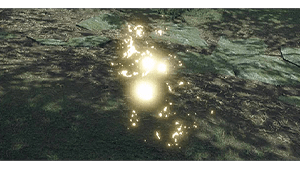
Ensnaring Life are species of endemic lifeforms that impart a negative effect on monsters. Each area is home to a variety of Ensnaring Life. Clever use of these critters could make all the difference on a hunt.
Crafty Creatures
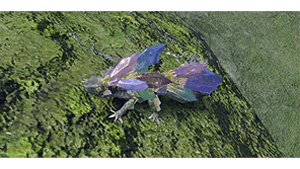
Crafty Creatures are endemic lifeforms that drop materials when attacked. The type of item dropped will vary depending on the species. Each time one takes damage, it will drop something.
Golden Spiribugs
Golden Spiribugs are endemic lifeforms that count towards your total points. They also restore your stamina when collected.
Great Wirebugs
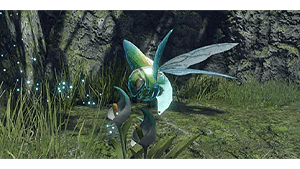
Great Wirebugs are endemic lifeforms that will carry you over great distances in a set direction. Each locale has a number of Jewel Lilies where you can place Great Wirebugs that you've received in the village.
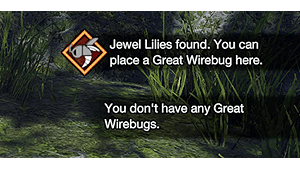
You can confirm how many Great Wirebugs you have in your Item Pouch. If you do not have any, you cannot travel from Jewel Lilies. Some Jewel Lilies, however, will have Wirebugs in them from the start.
Brewhare Affected Items
The Brewhare, a hunting helper, will enhance the effects of certain items when used while the Brewhare is inside of the Helper Cage. The following items are affected:
- Potion
- Mega Potion
- Ration
- Burnt Meat
- First-aid Med
- First-aid Med+
- EZ Ration
Abnormal Statues
Fireblight
A status that reduces your health. To remove it:
- Use a Nulberry.
- Wait for the effect to wear off.
- Repeatedly evade
 +
+ . Note that this is more effective while in water.
Waterblight
A status that reduces your stamina recovery rate. To remove it:
- Use a Nulberry.
- Repeatedly Wiredash.
- Repeatedly evade
 +
+ .
. - Wait for the effect to wear off.
Thunderblight
A status that makes you prone to getting stunned. To remove it:
- Use a Nulberry.
- Repeatedly evade
 +
+ .
. - Wait for the effect to wear off.
Iceblight
A status that reduces your Wirebug Gauge recovery rate. To remove it:
- Use a Nulberry.
- Repeatedly evade
 +
+ .
. - Wait for the effect to wear off.
Dragonblight
A status that nullifies the elemental and ailment effects of your weapon. To remove this:
- Use a Nulberry.
- Repeatedly evade
 +
+ .
. - Wait for the effect to wear off.
Poison
A status that reduces your health over time. There is also a more powerful form of poison. To remove it:
- Wait for the effect to wear off.
- Use an Antidote or Herbal Medicine.
Stun
A status that leaves you unable to move for a period of time. To remove it:
- Wait for the effect to wear off.
- Get knocked back by an attack.
- Mash buttons and rotate the
 .
.
Paralysis
A status that leaves you unable to move for a period of time. To remove it:
- Wait for the effect to wear off.
- Get knocked back by an attack.
- Mash buttons and rotate the
 .
.
Sleep
A status that gradually puts you into a deep sleep, leaving you unable to move. If attacked in this state, you will take more damage than normal. To remove it:
- Wait for the effect to wear off.
- Use an Energy Drink beforehand.
- Take attack damager while asleep.
Defense Down
A status that lowers your defense and causes you to take more damage. To remove it:
- Wait for the effect to wear off.
- Use an Adamant Seed or Armorskin.
Resistance Down
A status that lowers your elemental resistance for a certain period of time. To remove it:
- Use a Nulberry.
- Wait for the effect to wear off.
Stench
A status that prevents you from using health and stamina restoring items for a certain period of time. To remove it:
- Use a Deodorant.
- Wait for the effect to wear off.
Bubble
A status effect that affixes swelling bubbles to your body. If they become too large, you will become unable to maneuver your body with ease. To remove it:
- Use a Cleanser.
- Take attack damage.
Muck
Some monsters' attacks will leave behind snow or mud. These surfaces reduce movement speed while your feet are caught in them. Wiredash movement remains unaffected.
Monster Elemental Blight
The use of Endemic Life or attacks dished out between monsters can sometimes have elemental properties. These actions can result in one of several abnormal statues, namely Fireblight, Waterblight, Thunderblight, or Iceblight.
- A monster afflicted with Fireblight will temporarily suffer from damage over time. It is also more likely to flinch, which is an opportunity for hunters to target the monster's various parts.
- A monster's hide will become softer when it is afflicted with Waterblight. This effect becomes more pronounced the harder the body part is, making it a prime opportunity to go after sections that are otherwise difficult to damage.
- A monster afflicted with Thunderblight can also be stunned with non-blunt weapons. A strike to their head is most effective but hitting other body parts of their body will still accumulate and trigger the stun with a final blow to their head. Exploiting this state is advised.
- A monster will become sluggish when afflicted with Iceblight. Their slowed movement will make it easier for the hunter to react and helps in dealing with enranged, quick-moving monsters, but take care when inducing the iceblight, as it does not affect already exhausted targets.
Items
Item Pouch
Your Item Pouch is used to carry items you get during Quests or by shopping at the market. You'll also have access to a special field pouch during Quests that allow you to carry additional items with you. There is also a pouch for ammo and coatings.
Hunter's Tools such as Kunai and BBQ Spits can be carried with you as fixed items, some of these items may be switched out depending on the weapon you have equipped.
Crafting
Crafting is the delicate art of fusing two items to make another. You can craft items from the Start Menu or from the item box in your house. You can also use the Auto-craft function to automatically combine materials already in your possession.
The Crafting List command lets you choose a recipe from your Crafting List and then create that item. You can also configure the Auto-craft settings from the Crafting List.
Health Recovery Items
When your health is depleted, you faint. You can use a Potion to restore health. First-aid Meds are supply items that have the same effect. For quests involving large parties, Lifepowder can be used to heal more than one person within an area.
Stamina Recovery Items
Stamina is diminished over time during quests, limiting the number of dashes, evasions, and other stamina-consuming actions you can take. Eating a Well-done Steak will restore stamina right away, as will Rations, a supply item. Dash Juice also reduces stamina consumption.
BBQing
You can use a BBQ spit to cook up a hot meal when you're on a quest. To use the BBQ spit, you will need raw meat, which is generally obtained by carving up herbivores and small monsters you've slain. Depending on how long you cook your meat, you'll end up with rare steak, well-done steak, or burnt meat.
Upgrade Items
Gear isn't the only thing that can boost your attack and defense; items can temporarily increase your stats too. Use Might Seed and Adamant Seed you pick up in the field to power up your hunting ability for a bit.
Ailment Cleansing Items
Status Ailments can cause all manner of inconvenience to a hunter. To remove poison, use an Antidote: to remove an elemental blight, use a Nulberry. Know your target, and prepare accordingly to get the upper hand.
Shock/Pitfall Traps
Shock Traps and Pitfall traps can be created by crafting them. These traps are used to temporarily hinder the movement of a large monster that gets caught in them.
Shock Traps and Pitfall Traps won't always work, however, their efficacy varies depending on the type of monster, and its condition at the time.
You can disarm any trap that you have placed, as long as a large monster has not been caught in it. Sheathe your weapon and stand over the trap, then press ![]() to disarm the trap.
to disarm the trap.
Flash Sonic Bombs
Flash Bombs can be thrown in front of a monster to temporarily blind it. Sonic Bombs can be used to make a certain monster shrink back in fear or disrupt its actions.
Holding ![]() will allow you to aim in the direction your camera is facing. It can also be thrown forward while you are airborne.
will allow you to aim in the direction your camera is facing. It can also be thrown forward while you are airborne.
Bomb Items
Small and Large Barrel Bombs can be used to damage monsters. Large Barrel Bombs will need to be detonated after they're set. Bombs can also be thrown while airborne. Large barrels will be thrown downward, and small barrels will be thrown in front of the player.
They will explode once they hit the ground or anything else, so try not to get caught in the explosion. Small Barrel Bombs can be thrown in the direction you're aiming by pressing ![]() .
.
Throwing Kunai
Select Throwing Kunai from the Item Bar and press ![]() to throw; hold
to throw; hold ![]() while doing so to throw in the direction you are aiming. You can throw multiple in a row, toss them while airborne, and even use them to detonate explosive barrels. Note: Standard Throwing Kunai can be thrown an unlimited number of times.
while doing so to throw in the direction you are aiming. You can throw multiple in a row, toss them while airborne, and even use them to detonate explosive barrels. Note: Standard Throwing Kunai can be thrown an unlimited number of times.
Gathering Points
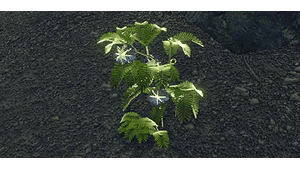
You can obtain items and materials from gathering points. Gathering points will disappear after being harvested once, but will replenish after a while. When you approach a useable gathering point, it will glow faintly.
Multiplayer
Chatting
You can chat with other players while playing multiplayer in two ways:
- Manually, via the on-screen keyboard or by using preset shoutouts.
- During Quests, certain circumstances will prompt automatic shoutouts.
You can register up to three custom groups of preset shoutouts for easy access during a quest. Automatically translated shoutout cannot be edited, but your shoutouts will be translated to match your companions' language. You can also send stickers in the chat. Each sticker has a text box in which you can enter your own message.
Blocking Players
You can open a person's profile by selecting View Profile from the member list and add that user to your blocked-user list. For more details, please see the Nintendo Switch support website.
Quests
Supply Box
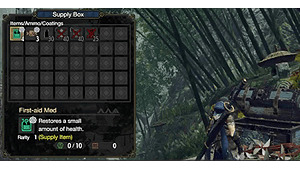
The Hunter's Guild will sometimes send helpful items to your supply box. Don't forget to split these with your allies if you're hunting in a party. Note: You cannot take supply-only items back with you to the village.
Basic Controls
The Basics
 : Move
 : Camera Controls
 +
+ : Dash
 : Crouching
 +
+ : Evade
 : Draw Weapon
 or
or  : Attack
 +
+ on a slope: Slide
 +
+ or
or  +
+ near a ledge: Jump
 with your weapon drawn: Sheathe Weapon
- Dashing: You can dash with
 . Dashing consumes stamina but allows you to run much quicker. You cannot dash when your stamina has dropped below a certain level.
 - Evading: You can dodge attacks at the cost of some stamina. When battling a large monster, evading while dashing away from it will perform a more effective dodge called an Emergency Evasion.
- Sliding: If you dash down a slope, you will perform a sliding maneuver. This lets you quickly cover ground without using up stamina, but at the cost of being unable to evade attacks.
- Recovering from Attacks: When knocked down by a monster, you can briefly negate damage from follow-up attacks by not pressing any buttons and staying down. However, be wary - some foes can still hurt an incapacitated hunter.
- Attacking: To perform an attack, draw your weapon and press
 ,
,  , or some weapons
  . Press these buttons multiple times to execute attacks in quick succession.
 - Attacking while Jumping: Press
 while jumping or falling to perform a jump attack.
Using Items
 : Use Item
- Hold
 +
+ or
or  : Select Item
 - Hold
 +
+ or
or  : Selemt Ammo/Coating
 - Hold
 +
+ : Select Radial Menu
 - Hold
 +
+ : Select Shortcut
 - Using Items: Press
 to check your item pouch. To slect an item, hold
  , press
  or
or  , then release
  . Unusable items are marked with an X.
 - Helper Cage: Hunting Helpers you've caught can be accessed or released from your Helper Cage in the Start Menu's Items and Equipment section. Hunting Helpers are used in the same way as items.
- Custom Radial Menu: Press and hold
 +
+ to use assigned items and shoutouts, which can be changed via the Radial Menu Settings in Items and Equipment. Note: These are default controls, which can be changed in Options > Controls.
Wirebug Commands
 +
+ on the ground: Wiredash (Upward)
 +
+ on the ground: Wiredash (Forward)
 +
+ while airborne: Wiredash (Forward)
 +
+ while airborne: Wiredash (Upward)
 +
+ : Wiredash (Targeted)
 in midair: Midair Stop
 +
+ when knocked back or sent flying: Wirefall
 +
+ or
or  with your weapon drawn: Silkbind
 +
+ or
or  while unsheathing your weapon: Gunner: Silkbind
- Wiredashing: Perform airborne acrobatics with Wirebugs to move toward a destination or target. Chain these moves together, or lead into a jump attack with
 . This will execute a wall run if used while facing a wall.
 - Wirebug Gauge: Performaing Wirebug actions consumes the Wirebug Gauge, which recovers over time. Once recovered, the gauge can be used again. The degree of consumption and recovery time varies for each action.
- Stopping Midair: Momentarily stop in midair. Your gauge will not recover during this time. Drop down with
 or evade with
  +
+ .
. - Evading Midair: To execute, press
 +
+ after a midair Wiredash or midair stop. This move is handy for getting around and dodging attacks.
 - Wirefalling: Press
 +
+ when a monster sends you flying to execute a Wirefall (this consumes some of your Wirebug Gauge), allowing you to quickly recover and evade any oncoming attacks.
 - Skilkbind: Each Weapon has a unique Silkbind attack. To execute, hold
 (Blademasters) or
  (Gunners) then press either
  or
or  .
.
Wall Actions
While Scaling Walls:
 : Wall Traversal
 +
+ : Wall Run
 +
+ : Wall Jump
 while in midair: Jumping Attack
 : Drop Down
- Wall Scaling: Move towards an ivy wall and you will automatically grab onto it.
- Wall Running: Wiredash while facing a wall to run in the direction of the
 . Hold down
  to consume stamina and sustain your wall run. You can also wall run while climbing iv by pressing
  and moving the
  .
.
Sharpness
- Sharpness: Melee weapon sharpness is designated by color: (Least sharp to sharpest) red>orange>yellow>green. A monster's hide is less likely to deflect attacks from a sharp weapon. Weapons slowly dull with use, resulting in more deflected attacks and less damage dealt overall.
- Whetstone: This item, which is kept inside your pouch, restores weapon sharpness. It can be used via the Custom Radial menu even while the weapon is drawn.
Wyvern Riding
 : Light Attack
 : Strong Attack
 +
+ : Move
 : Evade
 : Launch Monster
 +
+ : Mounted Punisher
- Wyvern Riding Gauge: The Wyvern Riding Gauge can be filled by damaging monsters or shrugging off an attack by evading just before it hits.
- Wyvern Riding Timer: Shows how long you can keep riding. Time is recouped when you land attacks, and heavily lost when you are hit.
- Attack Linking and Combos: Certain button sequences and repetitions execute transitions or combos when Wyvern Riding. These can also be triggered with the
 .
. - Moving: You can control monsters' movement freely while riding them. You can also transition to attacking or evading at any time.
- Emergency Evading: While attacking or being hit, you can evade more quickly than usual by pressing
 , at the cost of your Wirebug Gauge.
 - Shrugging off Attacks: Dodging or Emergency Evading just as you are about to be hit will stun your foe and also fill your Wyern Riding Gauge.
- Launching Monsters: Press
 while Wyvern Riding to dismount and send the monster flying forward. You'll topple the monster if it collides with a wall or another monster. If your press
  just as the monster hits the wall, you can use a Wirebug to hop back onto it, launch it again, and sent it crashing into the wall once more.
 - Mounted Punishers: Can be used once your Wyvern Riding Gauge is full. This will deal a huge blow to a monster, so make sure not to miss. You only have a limited time to use it though, and if you miss the attack window, you will automatically dismount.
- Landing the Mounted Punisher: While Mounted Punisher is available, you can use
 and
and  attacks to down the monster, making it easier to land the cop de grace.
Switch Skill Swap
Toggling between the two scrolls allows you to use different shrugging Switch Skill Loadouts.
Note: Switch Skill Swap can be used with your weapon sheathed or unsheathed.
Swap Evade: A special dodging action performed by pressing the Space Button after a Switch Skill Swap. Can be performed forward, backward, left or right. Using it requires stamina.
- Blademaster: Switch Skill Swap: Scroll Button + Left Click + Right Click
- Gunner: Switch Skill Swap: Shift + Mouse 5 + Mouse 4
- Swap Evade: After Switch Skill Swap, Space Button
