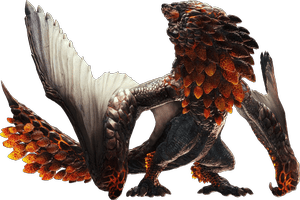
Bazelgeuseバゼルギウス (Bazerugiusu) |
|
|---|---|
 |
|
| Enemy Type | Large Monster |
| Class | Flying Wyvern |
| Threat Level | 8⭐ |
| Element | |
| Ailment(s) | |
| Weakness(es) | None |
| Resistance(s) | |
| Location(s) | Shrine Ruins Frost Islands Sandy Plains Flooded Forest Lava Caverns |
| Rampage Role | N/A |
Bazelgeuse is a Large Monster that appears in Monster Hunter Rise (MHR or MHRise). Large Monsters like Bazelgeuse are hostile and are usually the primary objective of Hunts. They provide valuable Materials when defeated.
Bazelgeuse Monster Guide: Characteristics, Weaknesses, Drops, Locations, Weapons & Armor, Strategies, Tips & Tricks and more to help you defeat Bazelgeuse in MH Rise.
Nature is a battlefield
Steeped in crimson dust
And the smoke of combat
Summons those who lust
For blood and fiery violence
And something to combust
Raining down destruction
Pandemonium galore
Friend or foe, irrelevant
It hungers for hot war
MH Rise Bazelgeuse Characteristics & Ecology
A nefarious flying wyvern that travels the world in search of prey. It scatters its own explosives scales over a wide area to prey on whatever gets caught in the blast. In some places, this has earned it the nickname "Bomber Wyvern".
- Class: Flying Wyvern
- Size: ♕ 1696.97 ~ ♕ 2410.47
- Small Monster version: N/A
- Hostile when approached
- Attacks other monsters: Yes
- Found in:
Shrine Ruins
Frost Islands
Sandy Plains
Flooded Forest
Lava Caverns - Turf War(s):
vs. Magnamalo
vs. Rajang
- Target of Quest(s): Death from Above
MH Rise Bazelgeuse Combat Info
The formidable scales that the Bazelgeuse scatters explode after receiving an impact but the time they take to regenerate can be used as a chance to attack. When its scales turn red hot, they will explode immediately and require caution, however, parts of the body will be soft too - the perfect time to attack.
- Threat Level: ⭐⭐⭐⭐⭐⭐⭐⭐
- Elemental
 Fire Damage monster
- Can inflict
 Fireblight
- Slight Weakness to
 Thunder (⭐⭐)
 Ice Element (⭐)
 Dragon Element (⭐)
- Kinsect Extract:
- Red: Head, Abdomen, Tail
- Orange: Leg
- White: Back, Wing
- Item Effectiveness:
- Effective: Shock Trap, Pitfall Trap, Flash Bomb, Dung Bomb
- Ineffective: Sonic Bomb, Drugged Meat, Poisoned Meat, Tinged Meat
- Enraged Mode: Indicated by scales glowing a fiery red
- Rampage: Bazelgeuse currently cannot be fought in the Rampage.
Quick Combat Tips
- Bazelgeuse's weakest parts are its head and tail. This is especially true when it enrages and the scales on its neck and tail tip glow red. However, attacking Bazelgeuse's legs can also prove effective in knocking the monster down, making it easier to focus on its weakspots during the small window.
- Fighting Bazelgeuse is all about maintaining mobility and avoiding explosions. Bazelgeuse constantly drops its explosive scales all around the battlefield, adding an extra layer of difficulty and keeping hunters on their toes. This is especially true for melee weapon users as the scales can be set off by accidental weapon swings. If you are having trouble, consider using one of the ranged weapons for a more manageable encounter.
- When Bazelgeuse drops its scales, they are inactive for a time until struck either by the hunter or by Bazel itself. They will also explode on their own after remaining on the ground for a long period. However, when the monster is enraged, dropped scales are primed immediately and will explode after just a few seconds. Striking a red hot scale will cause it to explode immediately so be careful with accidental swings.
- Attacking Bazelgeuse can also dislodge some of its scales, be careful when executing combos!
- Bring Flash Bombs to halt Bazelgeuse temporarily when it flies around the combat area. While subsequent uses will have diminishing returns, you will be able to knock Bazelgeuse out of the sky at least once and open it up for a beating.
- Bazelgeuse is an invading monster and appears in all Locales. It has a tendency to drop in and interrupt hunts. Consider bringing Dung Bombs to drive it away.
Bazelgeuse Attacks & Moveset
Bomb Scatter - Bazelgeuse's most common form of attack is to scatter its explosive scales in varying patterns either from its neck or tail. These scales remain on the ground for a period of time unless struck by either the hunter or Bazelgeuse. When struck, they glow a bright red and explode in a couple of seconds. Scales may also become dislodged when attacking Bazelgeuse or when it moves around. Watch out when this happens as you may accidentally set off the scales during a long combo or when recklessly attacking. When the monster is enraged, its scales glow red and are primed immediately when they hit the ground, exploding soon after. Bazelgeuse will at times strike even the red-hot scales to set them off even faster.
- Tail Whip - Bazelgeuse turns its backside towards hunters, raises its tail straight up and whips the ground behind it, sending a bunch of scales on a straight linear path outwards. When enraged, it will whip a second time, setting off its scales immediately.
- Tail Sweep - Bazelgeuse turns its backside towards hunters and sweeps its tail in a 180 degree arc, scattering its scales in the same direction. When enraged, it will often follow up with a tail whip, scattering scales in a linear path outwards as the explosions from the tail sweep obscure hunters' visions. Watch out for this dangerous combo and dodge accordingly.
- Forward Scatter - Bazelgeuse flicks its head forward, sending scales along a linear path towards hunters.
- Scatter Lunge Combo - Bazelgeuse tosses out two lines of scales on its left and right. It then immediately drops to a low stance, plants its wings down and drags its neck on the ground as it advances forward between the two rows of scales, setting off explosions along the way.
Strafe Run - Bazelgeuse takes flight and bombards the battlefield with plenty of scales, flying back and forth in a straight line 2-3 times. At the end of the strafing run, it will often follow up with its extremely powerful Divebomb attack.
Divebomb - Bazelgeuse dives down violently from its strafing run, aiming to crush hunters as it lands on them. This move sets off any remaining scales in the area and deals devastating damage to all hunters hit directly. Keep constant watch of Bazelgeuse as it strafes the area and prepare to move out of the way using our Wirebug or perform an Emergency Evade.
Fireball - Bazelgeuse raises its head up high as flames spew from its mouth and then lets loose a fiery ball that travels forward in a straight line. A direct hit deals moderate damage but the projectile is easily dodged by moving sideways.
Quick Bite - Bazelgeuse winds its head back sideways and lunges forward for a quick bite. Deals very light damage but can flinch and interrupt item use and other actions.
Aerial Stomp - Bazelgeuse takes flight, hovering just above its target and then forcefully lands on top of it. Deals moderate damage and knocks players away.
Bazelgeuse Weaknesses
The table below indicates the various parts of Bazelgeuse, including the damage values for each weapon type. This information is specific to MHRise.
| Bazelgeuse Parts | |||
|---|---|---|---|
| Head | 60 | 65 | 24 |
| Abdomen | 45 | 45 | 25 |
| Back | 30 | 30 | 10 |
| Wing | 25 | 25 | 45 |
| Leg | 30 | 30 | 20 |
| Tail | 60 | 55 | 35 |
The table below indicates the various parts of Bazelgeuse, including the damage values for each element. This information is specific to MHRise.
| Bazelgeuse Parts | |||||
|---|---|---|---|---|---|
| Head | 0 | 5 | 15 | 10 | 10 |
| Abdomen | 0 | 5 | 10 | 10 | 10 |
| Back | 0 | 0 | 5 | 5 | 5 |
| Wing | 0 | 5 | 10 | 10 | 10 |
| Leg | 0 | 5 | 15 | 10 | 10 |
| Tail | 0 | 5 | 15 | 10 | 10 |
Bazelgeuse Ailment Effectiveness
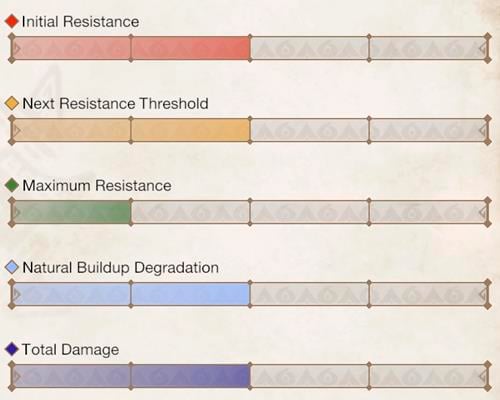
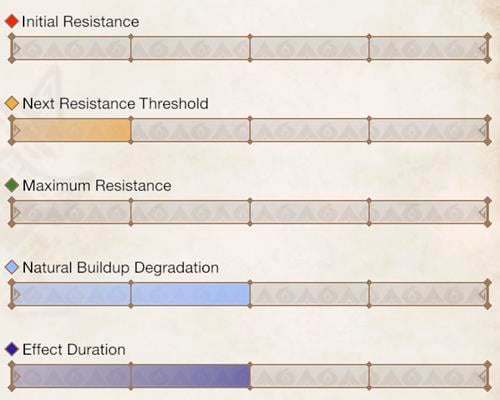
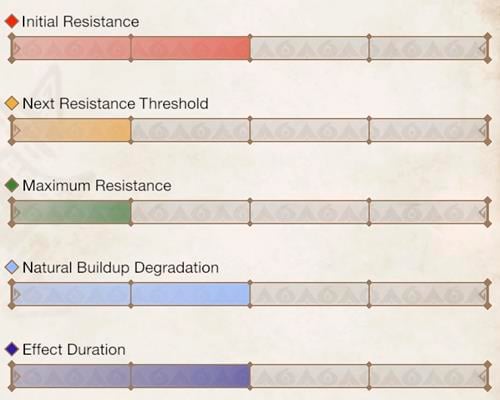
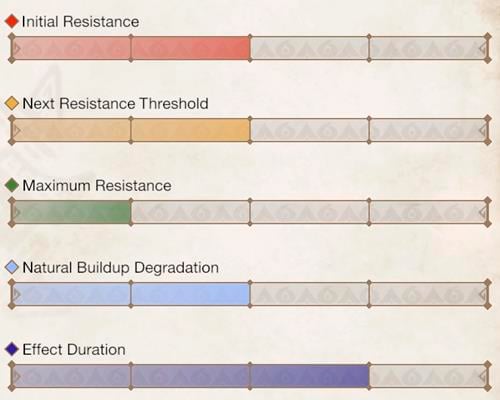
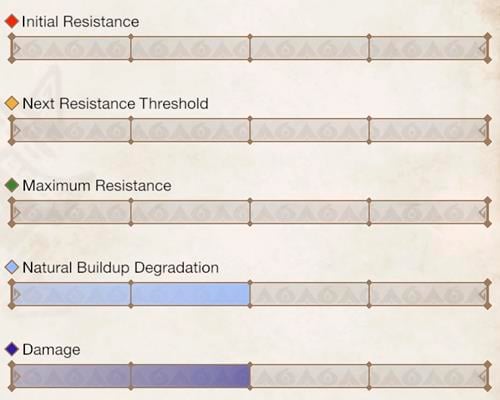
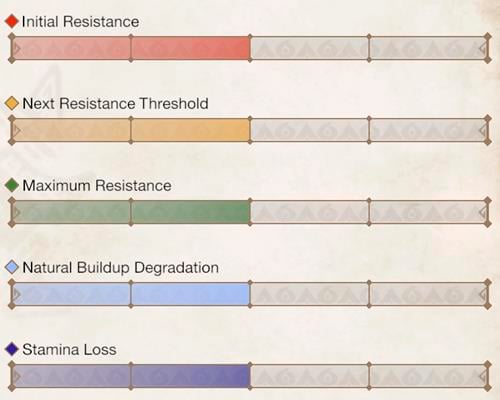
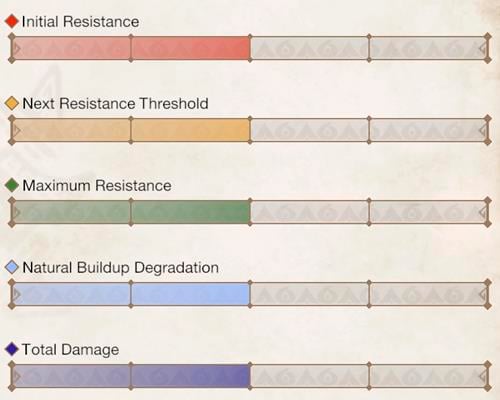
The higher the bars on the graphs and the more stars, the more advantageous it will be for the player. This information is specific to MHRise.
Bazelgeuse Materials
The tables below contain information on the materials that can be obtained from the Low Rank, High Rank and Master Rank variations of Bazelgeuse. This information is specific to MHRise.
Master Rank Bazelgeuse
The table below indicates the various materials obtained from the Master Rank variation of Bazelgeuse and the drop rates for each.
| Material | Target Rewards | Capture Rewards | Break Part Rewards | Carves | Dropped Materials |
|---|---|---|---|---|---|
| 17% | 13%[x2] | 22%[x2] (Head) | 37% (Body) | 39%, 55% | |
| 29% | 17% | 69% (Back) | 25% (Body), 27% (Tail) | 35% | |
| 22% | 23% | 35% (Wing) | 19% (Body) | 10%, 10% | |
| 14% | - | 70% (Head), 30% (Back) | 15% (Body) | - | |
| 12% | 27% | 65% (Wing) | - | - | |
| 4% | 5% | 5% (Head) | 3% (Body) | - | |
| 2% | 3% | 3% (Head), 1% (Back) | 1% (Body), 3% (Tail) | 1% | |
| - | 12% | - | 70% (Tail) | - | |
| - | - | - | - | 50% | |
| Afflicted Dire Shell | -- | -- | 40% | 40% | -- |
High Rank Bazelgeuse
The table below indicates the various materials obtained from the High Rank variation of Bazelgeuse and the drop rates for each.
| Material | Target Rewards | Capture Rewards | Break Part Rewards | Carves | Dropped Materials |
|---|---|---|---|---|---|
| 18% | 14%[x2] | 27%[x2] (Head) | 39% (Body) | 39%, 55% | |
| 31% | 18% | 69% (Back) | 26% (Body), 27% (Tail) | 35% | |
| 23% | 24% | 35% (Wing) | 19% (Body) | 10%, 10% | |
| 14% | - | 70% (Head), 30% (Back) | 15% (Body) | - | |
| 12% | 29% | 65% (Wing) | - | - | |
| 2% | 3% | 3% (Head), 1% (Back) | 1% (Body), 3% (Tail) | 1% | |
| - | 12% | - | 70% (Tail) | - | |
| - | - | - | - | 50% |
Low Rank Bazelgeuse
This monster is not available in Low Rank content.
Bazelgeuse Weapons & Armor
The following are weapons and armor sets related to Bazelgeuse. This information is specific to MHRise.
Bazelgeuse Weapons
 Rookslayer Handaxes I
 Rookslayer Handaxes II
 Bazelhawk Rookslayer
 Bazelhound Rookslayer
 Rookslayer Axe I
 Rookslayer Axe II
 Bazelrush Rookslayer
 Bazelava Rookslayer
 Bazel Buster I
 Bazel Buster II
 Bazel Destroyer
 Bazel Kingtopper
 Rookslayer Lance I
 Rookslayer Lance II
 Bazel Myniad Lance
 Bazel Myniad Queentaker
 Bazelhound Rookslayer
 Rookslayer Saber I
 Rookslayer Saber II
 Bazel Varga Rookslayer
 Bazel Jarre Blazer
Bazelgeuse Armor
Bazelgeuse Buddy Weapons & Armor
The following are Palico and Palamute weapons and armor sets related to Bazelgeuse. This information is specific to MHRise.
Palico
Bazelgeuse Buddy Weapons
Bazelgeuse Buddy Armor
Palamute
Bazelgeuse Buddy Weapons
Bazelgeuse Buddy Armor
Bazelgeuse Notes & Trivia
- Introduced in Monster Hunter: World.
- Name written as 爆鱗竜 in Chinese.
 Anonymous
 Anonymous
I think Bazelgoose Is what happrn when elder dragons bully others to much then they evole aggressive and stop giving a **** lol.

 Anonymous
the World version has more chill than this bomber happy psycho

 Anonymous
When other monsters are introduced, they either bully small monsters or low tier large monsters such as Great Wroggi, but when Bazel shows up he ****s up Tigrex

 Anonymous
 Anonymous
Gem missing part is: - Break Part Rewards Head 3% and Back 1% - Carves Body 1% and Tail 3%

 Anonymous
 Anonymous


A certified jerk.
0
+10
-1