Narwa the Allmother |
|
|---|---|
| Enemy Type | Large Monster |
| Species | Elder Dragon |
| Elements | |
| Ailments | |
| Weakness | |
| Threat Level | ⭐⭐⭐⭐⭐⭐⭐⭐⭐⭐ |
| Resistances | |
| Location(s) | Coral Palace |
Narwa the Allmother is a Large Monster in Monster Hunter Rise (MHR or MHRise). Large Monsters like Narwa The Allmother are hostile and are usually the primary objective of Hunts. They provide valuable Materials when defeated.
Divine beasts, with grace replete
Finally the twain shall meet
My queen, my queen
Smite the earth with your thunder
My king, my king
Let storm tear the clouds asunder
With lightning and hurricane
We sear and slice
For we are the architects
Of true paradise
Let us form our final bond
To rule the world and all beyond
Narwa the Allmother Details & Locations
Having absorbed the lifeforce of her "king," Narwa has transformed and become imbued with new power. She now possesses Ibushi's mastery over wind as well as her own control over thunder, and lusts for utter annihilation.
- Found in: Coral Palace
- Is hostile on sight
- Attacks other monsters: No
- Small Monsters version: N/A
- Size: 3875.05
- Fixed Size, no crowns.
- Species: Elder Dragon
- Target of Quests: The Allmother
- HP (Tempered): ~??
Narwa the Allmother Combat Info
- Elemental ?? Damage monster.
- Weak to
 Dragon Element (⭐⭐⭐),
  Ice (⭐⭐),
  Water (⭐) and
  Fire (⭐)
 - Resistant to
 Thunder Element
 - Kinsect Extract:
- Red: ??
- Orange: ??
- White: ??
- Enraged mode: ??
- Tips and notes go here
- Hunting Information: Narwa's ability to now command the wind like Ibushi as well as employ her usual attacks makes her twice as deadly. Keep your eye on her stance as she attacks so you aren't caught off guard. Attack the areas on her body that have accumulated energy to give yourself the edge over her.
Quick Narwa the Allmother Combat Tips
- The Platform mechanics is pretty much the same, everytime Narwa hits the ground, platforms rise above. The harder the ground hit, the higher the platforms rise. Platforms will still rise to very convinient positions where hunters can climb, jump or wirebug up to get a better reach to the flying creature and attack it.
- Endemic Life is key during this combat, gather Lanternbugs for health boosts. Also gather Aurortle to prevent fainting.
- Keep the machine guns on check, in some occasions the muchine guns will rise on a platform and will be available to use against the Narwa.
- At some point, another Large Monster will enter in the battle. It won't be your ally, but it won't be the Narwa's ally either. You can still mount it to attack the Narwa.
Narwa the Allmother Attacks & Moveset
- Thundersac Beam Barrage - Narwa floats upside down with her head close to the ground, pointing her abdomen downwards and unleashing multiple bright white/purplish beams from her Thundersac that fan outwards. Maintain distance from Narwa until the beams fan out enough that you can weave between the expanding gaps between them.
- Expanding Rings - Narwa charges and launches away many lightning pilars at the same time in all directions, then it will cast 3 expanding rings at different heights. Generally during this attack a platform may be suspended at a safe height, and may also have a usable machine gun on it.
- Devastating Pilars - Pilars seemingly made of rocks come out from the ground and start rotating around the Narwa while the Narwa casts a big thunder orbs that keeps getting bigger. The pilars rotate around the Narwa at an expanding radius so it's best to first keep distance, wait for the moment and jump closer trying to dodge them.
- Crossed Rings - Casts and launches 2 rings, one smaller inside the bigger one, but they are rotating in opposite directions. It's confusing for those who are used to the Thunder Serpent Narwa, but rings are slow enough to have a wise idea on how to dodge them.
- Multiple Crossed Rings - Casts and launches multiple expanding rings towards its target, each ring rotates in a different direction while it moves. Find the gaps, if the rings are too confusing for you, try getting away so the rings are more expanded once they reach you so you have bigger gaps to dodge them.
Narwa the Allmother Weaknesses
The table below indicates the various parts of the monster, including the types of damages that are weak to it. This information is specific to MH Rise.
The table below indicates the various parts of the monster, including the different elements that are weak to it.
Narwa the Allmother Ailment Effectiveness
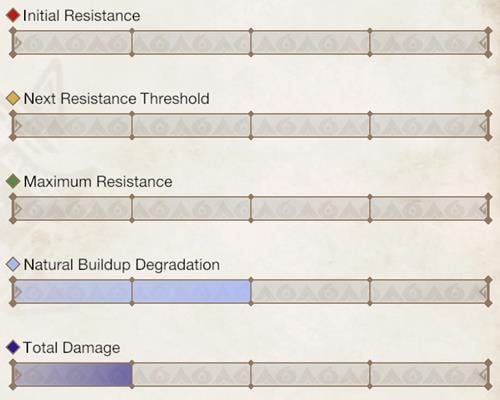
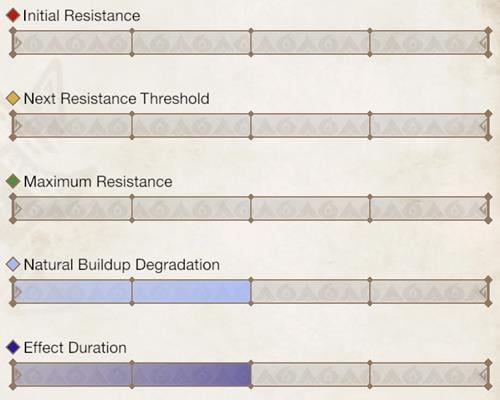
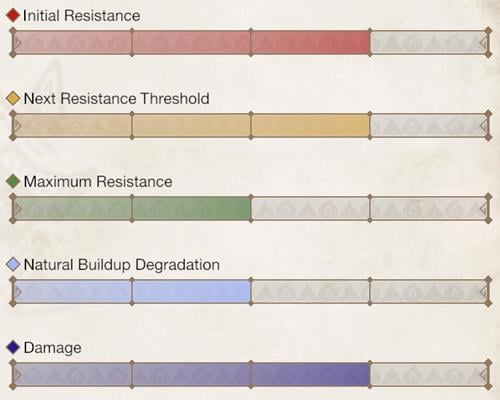
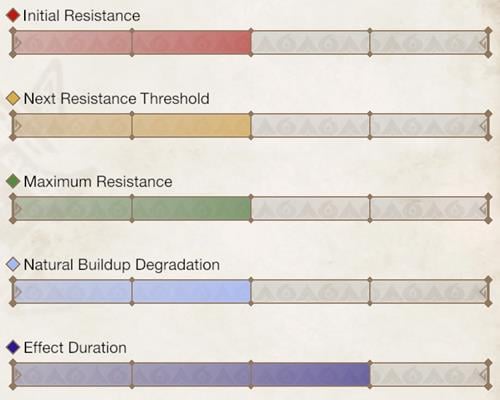
The higher the bars on the graphs and the more stars, the more advantageous it will be for the player. This information is specific to MH Rise.
Narwa the Allmother Materials
The tables below contains information on the different Items and Materials that can be obtained from the Low Rank, High Rank and Master Rank variations of Narwa the Allmother.
Master Rank Narwa the Allmother
The table below indicates the various materials or items obtained from the Master Rank variation of Narwa the Allmother, it also includes the percentage chance of how it can be acquired.
| Material | Target Rewards | Capture Rewards | Break Part Rewards | Carves | Dropped Materials |
|---|---|---|---|---|---|
| 20% | - | - | 37% (Body), 17% (Tail) | 55% | |
| 31% | - | 17% (Horn), 83% (Abdomen) | 29% (Body) | 30% | |
| 12% | - | 80% (Horn) | - | - | |
| 14% | - | 60% (Back), 20% (Wingarm) | 80% (Tail) | 30% | |
| 17% | - | 40% (Back) | 12% (Body) | - | |
| 4% | - | - | - | 3% | |
| 2% | - | 3% (Horn), 3% (Abdomen) | 1% (Body), 3% (Tail) | 1% | |
| - | - | 7% (Abdomen) | - | - | |
| - | - | 7% (Abdomen) | - | - | |
| - | - | 80%[x2] (Wingarm) | 21% (Body) | 20%, 15% | |
| - | - | - | - | 16% | |
| - | - | - | - | 30% |
High Rank Narwa the Allmother
The table below indicates the various materials or items obtained from the High Rank variation of Narwa the Allmother, it also includes the percentage chance of how it can be acquired.
| Material | Target Rewards | Capture Rewards | Break Part Rewards | Carves | Dropped Materials |
|---|---|---|---|---|---|
| 26% | - | - | 42% (Body), 20% (Tail) | 42% (x1), 65% (x1) | |
| 28% | - | 87% (Abdomen), 15% (Horn) | 25% (Body) | 25% | |
| 16% | - | 80% (Horn) | - | - | |
| 12% | - | 60% (Back), 20% (Wingarm) | 75% (Tail) | - | |
| 15% | - | 40% (Back) | 11% (Body) | - | |
| 3% | - | 5% (Horn), 3% (Abdomen) | 5% (Tail), 2% (Body) | 1% | |
| - | - | 5% (Abdomen) | - | - | |
| - | - | 5% (Abdomen) | - | - | |
| - | - | 80% (Wingarm) | 20% (Body) | 10% | |
| - | - | - | - | 27% | |
| - | - | - | - | 30% |
Low Rank Narwa the Allmother
This monster is only available in High Rank and Master Rank.
Narwa the Allmother Weapons & Armor
Armor and Weapons related to the Narwa the Allmother Monster.
Weapons
 Thunderbolt Great Sword I
  Abyssal Storm Cleaver
 Thunderbolt Sword I
 Abyssal Storm Shredder
 Windchaser
 Thunderbolt Blades I
 Abyssal Storm Blades
 Thunderbolt Long Sword I
 Abyssal Storm Sword
 Thunderbolt Hammer I
 Abyssal Storm Mauler
 Thunderbolt Horn I
 Abyssal Storm Horn
 Thunderbolt Spear I
 Abyssal Storm Lance
 Thunderbolt Gunlance I
 Abyssal Storm Gunlance
 Thunderbolt Axe I
 Abyssal Storm Axe
 Thunderbolt Sawtooth I
 Abyssal Storm Ward
 Thunderbolt Glaive I
 Abyssal Storm Glaive
 Thunderbolt Bow I
 Abyssal Storm Bow
 Thunderbolt Bowgun I
 Abyssal Storm Bolt
 Thunderbolt Cannon I
 Abyssal Storm Barrage
 Nightmare Frilled Blade
 Soporific Shellblade +
 Foreboding Shamshir +
 King Teostra Blade +
 Great Demon Hot Rod
 Skysplit Thunderstorm
Armor
Narwa the Allmother Buddies Weapons & Armor
Palico and Palamute Armor and Weapons related to the Narwa the Allmother Monster.
Palico
Weapon
- Narwa the Allmother Palico Weapon Example
- Narwa the Allmother Palico Weapon Example
Armor
- Narwa the Allmother Palico Armor Example
- Narwa the Allmother Palico Armor Example
Palamute
Weapon
- Narwa the Allmother Palamute Weapon Example
- Narwa the Allmother Palamute Weapon Example
Armor
- Narwa the Allmother Palamute Armor Example
- Narwa the Allmother Palamute Armor Example
Narwa the Allmother Notes & Trivia
- Can be lured with ??
- Camouflage works until ?? range
 Anonymous
 Anonymous
Not difficult, but annoying as all hell. It's just not fun when you're spending most of the time running around because the boss is flailing around in the air like a sperg.

 Anonymous
Horrible boss purely artificial difficulty and an annoyance beyond belief narwa/ibushi were already annoying but now this is purely to spite players it flies araund so much that its basically impossible to get a hit with a melee weapon only in super brief segments not to mention that the ballistas/gatlings only stay up araund 4-5 seconds which isnt even enough to reach them in some cases i would preffer a thousands xeno'jivas to this horrible boss

 Anonymous
Horrible fight unbalanced as hell and just overall annoying i have tried both solo and with randoms with various weapons and all of them sucked the solo fights were a snoozefest for half of the boss fight and then there would be a difficulty cliff with narwa spamming so many combos that i could only super man dive away and in most cases even that didnt save me because when i stood up i got hit with another attack and got combod into another one immediatly in multi it would be a batlle of attrition because some lets say not the brightest players didnt bring farcasters so they were stuck with no heals towards the end even though i tried supporting them with powders and stuff it still didnt work out i have had 10 multi player attempts and 4 solo ones and all of them were unfun although xeno'jiva wasnt the best boss it was fun but this is just horrid

 Anonymous
I personally prefer the Thunder Serpent Narwa fight over this one; the abundance of platforms with installations on them when Narwa attacked gave more options, and it's fun using the dragonator and splitting wyvernshot. This provides a monster for wyvern riding at one point, but it otherwise doesn't provide nearly as much variety.
All that said, this fight has grown on me.
 Anonymous
Feel like I spent too much time jogging around the arena. Some elden beast vibes, honestly, and I was not a fan.

 Anonymous
 Anonymous
She's a quick and easy fight once you understand her attacks. Practically built for longsword, you can counter everything she sends at you excluding two attacks (not including the teardrop attack with the dragonators).
She also gives a ton of zenny (29,000 minimum per hunt, without extra dragon treasures or carts), and about 1800 hr exp. Sub 10 minute hunts is the target for efficient farming as far as I'm concerned, but there are probably better monsters to farm for hr999.
 Anonymous
I ****ing swear the bite attack where she carved up the ground is absolute bullshit, and second is the electric handslam.

 Anonymous
Not a particularly difficult elder dragon. As always, the real difficulty comes from having under-prepared randos who seem hellbent on getting carted in strange and remarkable ways. Thus, going solo or with trusted friends is the way to go. Load up on lightning and dragon defense. The Rhopessa set has solid amounts of both, PLUS max Dragon attack: it was basically designed to murder every form of Narwa.
When Narwa throws up the spinning pillars while charging her bomb, either wirebug to the center immediately if you're close, or hop on your pupper and run to the edges until you see an opening to run in (palamutes are immune to the vaccum effect). Once in the center, it's time to do major damage and possible score a knockdown. Now, if you fail to knock her down during her charge, immediately jump on a ballista/machine cannon platform; tha'll keep you safe from her arena AOE. In fact, rule of thumb: if you're EVER in the vicinity of a siege platform, get your butt on it; it'll always be safer there.
Aside from that, the other rule of thumb (which is basically MonHun 101 but people STILL don't do this): if you get knocked down, STAY DOWN. Do not mash to stand up. Do not wirebug blindly. Do not pass Go. Do not collect 200 points of damage. You're INVINCIBLE for a long time during most hard knockdowns, so you can take your time to assess the situation and get up when it's safe. Frantically jumping to your feet or wirebugging on reflex will usually just get you juggled clear back to camp.
 Anonymous
worst fight in the game, a mix of boring and hard. At least XenoJiiva is a snoozefest but this fight is just hard enough to keep you awake and suffer

It's not a hard fight, it's not that much different from the original fight, some of the moves have changed, but the same general approach applies. The only thing you gotta watch out for is when she does the big attack with dragonator pillars that lasts a huge amount of time, you can knock her out of it if you do enough damage, or if you're just unsure of what do to, and don't want to take any chances on carting to the attack, you can just farcaster back to camp and literally skip the entire attack animation....so there's your "cope your way out" strategy. Also, she can be KO'd, so sticky ammo works really good here. Rajang sticky HBG absolutely deletes her (but let's be honest, it deletes anything), and stuff like Mango sticky/slicing LBG works really good too, and especially bow.
I play with people on discord, and if we're farming allmother, or narwa, and you don't bring a gun or a bow, you're asked nicely to leave. Some people think farming is simply doing the same hunt over and over again, nope, putting something on farm status means you've turned it into a loot pinata that gets destroyed repeatedly, and efficiently. Carrying peeps isn't farming. And considering MH Rise actually has 3 player multiplayer scaling, unlike World where you got 4 player scaling with 3 players, I don't feel like bringing melee players into a multiplayer farming run on a fight that's clearly a gunner's fight.
 Anonymous
 Anonymous


My queen- ibushi
0
+10
-1