Gaismagorm |
|
|---|---|
| Enemy Type | Large Monster |
| Species | Elder Dragon |
| Threat Level | 10⭐ |
| Elements | None |
| Ailments | Blastblight Bloodblight |
| Weakness | |
| Resistances | |
| Location(s) | Special |
Gaismagorm is a Large Monster in Monster Hunter Rise (MHR). It is one of the new Monsters in the Sunbreak Expansion. Large Monsters such as Gaismagorm are hostile and are usually the primary objective of Hunts. They provide valuable Materials when defeated.
Gaismagorm Monster Guide: Characteristics, Weaknesses, Drops, Locations, Weapons & Armor, Strategies, Tips & Tricks and more to help you defeat Gaismagorm in MH Rise.
- Gaismagorm became available with the release of the Sunbreak Expansion.
From the depth, its voice can be heard.
"The time has come."
From the depth, it beckons:
"Come to me!"
As it feeds on stolen life, its power grows ever stronger.
Until it finally reveals itself.
MH Rise Gaismagorm Characteristics & Locations
A gargantuan monster living in the darkest depths since ancient times. Gaismagorm's rock-like forearms boast tenacious strength which allows it to burrow underground. It has a symbiotic relationship with the Qurio, and feeds on their life force for energy. Once it has chosen a place to nest, it collapses the surrounding rock bed to create an opening to the surface. The opening forms a massive crater in which it releases the Qurio through.
- Class: Elder Dragon
- Size: ♕ N/A ~ ♕ N/A
- Small Monster version: N/A
- Hostile at any distance
- Attacks other monsters: No
- Found in: Special
- Turf War(s):
vs. None - Target of Quests:
Proof of Courage
The Devil's Reincarnation
MH Rise Gaismagorm Combat Info
Gaismagorm attacks with the explosive, crystallized Qurio on its carapace. Break these crystals by attacking, but beware: Gaismagorm can consume the shards and use them to deliver even more explosive attacks. When Gaismagorm climbs the pit's wall, it's readying a strong attack. Use the ballistae provided to stop it.
- Threat Level: ⭐⭐⭐⭐⭐⭐⭐⭐⭐⭐
- Physical Damage monster
- Inflicts Stun and Qurio attacks
- Weak to
 Dragon (⭐⭐⭐)
 Thunder (⭐⭐)
 Fire (⭐)
 - Resistant to
 Water (Immune)
 Ice (Immune)
 - Kinsect Extracts:
- Red: __redextract__
- Orange: __orangeextract__
- White: __whiteextract__
- Item Effectiveness:
- Effective: __itemeffective__
- Ineffective: __itemineffective__
- Enraged Mode: After falling down to the next level, Gaismagorm becomes enraged, with leaks of red gas coming out of its whole body.
- Rampage: Gasimagorm is not encountered in Rampages.
Quick Combat Tips
- Focus your attack towards it's head, it's front legs and, if you have the chance, it's tail. Otherwise your attacks will be less effective against the creature.
- You will be most vulnerable whenever you are right in front of the Gaismagorm. So you should always, at all stages, avoid standing there.
- Make use of the Dragonator at the first Stage (once ready) and the Ballistae when Gaismagorm starts climbing up in the second Stage.
- Gaismagorm can hit pretty hard, so make sure your armor is well upgraded.
- Attacking it will cause shards of Crystals to fall off of it. When it does its Vortex attack, these Crystals will also be absorbed, exploding and dealing sizable amount of damage. Focus on chipping off as much as you can by attacking its four front legs.
- Its big Arms cannot be partdamaged in the first Stage of the battle, only the Crystals covering them. Likewise, the tail can only be cut in the second Stage as well. The tail will, however, already take partdamage in the first Stage. The tail can be carved twice.
- There are many useful Hunting Helpers in the area, like an Aurortle, a Firebeetle and a Mudbeetle.
- When Gaismagorm crawls up the mountain in the seconds Stage, mount the Ballista and shoot the three spots on its back. Each one you destroy will net 500-1000 damage. When playing in Multiplayer, its recommended to focus one spot if possible until it destroyed.
- Most of its attacks can be avoided or more easily dodged by staying at its hindlegs.
- Almost everytime Gaismagorm is about to use its mouth to fire an attack, it's commonly a good idea to jump under its neck (or better beyond) to avoid them.
- During its Fire Rain attack, look at the ground to know where the attacks will land. Ideally, make your way towards and below Gaismagorm itself, as attacks rarely, if ever, land there, allowing you a safe window of attack.
- Gaismagorm may suddenly move by jumping and hit the ground at the fall. This summons rocks that rise up from the ground. If you are too far from the creature to get to its side or below it's neck, you should hide behind the rocks as it will most certainly begin absorbing everything around.
- Everytime its legs or "arms" are lifted up, they usually come back to the ground smashing it. So stayt away from those areas whenever that happens.
- At the second stage, Gaismagorm at a certain point starts climbing the wall, while you can attack it with turret. Multiple orbs come out from its back towards its target, but you can destroy those orbs with the turrets.
- While it's climbing the wall, aim for the red glowing areas of its body until your "destroyed" the three of them. Inmediately after destroying the last glowing area, Gaismagorm will spread this energy in a large blast to the sides, forming wings and a gleam can be seen while it's gathering energy. At the very instant you see those wings, leave the turret and run away, even use the wirebug as the creature will casting giant beam towards the area where all turrets are contained.
MH Rise Gaismagorm Attacks & Moveset
Gaismagorm goes through 3 Phases as the fight goes on. In its first Phase, the fight takes place in the first Stage of the arena. Hunters get to know the monster and its size, as Gaismagorm shows mercy on its attacks. To complete the first Stage and Phase, Gaismagorms HP must be reduced to 60%. A cutscene will play in which Gaismagorm falls off the cliff into the second Stage below. By coming down, the monster will start its second Phase, using more or less the same moves with additional explosions or longer attacks, with a few new attacks as well. When Gaismagorm enters the third Phase, it will start glowing red and its skin has even bigger leaks of gas, and sometimes fireballs will come out from its body while performing other attacks. Whenever Gaismagorn climbs the mountain, Hunters must use the Ballistae that get airdropped in to shoot at the glowing spots on its back and prevent the Qurios from reaching the Hunters. Gaismagorm attacks much more aggressively and destructively in this Phase.
Squash - Lifts its hand and slams it over a target, causing a little burst of fire (Phase 1). When enraged, it may use this attack while absorbing its target with its mouth (Phase 2). In Phase 3, this attack causes huge multiple explosions when it hits the ground.
Multiple Hand Slams - When enraged it performs multiple and consecutive slams with both hands (Phase 2). In Phase 3, each slam causes a huge explosion.
Head Sweep - Drags its head side to side multiple times over the ground against the Hunters that are attacking its face.
Vortex - Gaismagorm roars and jumps towards the Cliff in the arena. As soon as it lands, multiple boulders will jut out of the ground. Soon after, it will begin inhaling, sucking any chipped off crystals and Hunters towards it. To avoid getting drawn in, put one of the boulders between you and Gaismagorm. Every crystal it absorbs will deal sizeable damage, and if enough crystals are absorbed, the attack will fail and it gets knocked down. Should it succeed in its attack preperation, it will cause a massive explosion in front of it. This explosion can easily be avoided by just staying behind the boulders, but if you were unlucky to be drawn in, prepare for a lot of damage or even a faint.
Conflagration - Slowly spits out a huge fire ball and claps it with its hands, causing the fireball to explode in a huge explosion to every target at close range. Can be avoided by dodging behind its head, or by simply being far enough away.
Explosive Drag - Drags its hand around, causing explosions all over its path. When enraged, it makes a complete spin, also dragging its tail around.
Ground Fire - Gargles red gas through its mouth while breathing in, to suddenly spit the combustion to the ground. When enraged, this attack lasts longer as it keeps spitting fire for a short moment. In Phase 3, multiple orange/red markers will additionally appear on the ground, exploding shortly after.
Fireball line up - Spits a group of fireballs that stay in place aligned from one side to the other, exploding shortly after.
Belly Slam - Pulls its body up, shortly 'standing' on its back legs, and falls again slamming the ground with a burst of fire. During Phase 3, at the end of this attack, Gaismagorm spits a fireball at the ground, adding a huge explosion to the slam.
Rain of Fire - Gargles and charges red gas, looks up and spits fireballs into the sky, causing a massive amount of fireballs to drop from the sky. A red circle on the Ground will indicate where Fireballs will land. Gaismagorm keeps spitting for a while, and its recommended to use this time by attacking it from below its belly, using Gaismagorm itself as an umbrella.
Mouth Charge - While enraged, Gaismagorm will roar, hit the ground with its head without closing its mouth, and start walking towards its target, smashing the ground by dragging its mouth over it.
Wall Climb - At some point in the second Stage, Gaismagorm starts climbing one of the Walls. This is indicated by a Roar and a signal sound. Ballistae will be airdropped into the Arena, which Hunters can use to shoot at the three glowing spots that appear on Gaismagorms back. From time to time, Gaismagorm will release small clouds of Qurios that home in on Hunters, which must be shot down to avoid damage. Each spot destroyed will result in a good chunk of damage. If two spots are destroyed, it will slide down the wall a small distance before resuming its climb, and destroying all three will result in Gaismagorm falling to the ground, landing on the Ballistae and destroying them in the process.. If Gaismagorm reaches the top, it will charge a massive Laserbreath, targeting the middle of the arena with a huge dangerzone, causing a massive explosion, which also destroys the Ballistae.
Frenzy - Near the end of combat, Gaismagorm becomes even more enraged and starts thrashing around the Arena, hitting any targets on its path, while fireballs come out from the gas leaks of its body, which will move slowly towards Hunters.
Gaismagorm Weaknesses
The table below indicates the various body parts of Gaismagorm and the damage values for each Physical Damage type. These values indicate the effectiveness of attacks that deal these damage types. The higher the value, the more effective the attack. Note that Weapons can vary in the types of Physical Damage dealt depending on the moves used.
| Gaismagorm Parts | |||
|---|---|---|---|
| Head | 70 | 72 | 45 |
| Neck | 40 | 42 | 24 |
| Back | 20 | 20 | 14 |
| Abdomen | 32 | 34 | 16 |
| Wingarm | 43 | 43 | 28 |
| Foreleg | 32 | 32 | 20 |
| Hind Leg | 26 | 26 | 18 |
| Tail | 32 | 30 | 16 |
| Tail Tip | 45 | 38 | 22 |
The table below indicates the various body parts of Gaismagorm and the damage values for each Elemental Damage type. These values indicate the effectiveness of attacks that deal these damage types. The higher the value, the more effective the attack. Certain Weapons can have Elemental Damage properties which are added into the damage calculation along with their Physical Damage type.
| Gaismagorm Parts | |||||
|---|---|---|---|---|---|
| Head | 10 | 0 | 20 | 0 | 30 |
| Neck | 5 | 0 | 15 | 0 | 25 |
| Back | 5 | 0 | 5 | 0 | 10 |
| Abdomen | 5 | 0 | 15 | 0 | 25 |
| Wingarm | 5 | 0 | 15 | 0 | 25 |
| Foreleg | 5 | 0 | 10 | 0 | 20 |
| Hind Leg | 5 | 0 | 10 | 0 | 15 |
| Tail | 5 | 0 | 10 | 0 | 15 |
| Tail Tip | 5 | 0 | 15 | 0 | 25 |
Gaismagorm Ailment Effectiveness
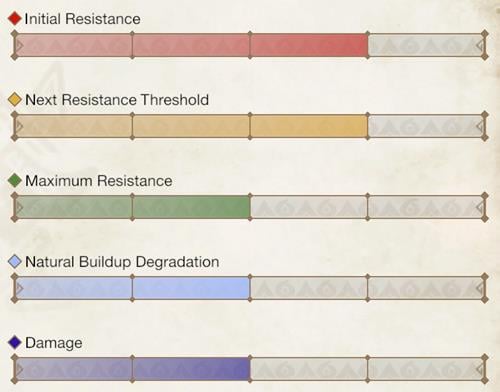
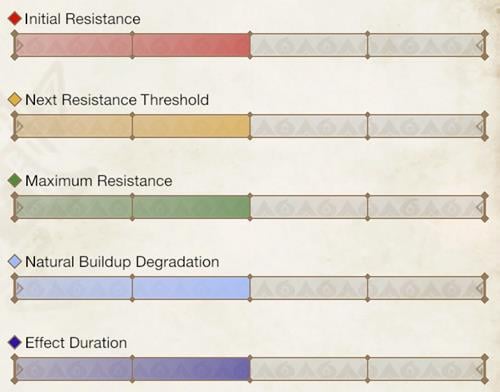
The higher the bars on the graphs and the more stars, the more advantageous it will be for the player.
MH Rise Gaismagorm Materials
The tables below contains information on the different Items and Materials that can be obtained from the Low Rank, High Rank and Master Rank versions of Gaismagorm.
Master Rank
The table below indicates the various materials or items obtained from the Master Rank version of Gaismagorm. It also includes the percentage chance of acquiring the materials.
| Material | Target Rewards | Capture Rewards | Break Part Rewards | Carves | Dropped Materials |
|---|---|---|---|---|---|
| 15% | -- | -- | 37% (Body), 17% (Tail) | 34% | |
| 28% | -- | 97% (Head) | 29% (Body) | -- | |
| 20% | -- | -- | 21% (Body) | -- | |
| 12% | -- | 80% (Right Wingarm), 80% (Left Wingarm) | -- | -- | |
| 16% | -- | 20%[x2] (Right Wingarm), 20%[x2] (Left Wingarm) | -- | 25%[x2] | |
| 7% | -- | -- | 80% (Tail) | -- | |
| 2% | -- | 3% (Head) | 1% (Body), 3% (Tail) | 1% | |
| -- | -- | 100% (Horn) | 12% (Body) | -- | |
| -- | -- | -- | -- | 40% |
Low Rank & High Rank
This Monster is only available in Master Rank.
MH Rise Gaismagorm Weapons & Armor
The following are Weapons & Armor related to Gaismagorm.
Weapons
Armor
MH Rise Gaismagorm Buddy Weapons & Armor
The following are Palico and Palamute Weapons & Armor related to Gaismagorm.
Palico
Palamute
Notes & Trivia
- Can be lured with ??
- Camouflage works until ?? range
 Anonymous
My favorite part of the fight is when he said "It's gaismagormin time!" And gaismagormed all over the place

 Anonymous
Do not attempt to fight solo unless you hate your life. Boss will constantly back away from you at severe speeds to where you will spend majority of the fight trying to close distance, or getting blasted across the arena repeatedly, as well as their ability to turn almost instantly meaning if you are solo, you will always be in front, it will always be backing away from you at rediculous speeds, and you will be struggling to get damage done and spend more time moving and dodging then you will hitting.

 Anonymous
if he were smaller this fight would have been PEAK. most of his physical attacks are very hard to read due to how colossal he is

 Anonymous
 Anonymous
I am so sick of trying to get this stupid mantle, this fight is terrible he either does an attack that will never hit you like slamming his fist down or something that you can't dodge like ****ing Tigrex dashing across the arena or doing a 360 spin or clapping his hands together to cause a nuclear blast. The ballista phase feels very 50/50 sometimes it's easy to hit the spots and other times they just move around to erratically.
Why does every final boss have to be skyscraper sized? Can't they just for once make the final fight good instead of flashy
 Anonymous
This fight is a 50/50 of either him just normally fighting you or him just waisting your time by running in circles non stop

 Anonymous
Oh good another monster that is too big to ever dodge... Really looking forward to farming this b,itch for the next week

 Anonymous
Honestly this "fight" was just a Lightshow. For me this monster falls unter the "too large to be fun" category together with xeno and shara

 Anonymous
Don't bring bloodlust to this, it will delete your hp during the ballista phase and then leave you with a debuff

 Anonymous
 Anonymous
Why is the Abyssal Windstorm(hammer) not in the weapon list?

 Anonymous
Fiorayne is honestly such a chad. Seeing her wirebug in the air so she could bring this thing down was such a power move.

bruh ive killed like 20 of these and still no "abyssal dragonshpire"

 Anonymous
if you get all 3 you can bring the demon down and get some DPS time with its head. this is genuinely impossible, 4 hunters and best you can get is two of the things.

 Anonymous




 Abyssal Hailstorm
 Abyssal Splitter
 Abyssal Insectoid
Please add Abyssal Windstorm, Abyssal Rockslide, Abyssal Void, and Abyssal Nova to the Weapons list.
0
+10
-1